DIY Wooden Christmas Tree Village with Woodpeckers Crafts

*This post was created through a paid partnership with Woodpeckers Crafts. However, all opinions are honest and 100% my own.
*This post contains affiliate links. For more information, please see my disclosure page here.
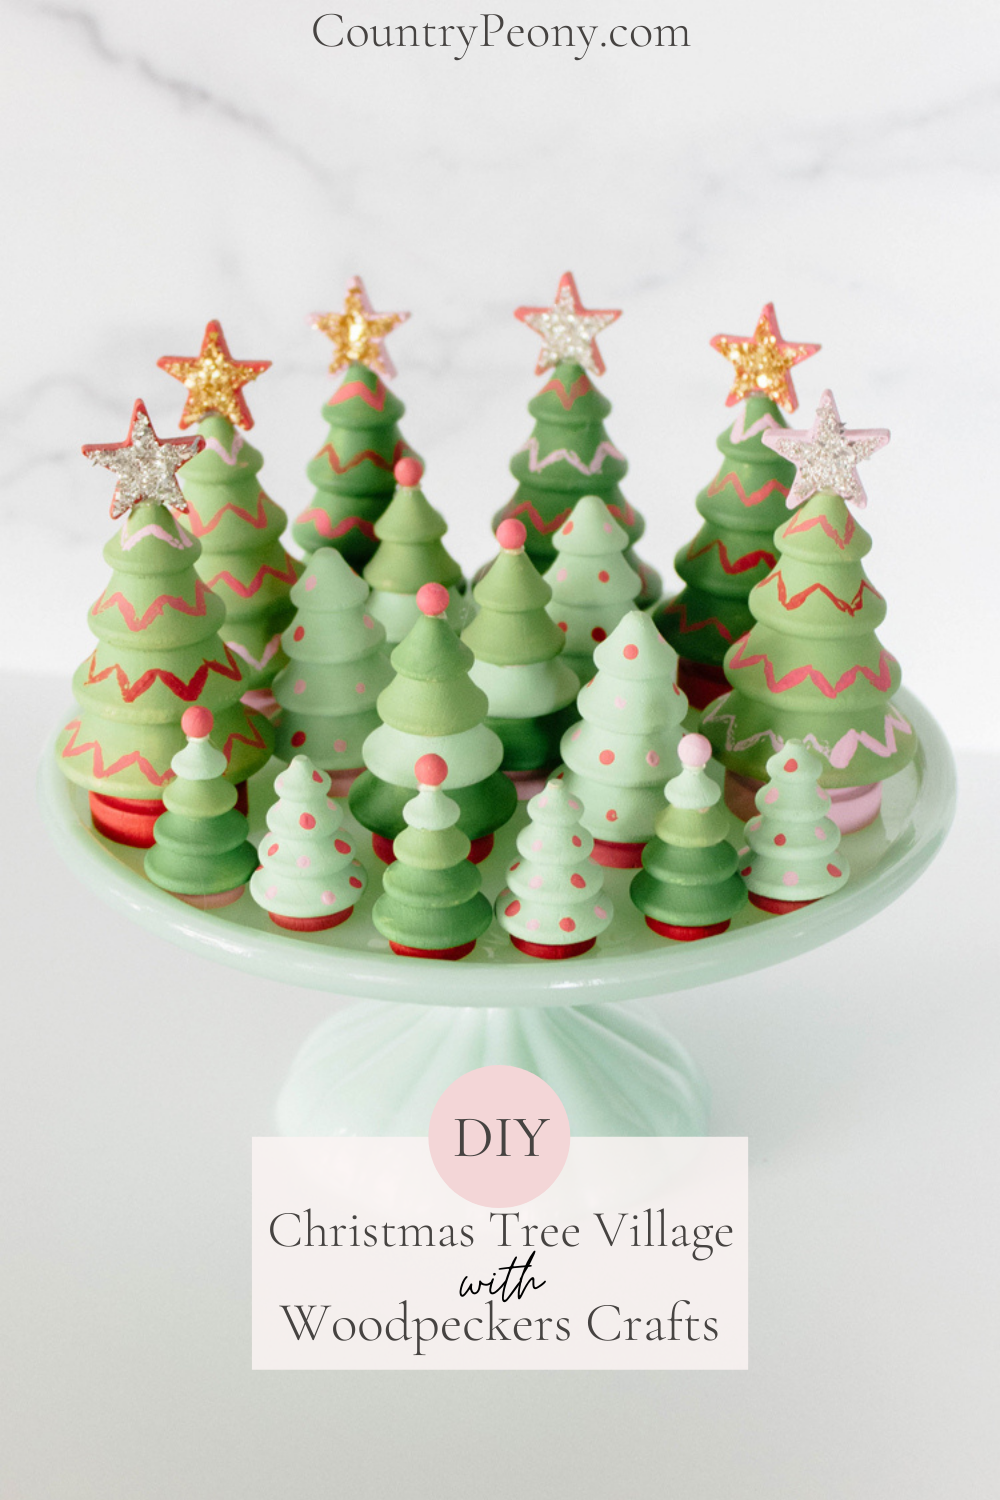
I am so excited to share some fun and festive DIY Christmas decor with you today. I think tree villages are a whimsical and unexpected twist on Christmas decorations. Bottle brush trees get a lot of love during the holiday season, but I found some really charming trees through Woodpeckers Crafts that may just be my new favorite way to create a Christmas village.
Today I want to show you how to make three different sets of trees so you can make your own custom, Christmas Tree Village using the fantastic wooden pine trees from Woodpeckers Crafts. The beauty in this DIY is that with a little paint and glitter, these trees are fully customizable and it is so simple and fun to make. You can even get your children involved in this fun project, and include fabric, paper, and even more glitter. The possibilities are endless!
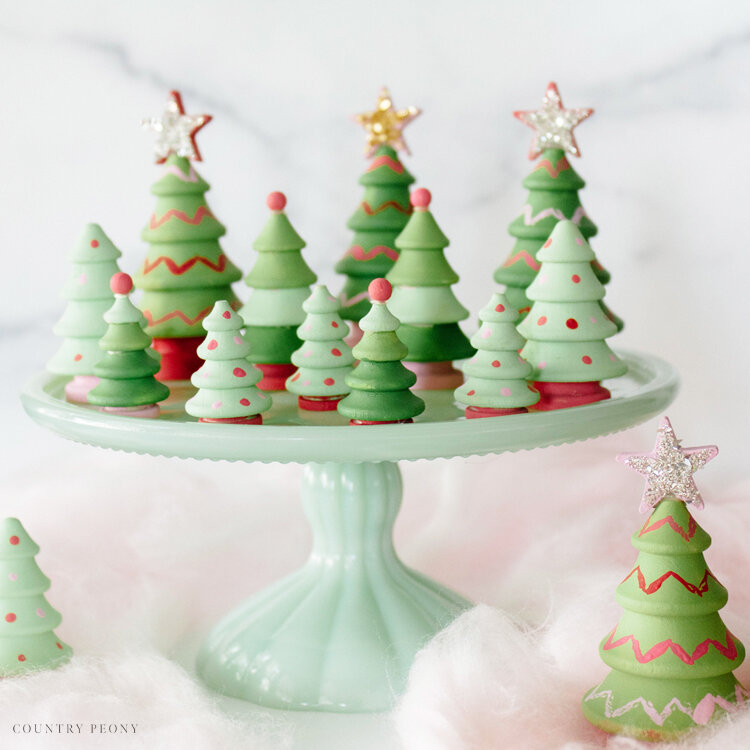
To create this look, I used the incredible quality wooden trees, stars, and balls from Woodpeckers Crafts. Three different shades of green, and three different shades of red/pink in simple geometric patterns to really transform these trees. Add a dash of glitter and you are done. A fun weekend afternoon’s project that will last for many Christmases to come.
Before we get started, I wanted to highlight Woodpeckers Crafts. I am so excited to partner with Woodpeckers Crafts today because they provide very high quality wooden products that are the perfect base for any crafting project. Their mission to use wood to fuel creativity is a wonderful one I can get behind, and I feel so grateful to partner with them on today’s project. And, if you want to try this craft project for yourself or if you want to purchase any of their products, they have graciously offered 5% off your purchase, by using the code “countrypeony”.
Continue below for the step-by-step tutorial to make your own DIY Christmas Tree Village with Woodpeckers Crafts wooden pine trees


To Make Your Own Christmas Tree Village, you will need:
Woodpeckers Crafts’ Pine Trees in Various Sizes. I used the 2 3/4”, 2”, and 1 1/4” to create a multi-layer Christmas Tree Village. *Use code “countrypeony” for 5% off your purchase at Woodpeckers Crafts.
Woodpeckers Crafts’ Stars. I used the 1” star, but they have a variety of sizes to choose from. *Use code “countrypeony” for 5% off your purchase at Woodpeckers Crafts.
Woodpeckers Crafts’ Balls. I used the 1/4” wooden ball, but they have a variety of sizes to choose from. *Use code “countrypeony” for 5% off your purchase at Woodpeckers Crafts.
Craft Paint. I used 3 different greens, and 4 different pink/red combos to create today’s look.
Craft Paintbrush
Glass Glitter
Glue for the Glitter
Hot Glue Gun with Glue Sticks
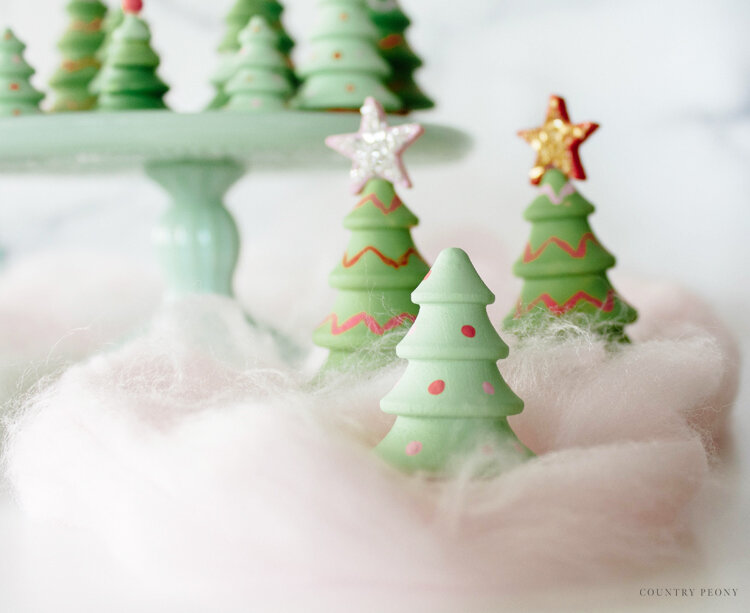
Christmas Tree with Star

For the first look, I wanted to create a tree that was traditional with a splash of whimsy. I believe the chevron garland and glitter really make this first tree a lot of fun!
To create the first look for the Christmas tree with the star, paint the 2 3/4” wooden pine trees green.
* I only painted these in one coat because the paint took to the raw wood beautifully.

Be sure to paint underneath the tree as well.

Then, paint the tree base a fun color like I did with the red/pink combo.

Create the garland effect by using the tip of the paintbrush to create a chevron pattern along the tree edge.

For extra whimsy paint the garland on each tree layer a different color.

To create the tree topper, paint the star in a fun color to match the base. Let it dry.
Then add the sparkle to the star. Lay a piece of paper down first, then attach glass glitter to the star with some glitter glue that dries clear.
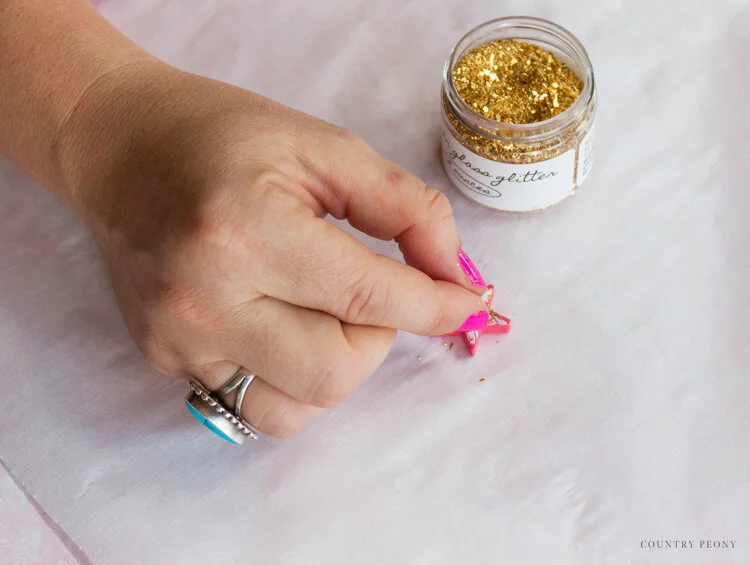

Shake off the excess glitter from the star, then fold the paper in half and return the excess glitter to the glitter jar.

Attach the finished glittered star to the top of the Christmas tree with hot glue. And, enjoy your charming tree!

Polka Dot Christmas Tree

Polka dots scream whimsy, and I had so much fun making these polka dot trees.
To create your own, paint the tree green. I used a beautiful mint green for these trees so that the pink/red polka dots would jump off of them. But you can use any color combo that your heart desires.
* Again, I only painted these in one coat because the paint took to the raw wood beautifully.
Paint the base a fun color as well. Then, let it dry.

Once the tree is dry, use the back of the craft paintbrush and dab paint onto the tree in a random pattern.
*To create a whimsical look, I recommend using at least three different colors for the polka dots.
Then, enjoy your charming polka dot trees.
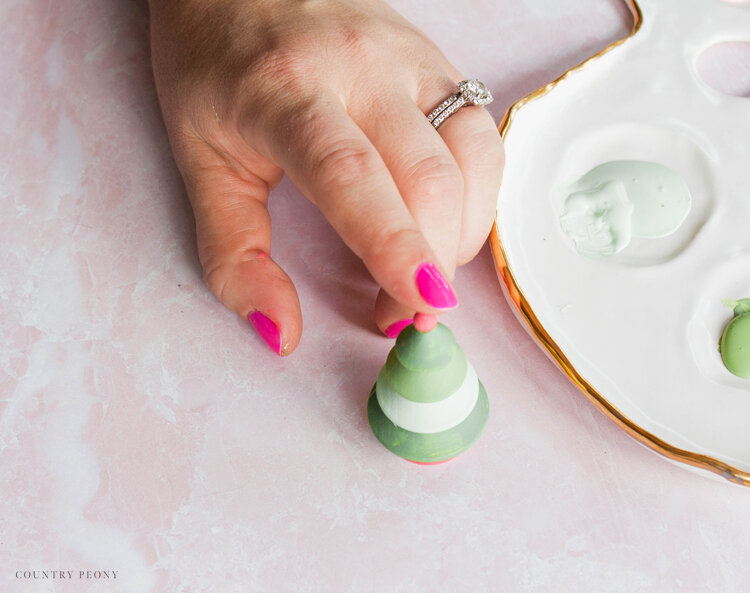
Ombre Christmas Tree

For the last look, I thought it would be sweet to create an ombre Christmas tree using the different shades of green.
To create this look, paint a different shade of green on each tree level. Then, paint the base a fun color.
To add even more interest, paint the wooden ball a fun color. Then, let it dry.

Once the tree and ball are dry, attach the ball to the top of the Christmas tree with hot glue.
Enjoy your ombre Christmas tree!

Once you have decorated all of your trees, now comes the fun part! It is time to create a vignette and display the trees for all to enjoy this holiday season!

I love putting my trees on a sweet cake stand surrounded by fluffy wool. However, you can style yours anyway that your heart desires.


I had so much fun painting and decorating these charming wooden trees from Woodpeckers Crafts, and I hope you enjoy the process just as much!

Thank you to Woodpeckers Crafts for providing me with your amazing products to create this charming Christmas vignette. As a reminder, if you want to create your own, please use code “countrypeony” to receive 5% off at checkout at Woodpeckers Crafts.
I believe crafting is more fun when we share our projects. Please email me at elizabeth@countrypeony.com, or please tag me @thecountrypeony or #countrypeony to show me your beautiful, custom creations!
Thank you so much for following along!