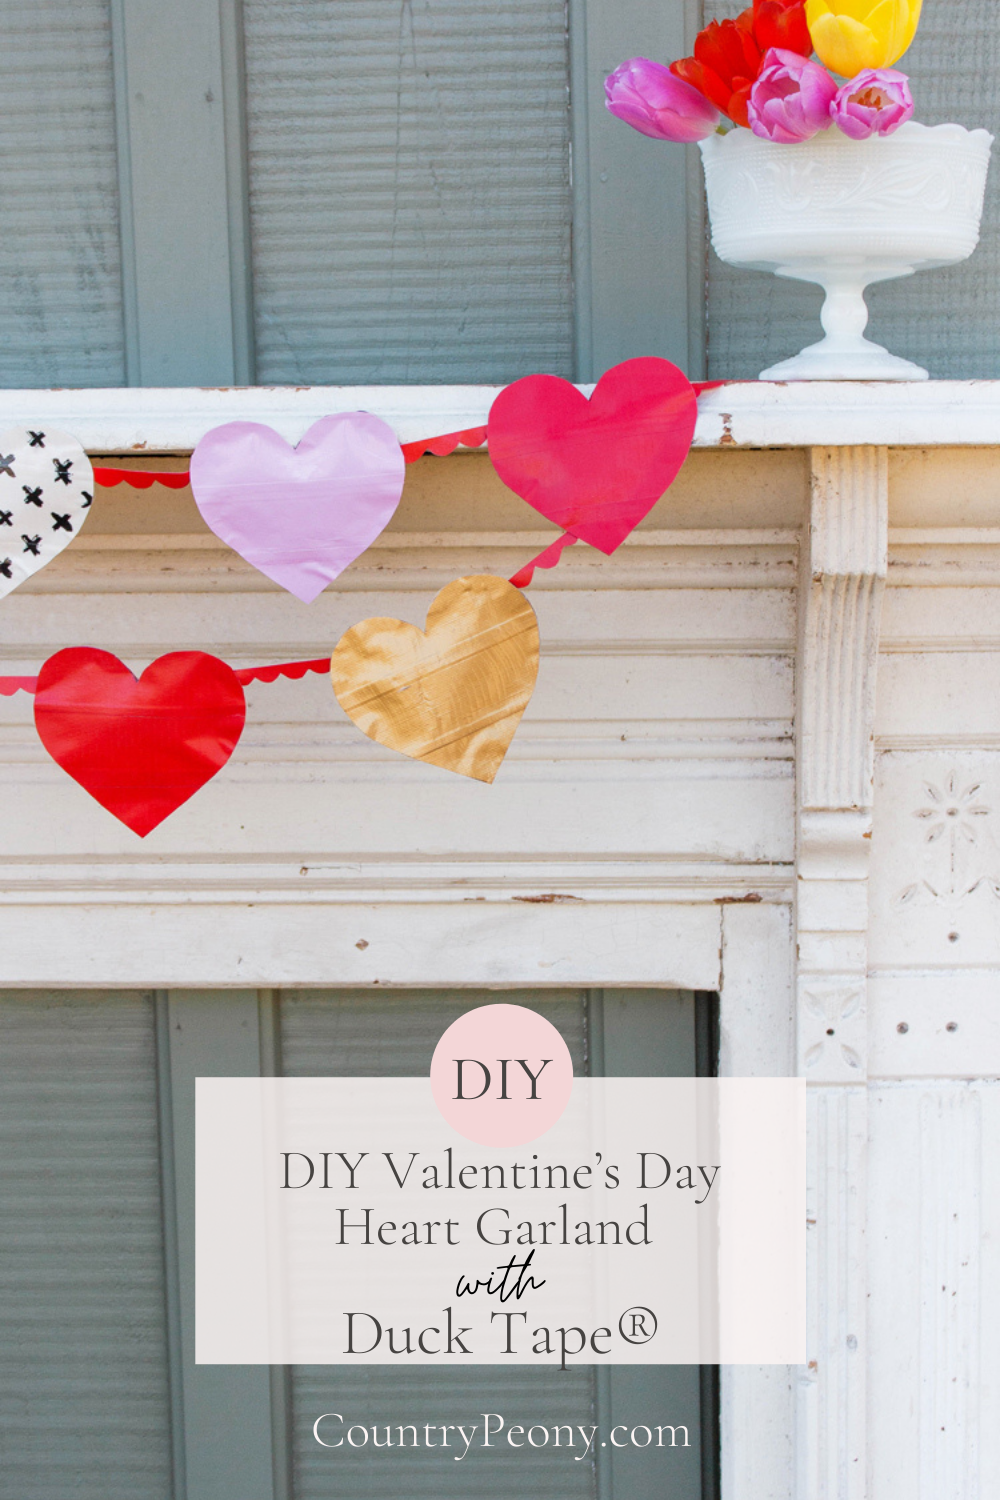
DIY Valentine’s Day Heart Garland with Duck Tape®
*This post was created through a paid partnership with The Duck® Brand. However, all opinions are honest and 100% my own.
Are you ready for a simple and charming Valentine’s Day craft made out of tape? Today I am so excited to partner with the Duck® Brand to bring you a Duck Tape® Heart Garland for Valentine’s Day that is not only super charming, but is also super durable.
The beauty is in this DIY garland is that you can customize the hearts to fit your design style as Duck Tape® comes in a variety of colors and patterns. It is also a really fun and simple craft that can be completed in one afternoon, and is kid-friendly!
Continue below for the step-by-step tutorial to create your own heart garland décor for Valentine’s Day using Duck Tape®

To Make Your Own Duck Tape® Heart Garland, you will need:
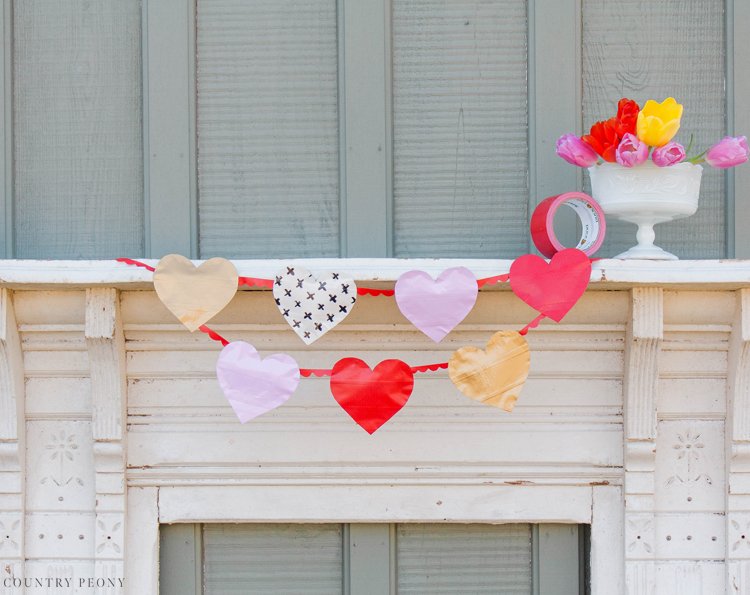
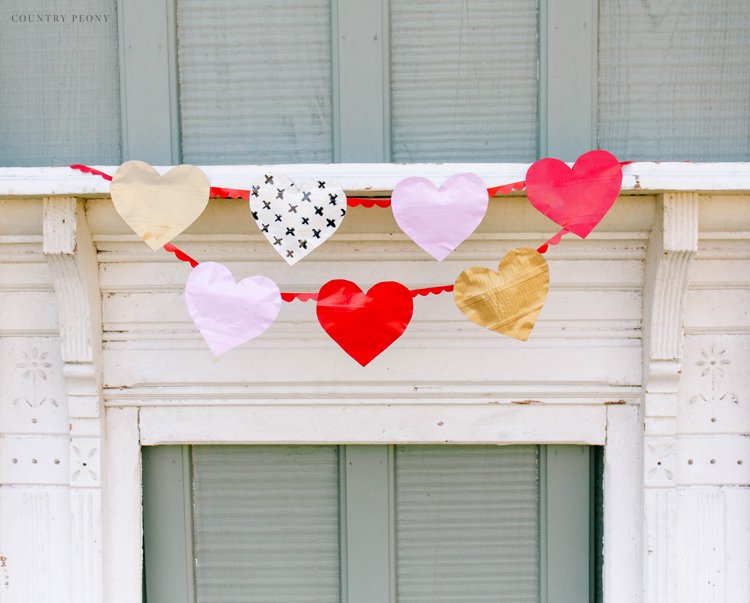
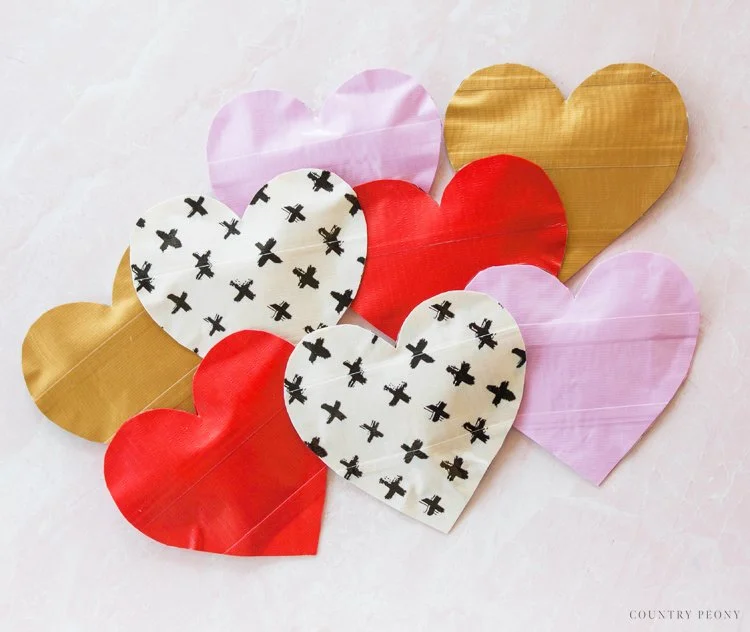
· Duck Tape® in a variety of colors and patterns. For this project I used Red, Baby Pink, Gold, and Brushed.
· Duck® Brand Double Stick Tape
· Scissors
· Cardstock
· Pen or Marker
· Craft Scraps for Stuffing. I used old plastic grocery bags, but you can use old scraps of fabric or paper as well.
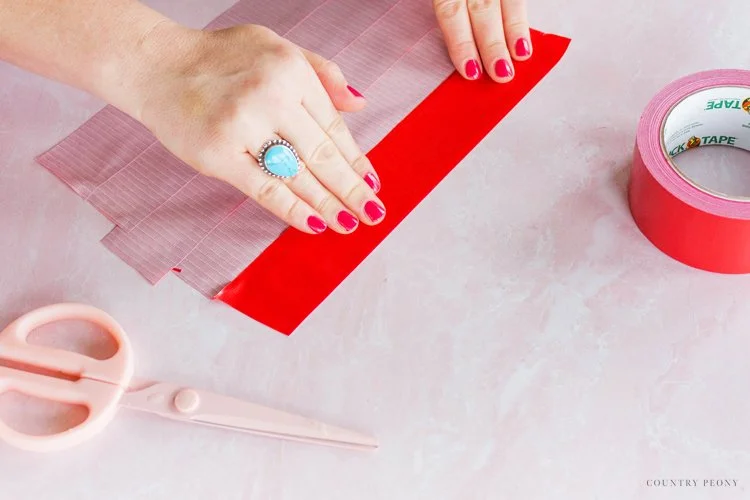
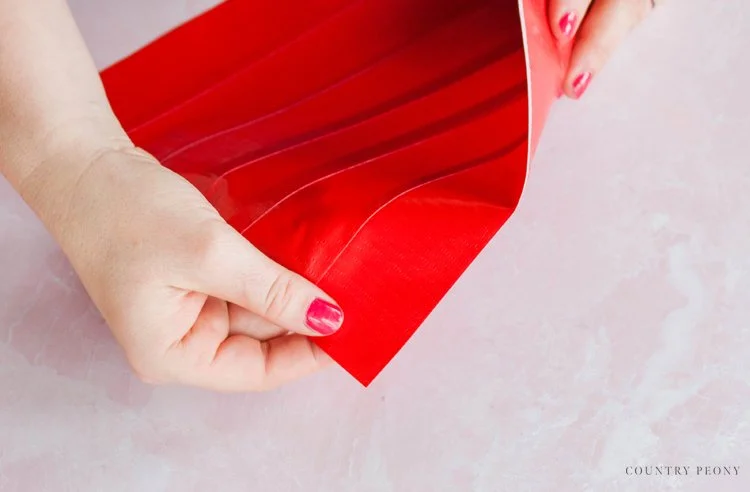
Create the Duck Tape® Fabric

Cut out strips of Duck Tape® and lay them on a flat surface.

One at a time, attach the Duck Tape® strips to one another by carefully overlapping the top of the Duck Tape® onto the bottom.

Once one side is complete, attach another set of Duck Tape® strips to each other to create the Duck Tape® fabric.
Cut Out the Duck Tape® Hearts

Create a heart stencil onto cardstock, then trace the heart onto the Duck Tape® fabric.
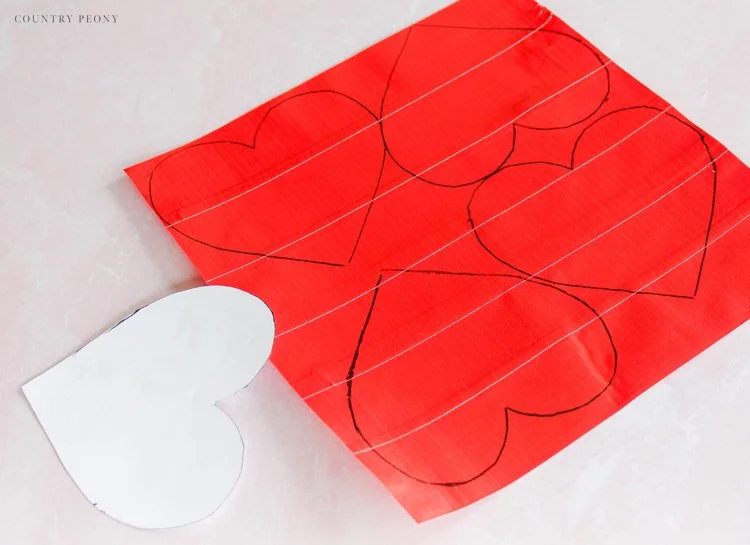
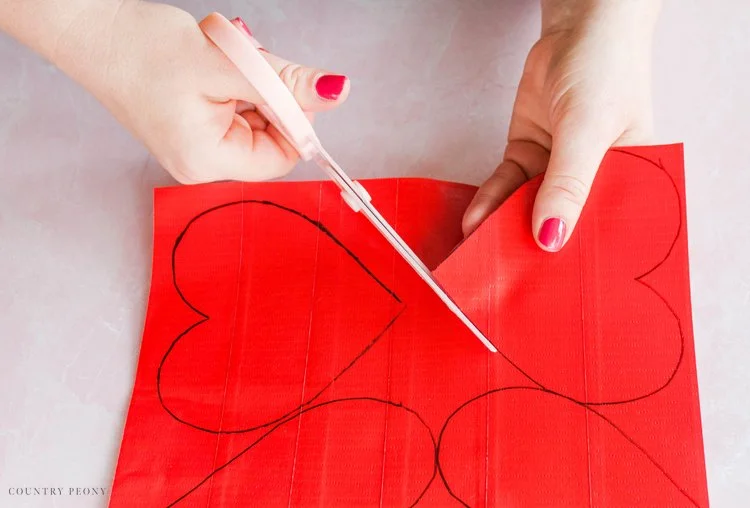
Cut out the hearts from the Duck Tape® fabric.
Cut out enough hearts to create the 3-D hearts for the garland.
Each 3-D heart for the garland will require 2 hearts. For my project, I created 7 3-D hearts, so I cut out 14 hearts.

Create the 3-D Duck Tape® Hearts
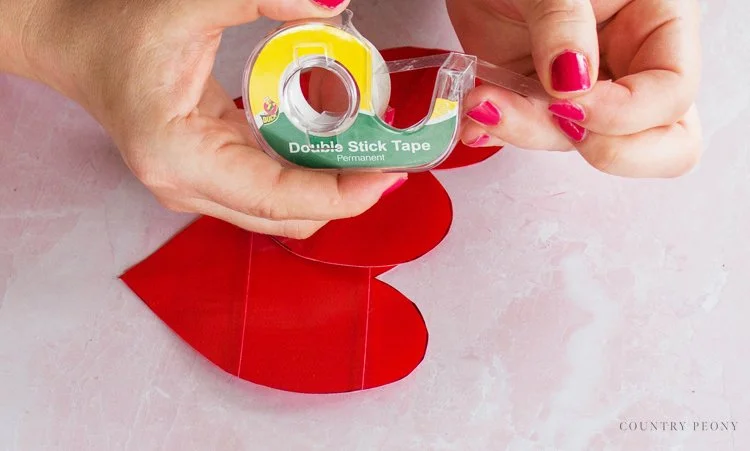

Attach the Duck® Brand Double Stick Tape around the edges of one of the hearts. Leave about 3 inches open for stuffing.

Attach the other heart to the taped heart.

Trim the tape around the heart if it is peeking through.

Cut the crafting scraps. For my project I used a leftover plastic grocery bag.

At the heart opening, insert the crafting scraps to act as stuffing for the heart.
*Don’t overfill the heart, because then it will be hard to close.

Once you are done stuffing the heart, secure the open end of the heart with Duck ® Brand Double Stick Tape.

Create enough hearts for the garland. For this project, I created 7 hearts.
I like to stick with 3-4 different colors and I think it is fun to add an unexpected pattern into the mix like I did with the brushed pattern.
Create the 3-D Duck Tape® Heart Garland

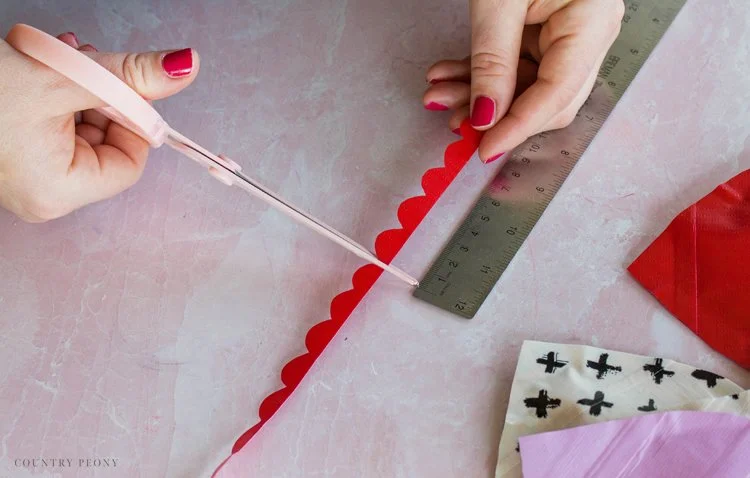
Create a thin strip of Duck Tape® fabric. Then, cut it in half.

Then use your scissors to create a thin strip of Duck Tape® fabric to act as the string in between the hearts for the garland.
To add extra whimsy and charm, I created a fun scallop strip, but you can do whatever your heart desires!

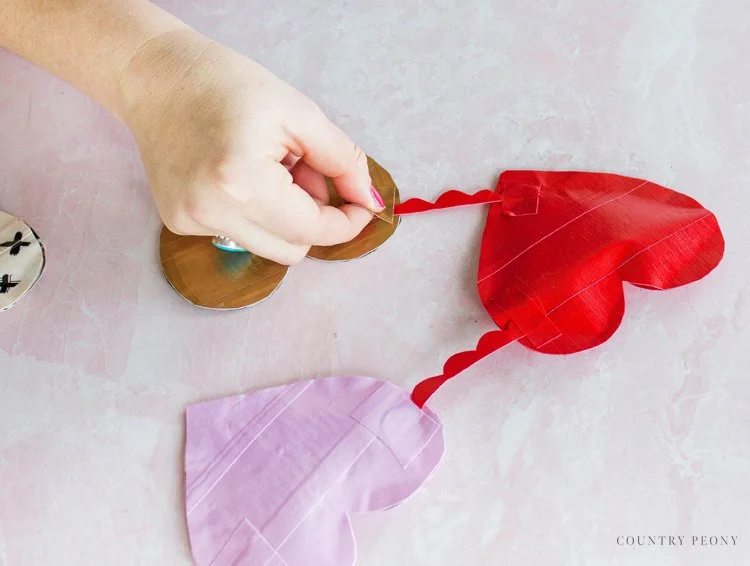
Once you make your Duck Tape® string, cut it into sections that will go in between the hearts.
*I cut my string at 9 inch sections, because I wanted the hearts to be 6 inches from each other on the garland.

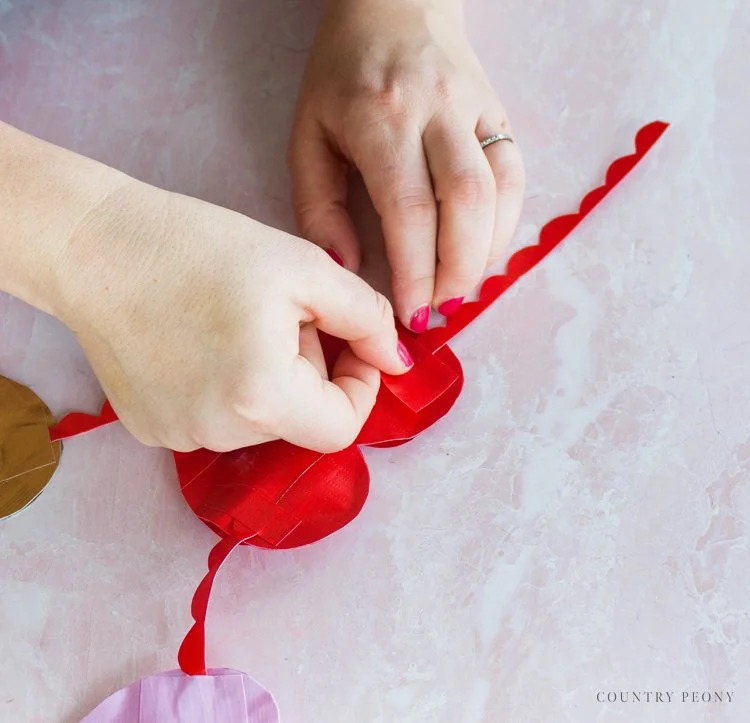
Then, create a pattern for the garland and attach the Duck Tape® sections to the hearts to create the garland.
*For a polished look, use the same color Duck Tape® as the heart when attaching the string.

Continue to use Duck Tape® to attach the hearts to the string to create the garland.
You can choose to create a one level garland, or add another layer like I did.
Enjoy Your Charming and Custom Duck Tape® Heart Garland

Find your favorite door, a mantle, or blank wall and add hang your garland up for all to enjoy this Valentine’s Day.

I love how charming and sweet this Valentine’s Day garland turned out using such a fun product like Duck Tape®. I hope you enjoy making yours just as much I did!

Thank you to the Duck® Brand for providing me with your amazing products to create this charming Valentine’s Day Garland.

I believe crafting is more fun when we share our projects. Please email me at elizabeth@countrypeony.com, or please tag me @thecountrypeony or #countrypeony to show me your beautiful, custom creations!
Thank you so much for following along!