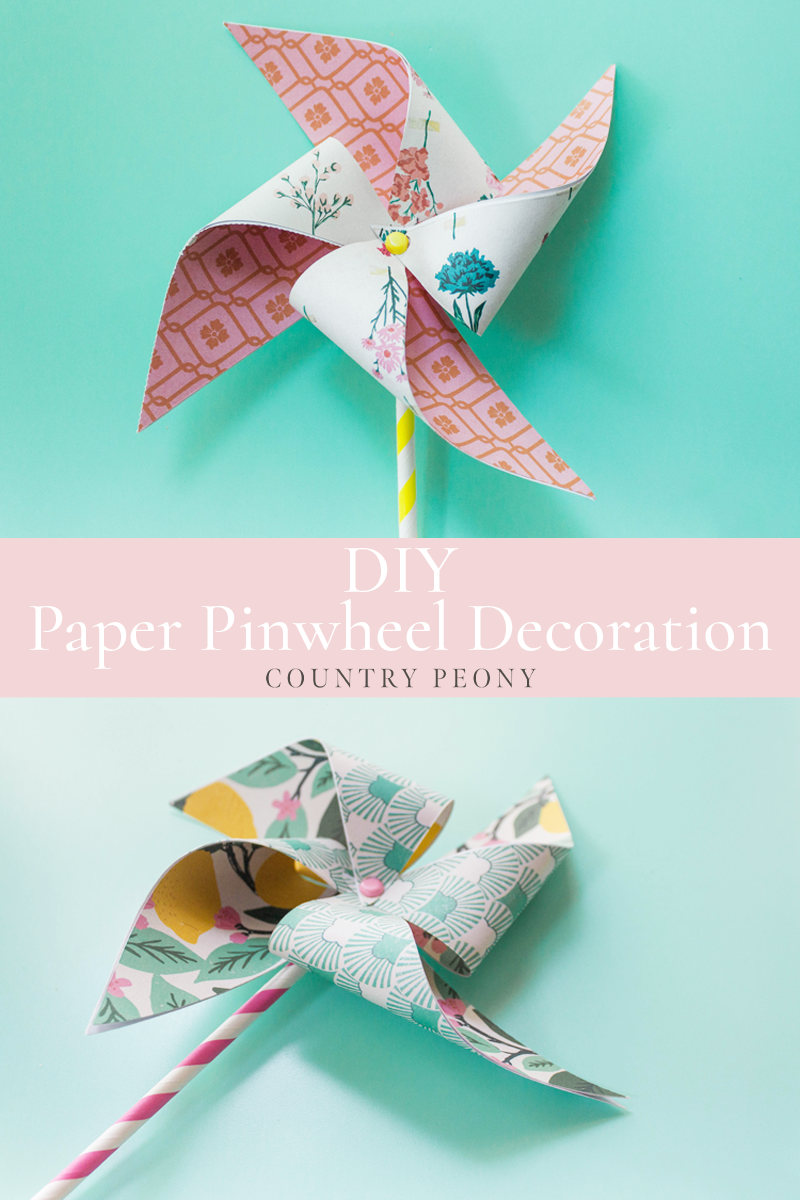
DIY Paper Pinwheel Decoration

Pinwheels have always reminded me of the sweet and simple summertime with their whimsical and cute nature. I was recently inspired to make my own when I saw these pinwheels with cute paper straws as the base from this simple tutorial from Polka Dot Made. So, today I thought it would be fun to create a very simple paper pinwheel that would make the cutest accessory at your next gathering or in your home. I can see these pinwheels as a cake topper, tied together to make a garland, or as a stand-alone centerpiece or together as part of the tablescape.
This is the perfect DIY because it is very simple and inexpensive, but still packs a cute punch!
Eventhough I am not a scrapbooker (maybe someday), I have a large amount of scrapbook paper. I love hoarding pretty paper, and I love crafting with it. So these pinwheels are the perfect reason to use up your scrapbook paper if you are like me.
*My pinwheels are for decoration only and don’t work as traditional pinwheels because they don’t spin. But, as I mention below if you purchase larger and longer brads, and leave some space between the brad and paper it should work just fine!
For your convenience, please enjoy the step-by-step video below then follow along for the step-by-step tutorial to make your own DIY Paper Pinwheel Decoration!
Continue below for the step-by-step pictorial to make your own DIY Paper Pinwheel Decoration

*Some of this post contains affiliate links, which means a commission is earned if you purchase via my link at no extra cost to you. Thank you so much for helping to support this blog. For more information, please see my disclosures here.
To make your own paper pinwheel decoration, you will need:

Step 1: Fold the scrapbook paper in half twice with the bone folder so that you get four 6-inch squares.
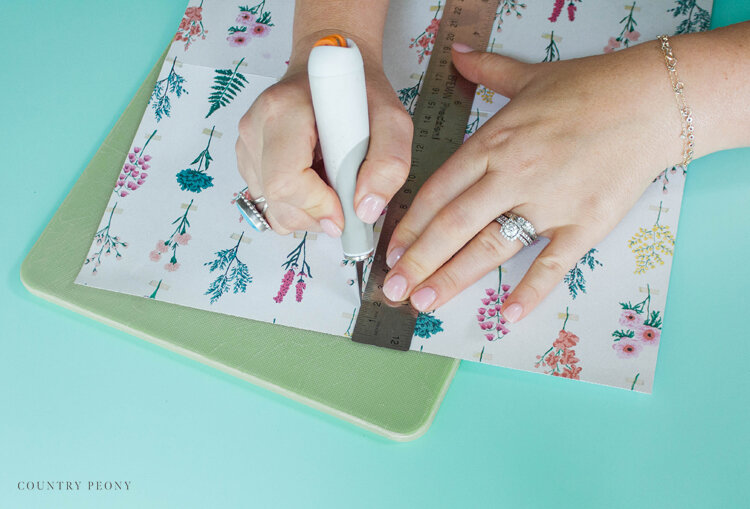
Step 2: Use your metal ruler and utility knife to cut along the paper lines to create four separate squares.


Step 3: Repeat Steps 1 & 2 with a different but corresponding scrapbook paper.

Step 4: Place your metal ruler at a diagonal line on the square then mark three lines: one at the center at 4 1/2”, one at 1/4” above the center, and one at 1/4” below the center.

Step 5: With the utility knife and ruler, cut from the edge of the corner to each mark. Cut to the mark lines from the top and from the bottom. Leaving the center intact.

Step 6: Rotate your paper, and repeat the process so you have 4 cut corners. Leaving the middle intact.

Step 7: Cut an x in the center of each paper.
Step 8: Repeat steps 4-7 on the rest of the cut scrapbook paper.

Step 9: Place two different patterned papers together. Pattern side should be facing out. Match up the cuts.

Step 10: Punch a hole through both pieces of paper in each far right corner of each cut triangle.


Step 11: Pinch one end of the paper straw down then punch a hole through it.


Step 12: Loosely fold in the punched ends of the paper into the center, then insert the paper brad into each hole.


Step 13: Turn the pinwheel over. Push the paper brad legs all the way through the paper and through the paper straw hole.

Step 13: Split the legs of the paper brad and press them down to secure the pinwheel and straw in place .
*If you want your pinwheel to spin, purchase larger brads with longer legs and don’t press the brad legs all the way down.
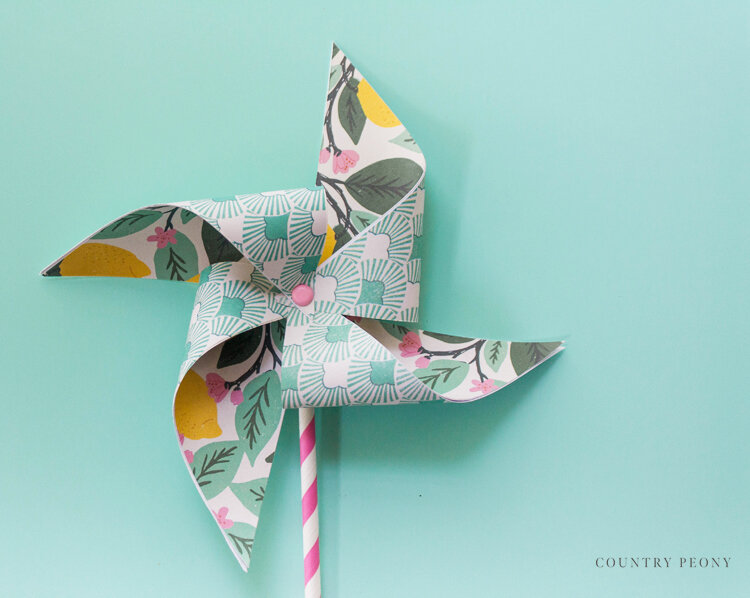
Step 14: Enjoy your custom pinwheel decoration!


I hope you enjoy playing with the colors and patterns to create your own one-of-a-kind paper pinwheel!

I believe crafting is more fun when we share our projects. Please email me at elizabeth@countrypeony.com, or please tag me @thecountrypeony or #countrypeony to show me your beautiful, custom creations!
Thank you so much for following along!