How to Create a Cohesive Thanksgiving Tablescape with Miss Mustard Seed's Milk Paint

*Miss Mustard Seed’s Milk Paint graciously provided the wonderful milk paint products for this post. However, all opinions are honest and 100% my own.
Thanksgiving is next week, and today I want to show you how easy it is to achieve a curated Thanksgiving tablescape with items you already have in your home. This post is meant to inspire you to look around your home and transform outdated items into ones that you love again. Or to inspire you to bring thrifted items back to life with the power of milk paint.
If you have have been here for a while you know that I love Miss Mustard Seed’s Milk Paint as witnessed by my most recent milk paint endeavors: DIY Milk Paint Pumpkins, Thrifted Windsor Chair Makeover with Milk Paint, DIY Dresser Makeover with Milk Paint, Media Cabinet Makeover with Milk Paint, and the DIY Bench Makeover with Milk Paint.
In today’s tutorial I will show you how to pull items together to create a cohesive tablescape. Think vases, cake stands, and candlesticks that you can paint. With Miss Mustard Seed’s Bonding Agent you can paint onto any surface. I used the bonding agent to transform the simple glass vases that were gifted with floral arrangements years ago (as you can see below). Visit the DIY Milk Paint Pumpkins tutorial to see how to add bonding agent to the paint.
Beginning your milk paint endeavors with small thrifted or gifted finds around your home is a great place to start. I love painting furniture with milk paint, but it can be intimidating. The key is to just have fun! Milk paint is very forgiving and you really can’t go wrong.
So let’s get started!
Inspiration Behind the Thrifted Thanksgiving Tablescape
The first thing to do when creating a tablescape is to find your inspiration piece. Mine is this plate set that I thrifted about a year ago. I love the colors and the beautiful pattern. It has wonderful Fall-like colors, but it doesn’t shout Fall. I knew the colors would also go very well with my painted pumpkins that I wanted to incorporate into the tablescape.

From here, I pulled three colors from Miss Mustard Seed’s paint line to incorporate into the design. When designing a bedroom or event space I like to include 3 colors (black and white don’t count).
I thought Miss Mustard Seed’s Eulalie’s Sky was a beautiful nod to the blue, Miss Mustard Seed’s Arabesque is a lovely play on the purple, and Lucketts Green adds a fun element.

Sidenote: I used Canva to create this simple inspiration board. I use Canva for all of my designing needs (personal and for the blog). They have a free version and a professional version. If you want to try it please feel free to use my referral link: https://www.canva.com/join/smiley-clique-momo
Thrifted Finds Before Miss Mustard Seed’s Milk Paint
Next up, find items that will fit the tablescape. I went through items in my home that were thrifted and gifted that needed a makeover. I chose items of different height, style, and texture to add interest.

Thrifted Finds After Miss Mustard Seed’s Milk Paint

Watch My Live Demo!
Click below to watch the recording of my live stream demo on Miss Mustard Seed’s Milk Paint Facebook page to see how I made this Thanksgiving tablescape. I take you through every step of the process.

Continue Along for the Step-by-Step Tutorial to Paint with Miss Mustard Seed’s Milk Paint
Before we start, I created this video a couple of months ago showcasing how I updated a thrifted Windsor chair using Miss Mustard Seed’s Arabesque. It may be helpful if you are new to milk paint.
*This post contains affiliate links. For more information, please see my disclosure page here.
To make your own milk paint pumpkins, you will need:
Follow below to start the simple process of painting your collected items to give them a cohesive look.
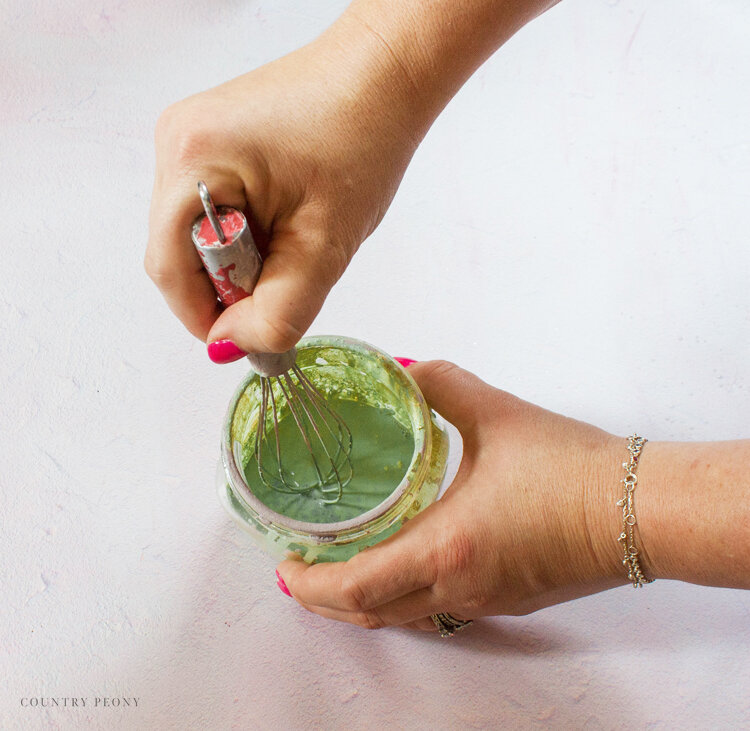
Step 1: Mix the paint.
Mix 1 part paint powder to 1 part water.
I always recommend starting with less so you don’t waste your product. You can always make more paint later. A little bit of milk paint goes a long way!
Whisk the paint together with the water until the paint is fully integrated into the water.
I have found that a miniature whisk is the best mixing tool to ensure the milk powder stays fully integrated into the water.
Your paint mixture should look like a thin pancake batter once it is mixed.
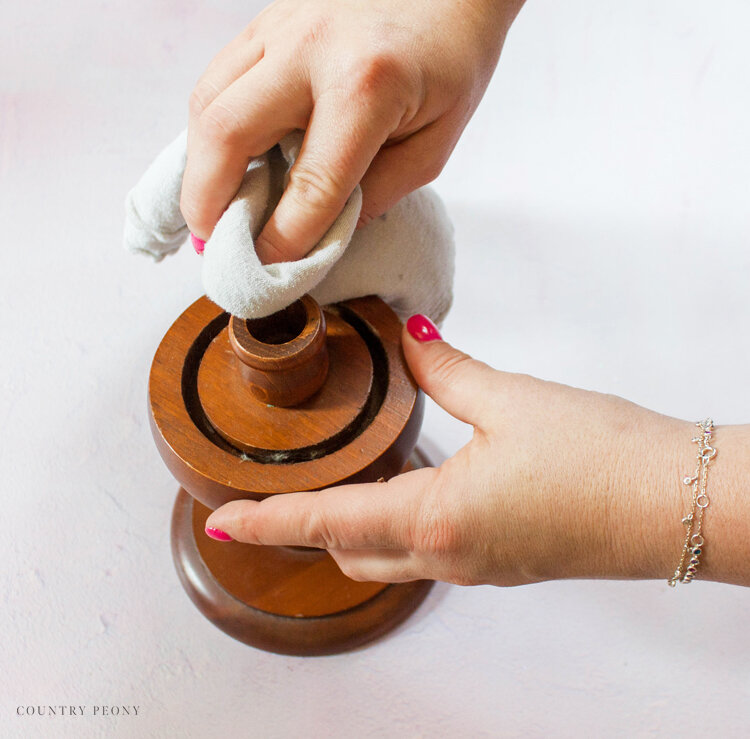
Step 2: Sand and clean your piece.
Clean with your favorite furniture cleaner. I used Thieves Cleaner.
Let it dry completely.
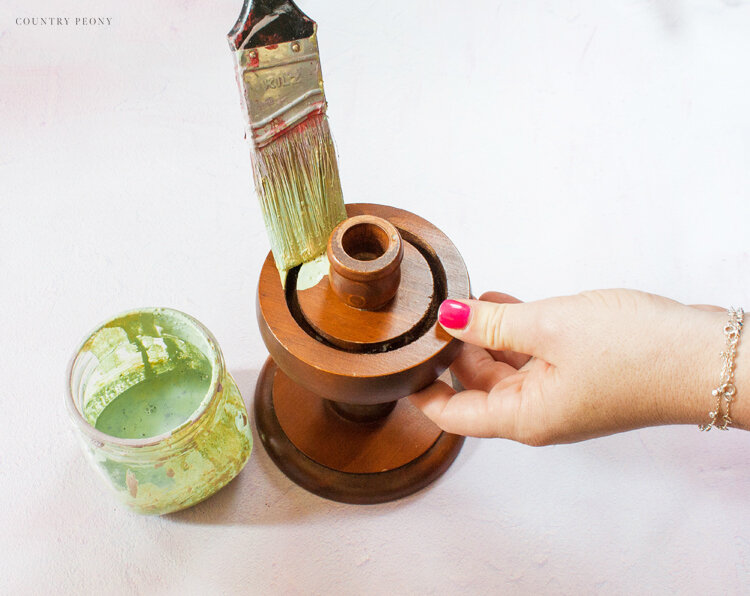
Step 3: Apply 1 thin, even coat of the milk paint mixture to the piece.
Allow the paint to dry fully before you add another coat. My first coat took about 1 hour to dry.
A little bit goes a long way with milk paint.
If the milk paint starts to settle, you may need to whisk it some more.
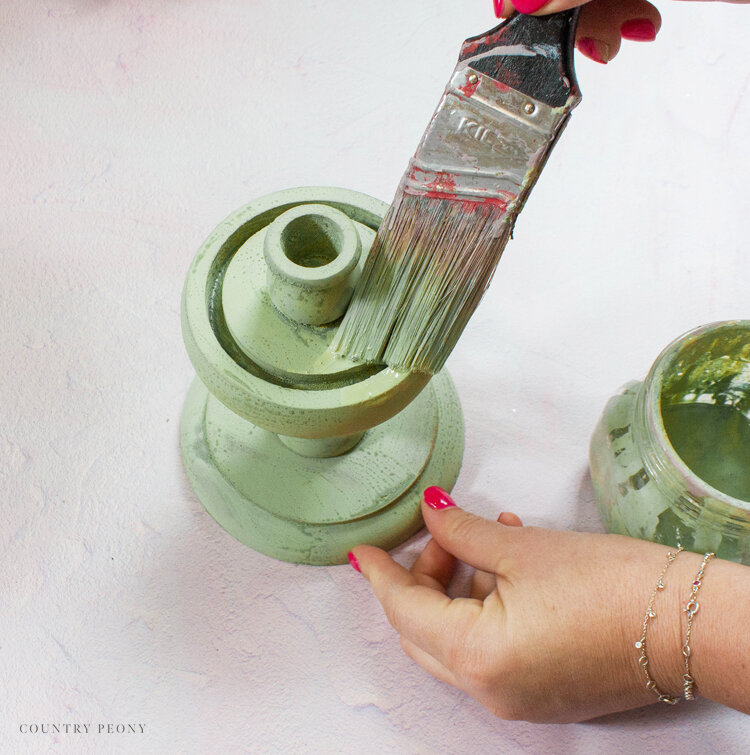
Step 4: Add another coat of paint mixture.
After your first coat of paint dries, add another coat of milk paint. Allow the second coat to dry completely.
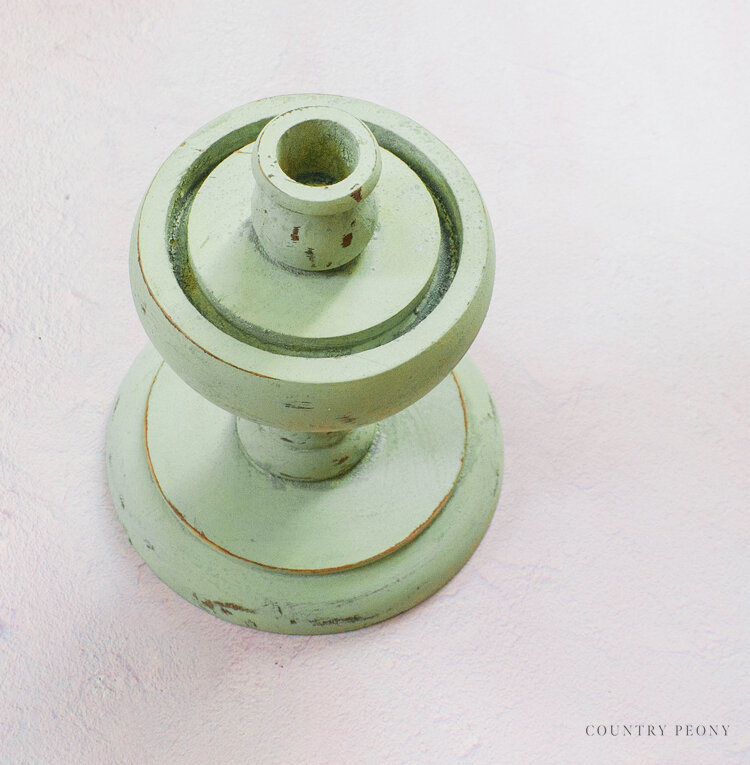
You can stop here or you can continue to add more layers of paint if you would like to. If you like some of the original color showing through, then 2 coats may be the best stopping point. It is all up to you!
I only added two coats of paint to this project, because I knew I would sand after to create an aged patina.
Let the paint dry overnight.
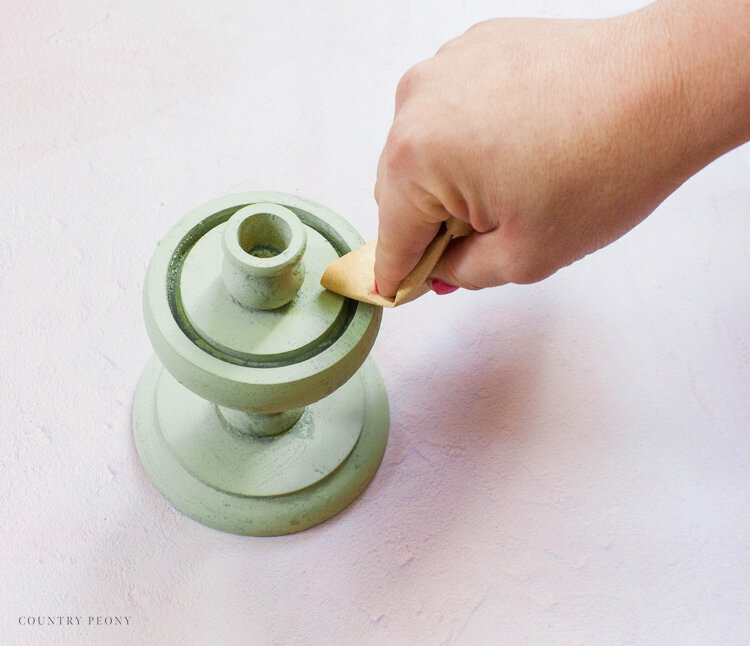
Step 5: Sand down the piece to create a smooth finish, and to create a distressed look.
Ensure the paint is completely dry before you sand. I like to let mine sit overnight.
This step is optional. The beauty in milk paint is that sometimes the paint chips on its own. You can speed up or control the process by sanding it for yourself like I did.
The key is to just have fun with it. You truly can’t go wrong. And, if you don’t like how it is turning out you can always start over.
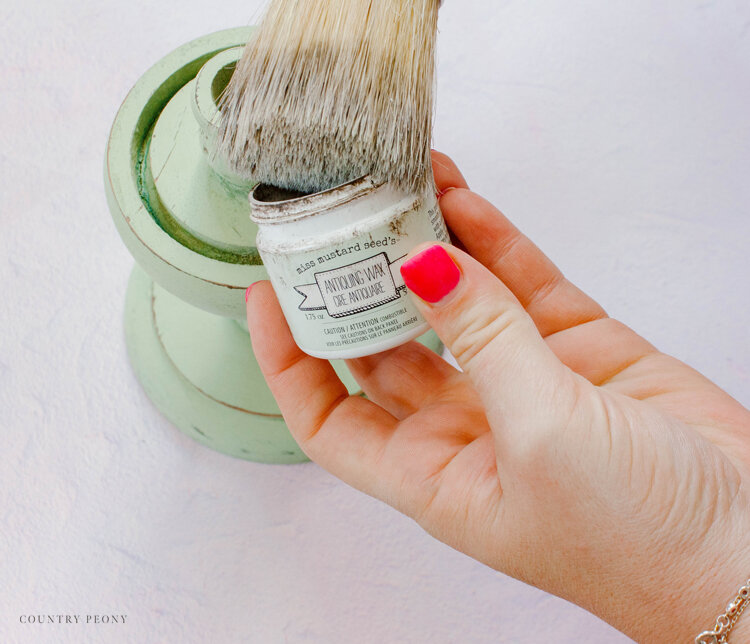
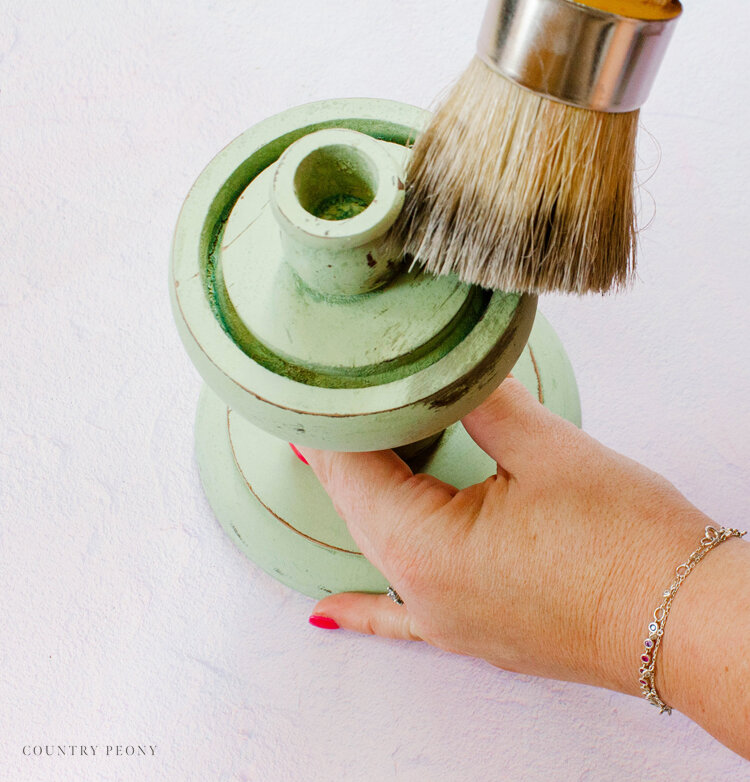
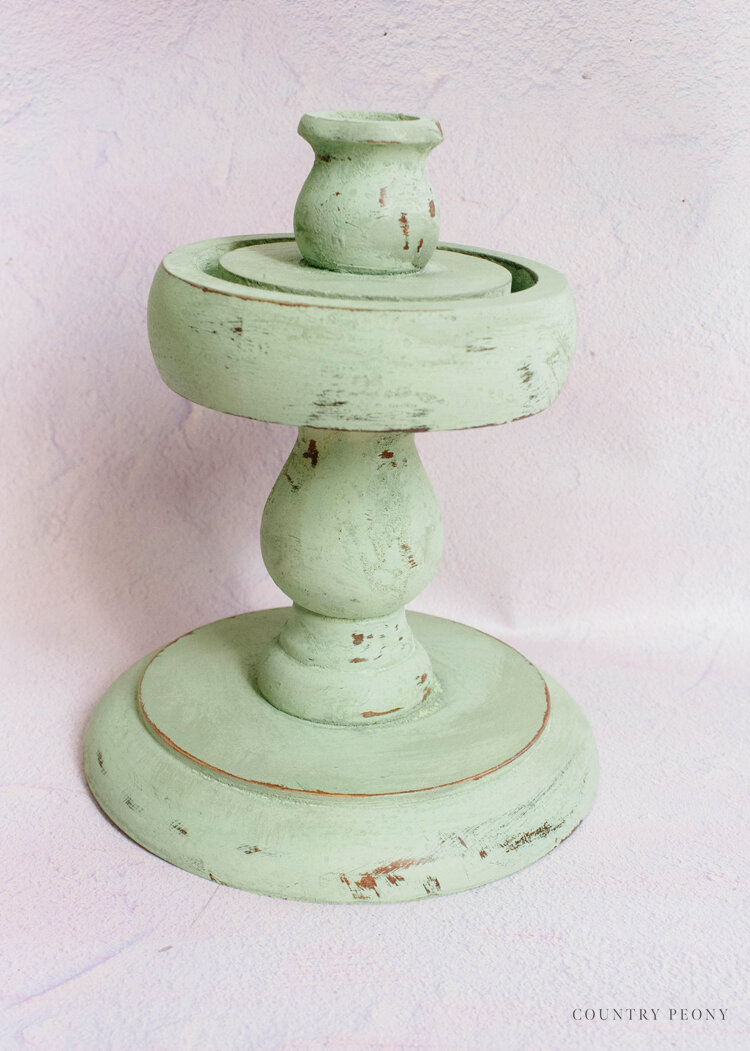
Step 6: Add Miss Mustard Seed’s Antiquing Wax or White Wax.
Once your paint has dried overnight, you can add Miss Mustard Seed’s antiquing wax or white wax. Add antiquing wax for a more aged, darker look and add white wax for a lighter look. I added the antiquing wax to these candlesticks. But I added the white wax to my painted pumpkins and to the blue cake stand below.
I always like adding a little more depth and texture to a piece. So I decided to add antiquing wax to this piece to bring the deeper tones out even more.
*I used a Miss Mustard Seed Wax Brush (source linked above) to apply the wax, and it made the process so much easier to apply the wax than with a cotton cloth.
*It is helpful to work in small sections so that you get the consistent look that you want throughout, and you don’t get overwhelmed.
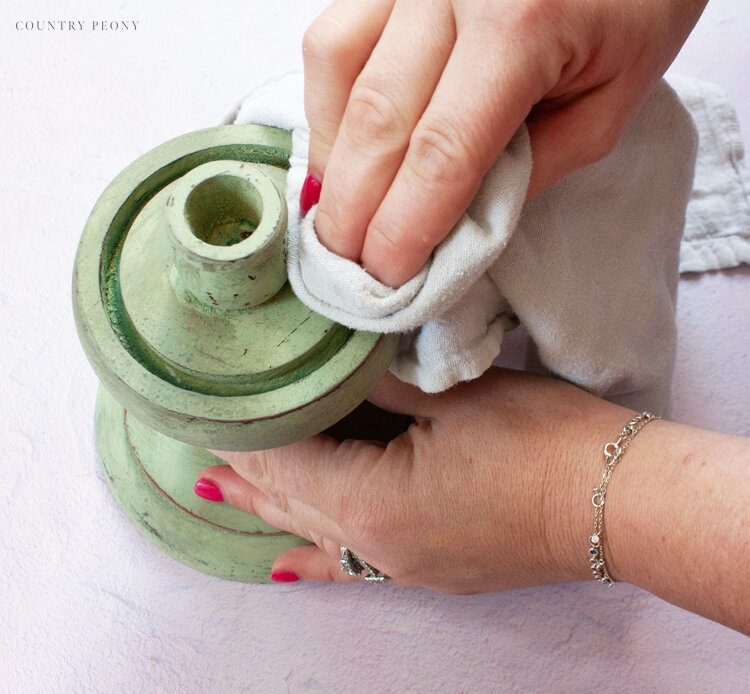
Step 7: Wipe off the excess wax and buff it with a clean cloth.
Step 8: Let it cure for 30 days, then enjoy your custom upcycled piece.


Decorate Your Table

I used a vintage quilt that I found at an estate sale to act as the tablecloth. I love using vintage quilts because they normally have some wear to them already, and they add such a beautiful texture and interest to the tables.

I then added depth to the table with thrifted brass candlesticks, colorful goblets, gold flatware, and thrifted wicker chargers.

Add some fun pumpkins and fresh flowers with Fall accents, and you are good to go!

I hope you feel empowered to create a fun tablescape for Thanksgiving using items you already have in your own home.
Thank you to Miss Mustard Seed’s Milk Paint for providing the wonderful products for this post.
Thank you so much for following along today. I hope you enjoy experimenting with Miss Mustard Seed’s Milk Paint as much as I do!

I believe crafting is more fun when we share our projects. Please email me at elizabeth@countrypeony.com, or please tag me @thecountrypeony or #countrypeony to show me your beautiful, custom creation!

