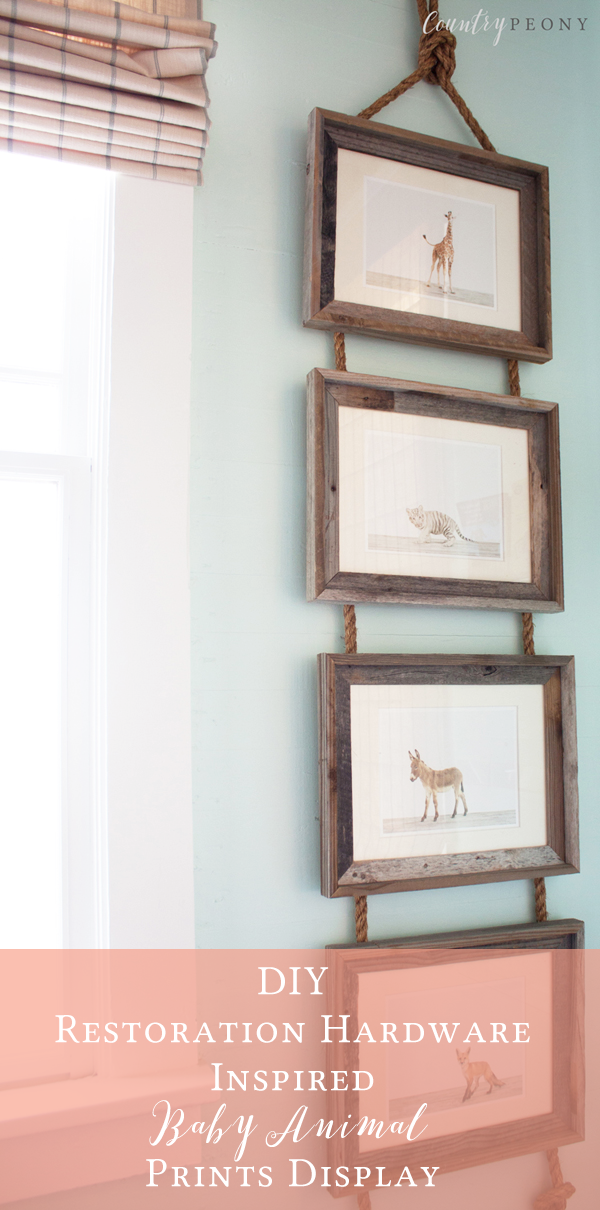
Restoration Hardware-Inspired Animal Prints Display

When my husband and I were preparing for the birth of our first born, now four-year-old son, I was inspired by the picture below from Restoration Hardware Baby when dreaming up his nursery design. Unfortunately, the price tag was a bit too steep for our budget. So I scoured the internet for some similar photographs, and my handy husband created a similar photo display at a fraction of the cost that fit my son's room perfectly.

Fast forward four years, and the photo display is now repurposed into my children's shared bedroom which I shared on the blog a couple of weeks ago.
Today I would like to share a short DIY on how we created the ladder-style with rope animal print display.
*This post contains affiliate links. For more information, please see my disclosures here.
To make your own ladder-style, animal print display, you will need:

Step 1: Determine how many photo frames you will use, and the placement/spacing of your photo frames. This will help confirm how long the rope should be.
Step 2: Once you determine the placement and length of your photo display, screw a hook into the wall about a foot above where the first framed photo will rest.
Step 3: Decide on the length of the rope by how many photos you will have. (Ensure to add about one to two feet to account for the knots at the top and the bottom.) Then double the length of the rope, and tie a knot with a loop at the halfway point of the rope's length. Hang the looped knot onto the hook.

Step 4: Attach the tube straps onto either backside of the top part of the picture frame. Ensure the screw does not go through to the front of the picture frame.
Step 5: Thread each rope through the tube strap onto either backside of the picture frame. Once the picture is in the proper location, crimp the tube strap with your fingers or pliers to keep the picture in place.

Step 6: Flip the picture frame up so that you have room to work underneath the picture frame. Then attach the rope to the wall with the tube strap in a location that will not be visible when the picture is hanging down.
*Each picture frame should have four tube straps: two copper tube straps to place onto the backside of the picture frame, and two plastic tube straps to secure to the wall behind the picture frame. However, you can use copper tube straps for all applications since they are easy to crimp.
Step 7: Repeat steps 4-6 for the remainder of the picture frames.

Step 8: After your last picture is secure, tie each rope into a knot approximately 6 inches to 1 foot below the last picture frame (or desired length). Try to ensure that the knots are even with each other. Then cut off any remaining rope.

I hope you enjoy customizing your own photo display wall.