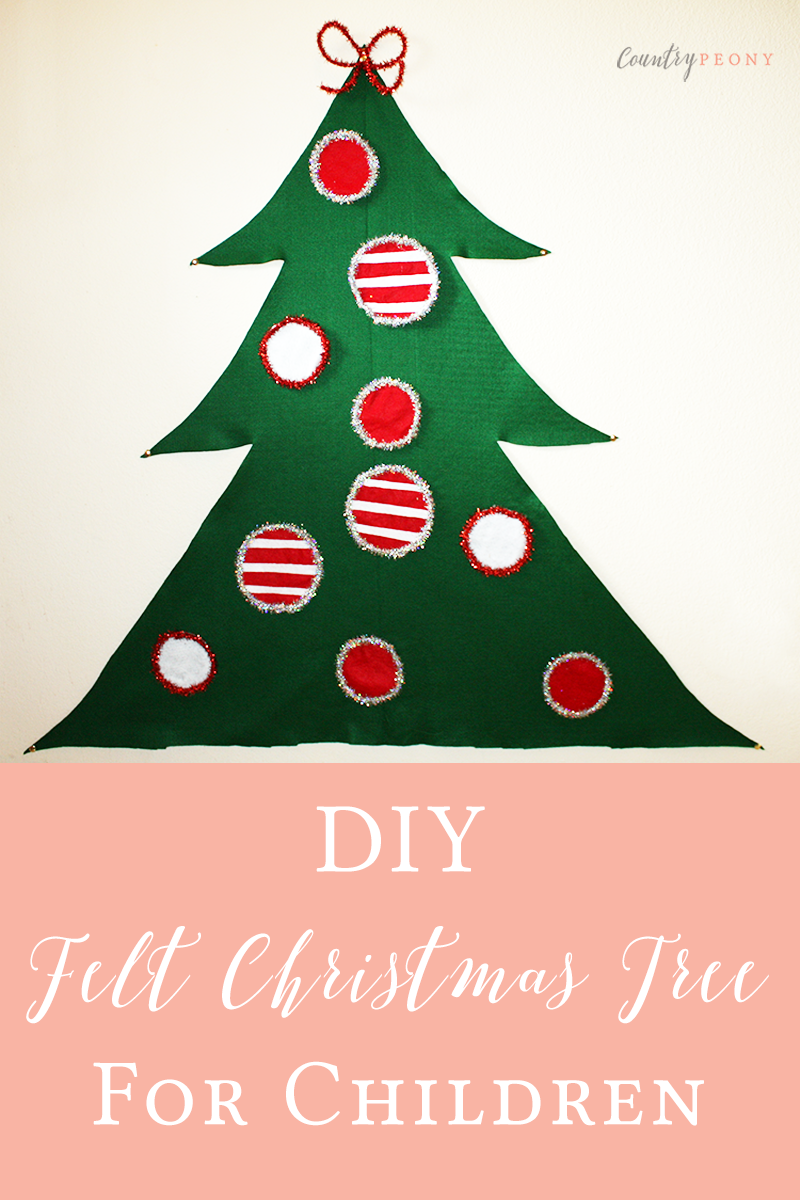
DIY Felt Christmas Tree for Children

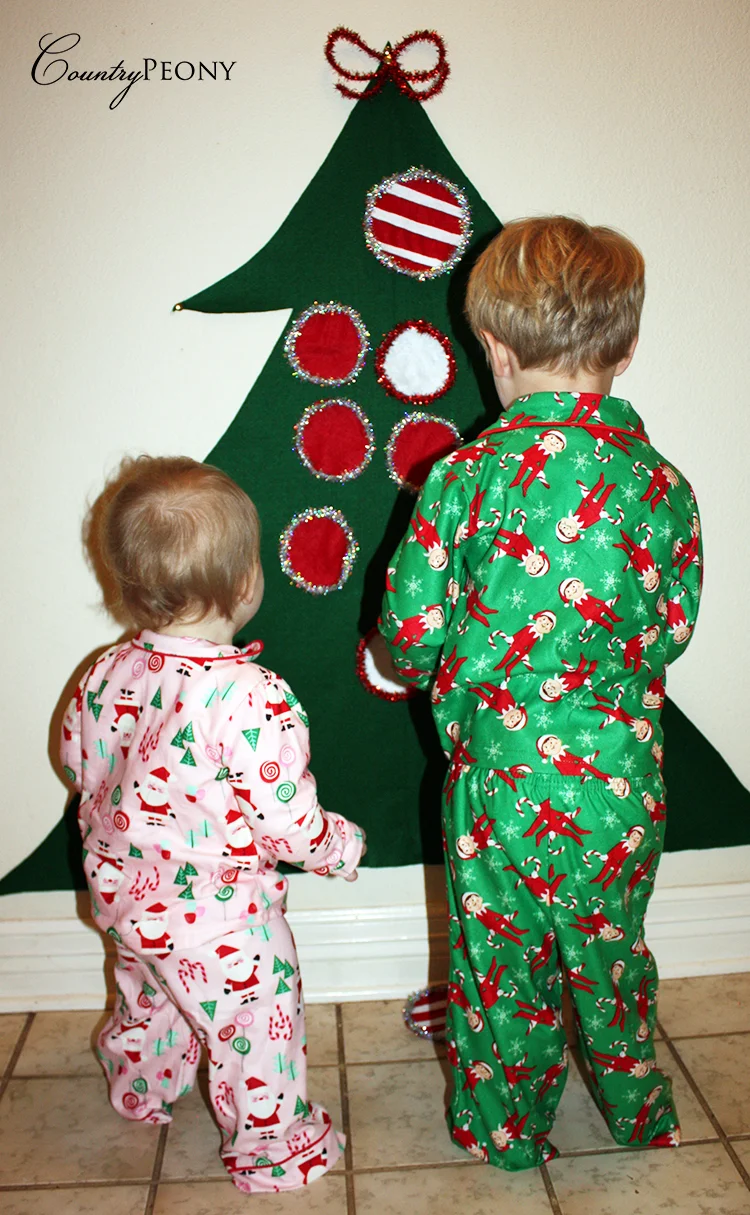
Last year, Chelsea from Two Twenty One inspired me with her colorful and detail-oriented felt Christmas tree. With two toddlers to entertain this year, I thought now would be the perfect time to create my own version.
This project was a winner, because it only took about one hour to create (nap time), and it was inexpensive. Above all else my children now enjoy decorating their own tree.

*This post contains affiliate links. For more information, please see my disclosure page here.
For this project, you will need:
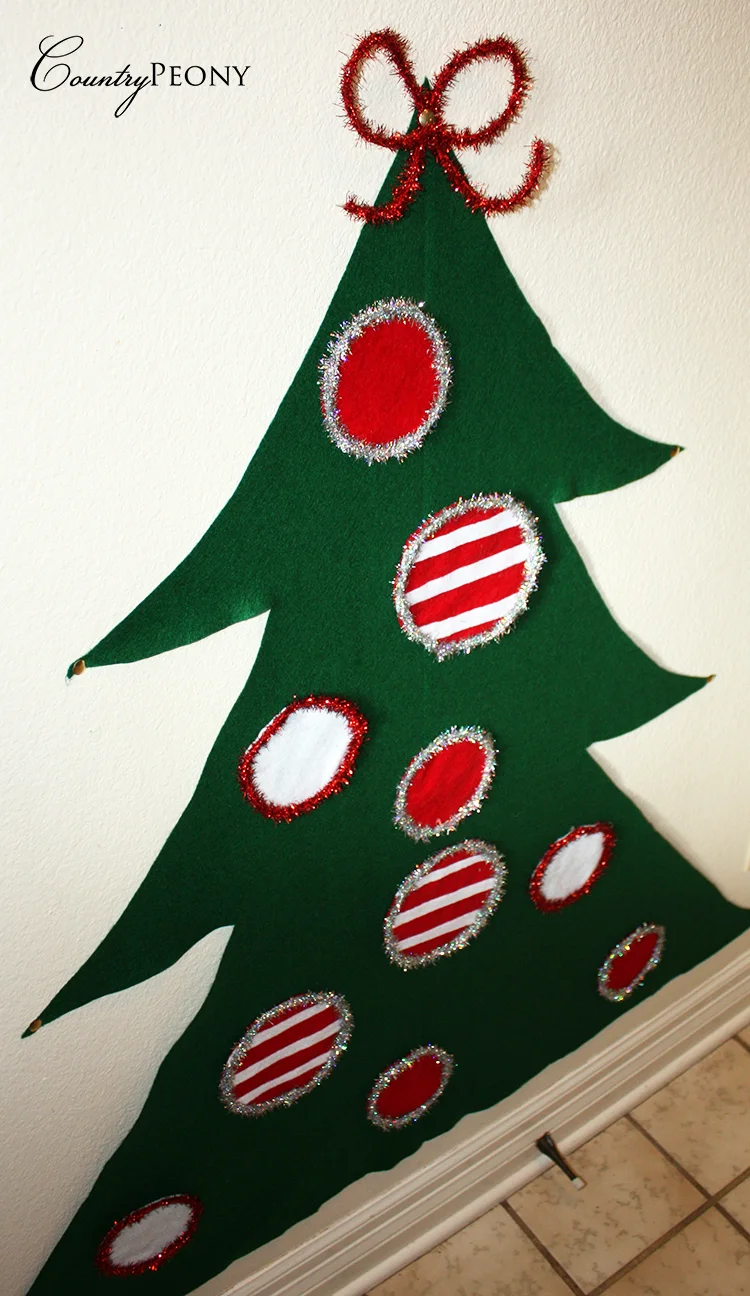
Felt. I used 1.5 yards of 72 inch wide green felt, and a .5 yard each of red and white for the ornaments. I went with classic colors to match our large tree, but you can choose any colors that speak to your heart's desire.
Hot Glue Gun with hot glue sticks
Chalk or Washable Marker for the template designs. Chelsea used chalk, but I couldn't find chalk in the house so I used a washable marker.
Ribbon for embellishing the ornaments (optional)
Stencil for the ornaments. Chelsea has some beautiful templates, however I used a coffee mug to get the circular ornament that I was after.
Tacks to attach the tree to the wall

The first step is to create your tree. Make sure that you keep the natural fold (from the fabric store) of the material in place so you only have to cut one time and the tree is symetrical. You can certainly use a ruler to space the tree limbs out properly. However, I chose to do the guide marks for the tree limbs freehand. I decided to eyeball my guide lines, because 1) I wanted to have fun with this project and didn't want perfection to play a role, 2) I think the curved and jagged lines give the tree a more authentic and whimsical feel which is perfect for my children. I started my freehand process at the bottom, then made a mark in the middle and slowly made my way up the tree to ensure I used my fabric to its full extent.
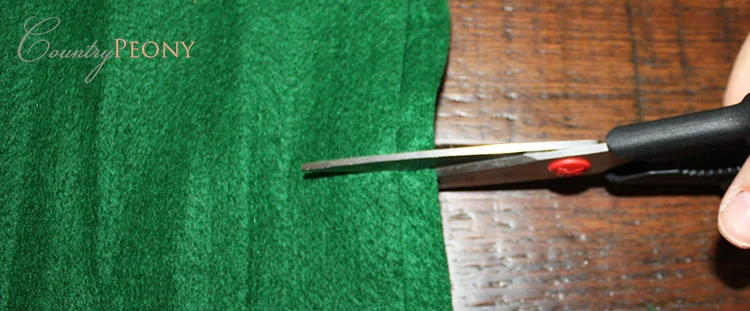
Once I was happy with my guide marks I decided to bring the tree to life. Felt is very forgiving to work with, but it can also be very bulky. Therefore, I cut from the side of the fabric so the felt would stay flat.

Once I reached the tree branch I cut my way up, and then backtracked (as you can see below) so my branches would have a nice point to them.

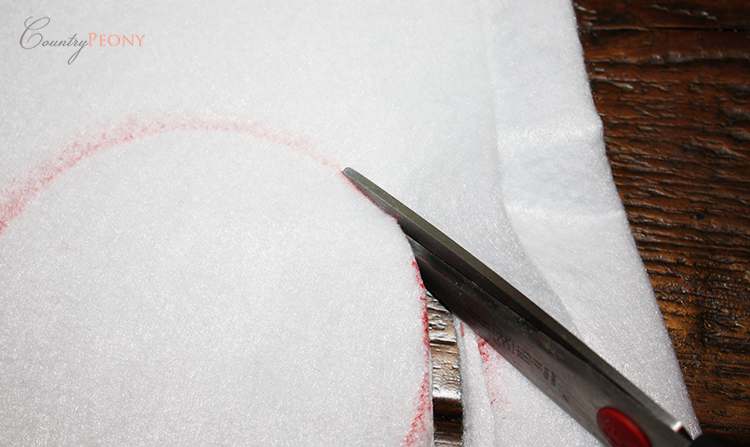
After I completed my tree, I started on my ornaments. As you can see below I used a coffee mug I received from a beautiful friend as a template. If you are going to use household items as stencils for your ornaments ensure that your marker is washable and non-toxic. Since I live with two toddlers, washable and non-toxic are the only markers we have available.

To save time, I placed four pieces of felt together when I cut out the ornaments.
For the ornamental embellishments I hot-glued felt and ribbon with wire to the ornaments. The only rule here is to make sure that your embellishments are light weight so that your ornaments are not too heavy and can stick to the tree.
I hope you get to use your creative liberties and enjoy this project as much as I did. I know my kids are enjoying the final product, even if it isn't perfect.