DIY Easter Egg Wreath with Duck Tape®
*This post was created through a paid partnership with The Duck® Brand. However, all opinions are honest and 100% my own.

Happy Spring! With Easter right around the corner I am so excited to bring you a really cheerful Easter egg craft. Today I am so happy to partner with the Duck® Brand to bring you a Duck Tape® Easter Egg Wreath for Spring that will add the most colorful and cheerful Easter charm to your home this season!
I was so inspired by all of the colorful and vibrant Duck Tape® options that I decided to create some cheerful and whimsical Easter eggs for a Spring wreath. The beauty with this DIY is that it is very simple, inexpensive, and fully customizable to whatever color scheme your heart desires! It is also a really fun and simple craft that can be completed in one afternoon, and is kid-friendly!
Continue below for the full step-by-step tutorial to make your own!
Enjoy the video below to learn how to create your own Easter egg wreath using Duck Tape® this Spring, then follow along for the step-by-step tutorial below to make your own!
Continue below for the step-by-step tutorial to create your own Easter egg wreath for Spring using Duck Tape®


Create the Duck Tape® Fabric

Cut out strips of Duck Tape® and lay them onto a flat surface.
One at a time, attach the Duck Tape® strips to one another by carefully overlapping the top of the Duck Tape® onto the bottom.

Once one side is complete, attach another set of Duck Tape® strips to each other to create the Duck Tape® fabric.

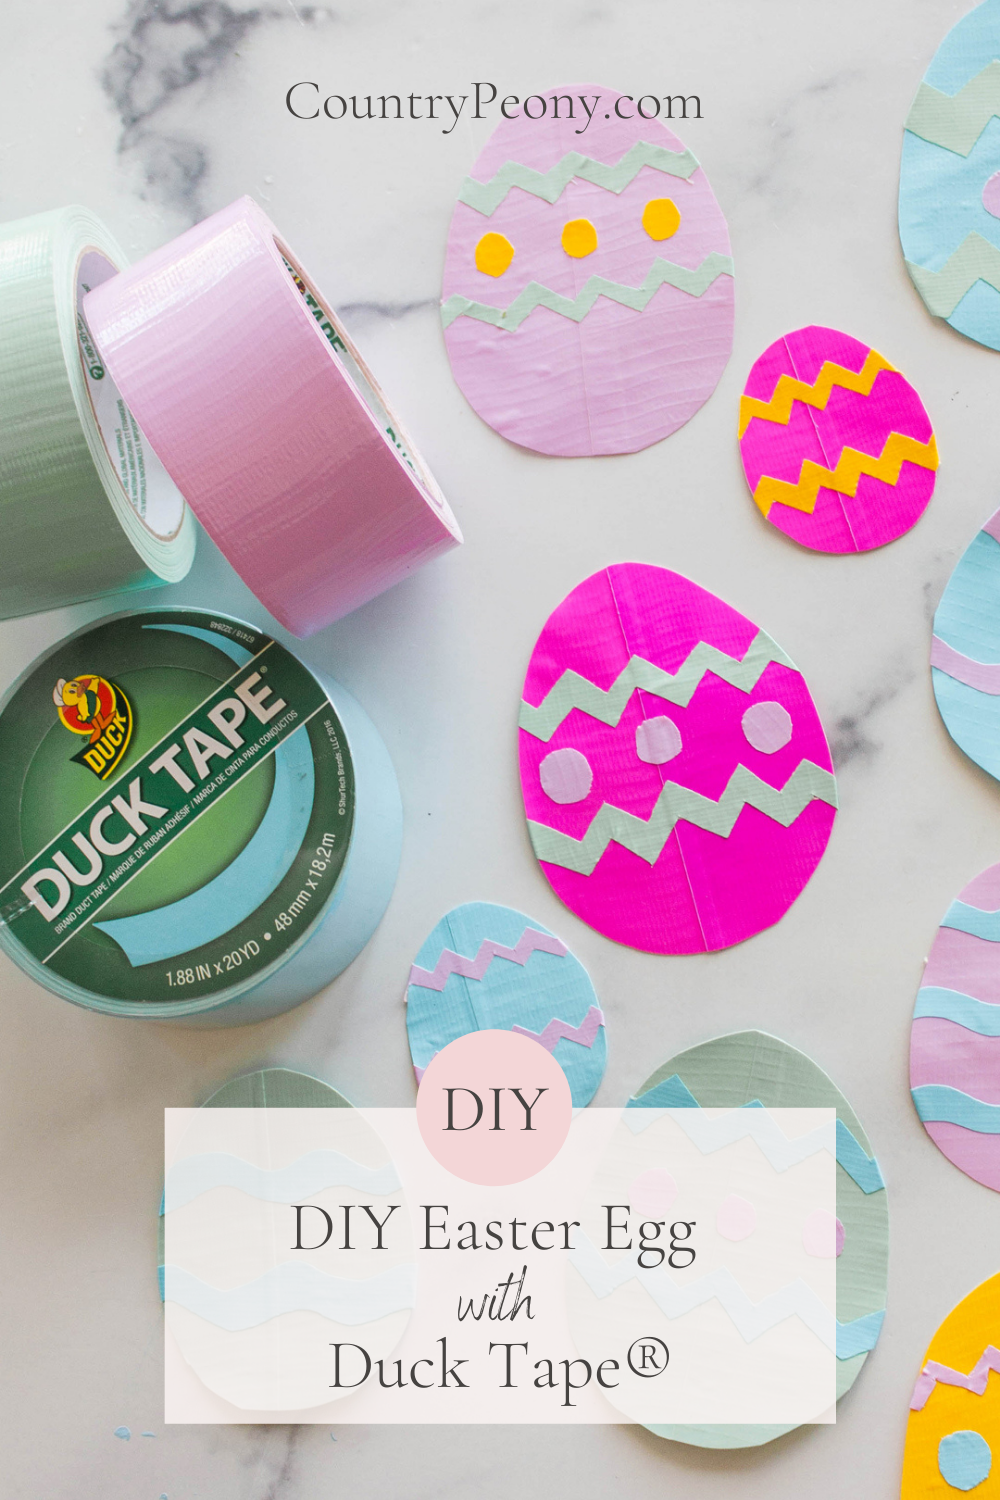
Cut Out the Duck Tape® Easter Eggs

Create an Easter egg stencil onto cardstock, then trace the Easter egg onto the Duck Tape® fabric and cut it out.
Cut out enough Easter eggs to create the wreath. For this project, I used 3 different sizes: Small, Medium, and Large. I used 6 large Easter eggs, 6 medium Easter eggs, and 8 small Easter eggs for my 12 inch wire wreath frame.
Decorate the Duck Tape® Easter Eggs

Use a craft knife and a cutting board to create different shapes and patterns with the Duck Tape® for the Easter eggs.


For the large Easter eggs, I created a zig zag pattern with dots. For the medium Easter eggs, I created a soft wave pattern. And, for the small Easter eggs I created a zig zag pattern. However, you can do whatever your heart desires!


I like how each one is just a little bit different!

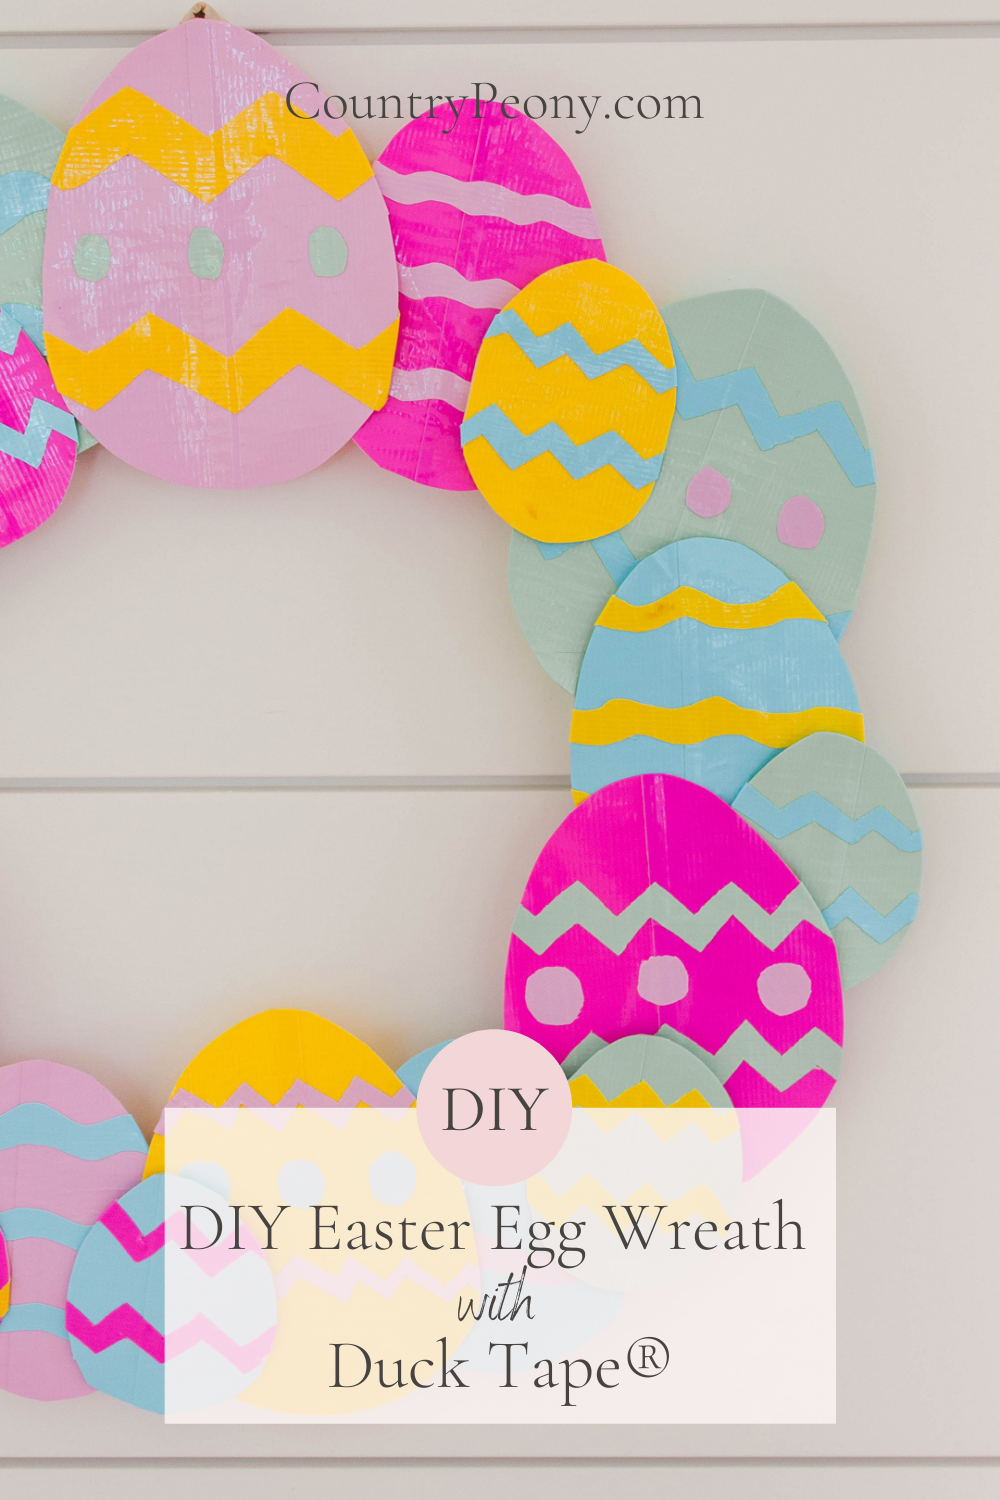
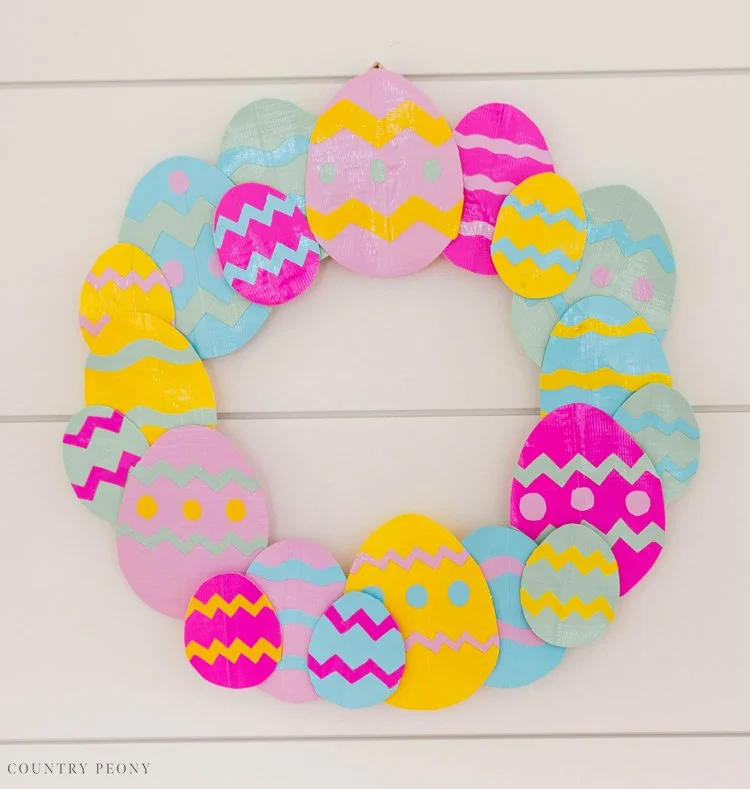
Create the Duck Tape® Easter Egg Wreath

Wrap the wire wreath frame with Duck Tape® to cover the wire wreath, and to give it a great base for the Easter eggs to attach to.

Once the wreath is covered in Duck Tape®, create a wreath hanger with Duck Tape®.
Fold the Duck Tape® over to create a strip.

Create a loop with the Duck Tape® strip and attach it to the back, top of the wreath frame with Duck Tape®.

Start with the large Easter eggs and lay them out in a desired pattern.
Then, fold a piece of Duck Tape® over to create a double-sided piece of Duck Tape®, and attach it to the back of the Easter egg and onto the wreath.


Attach the Easter eggs to the wreath one at a time with Duck Tape®.
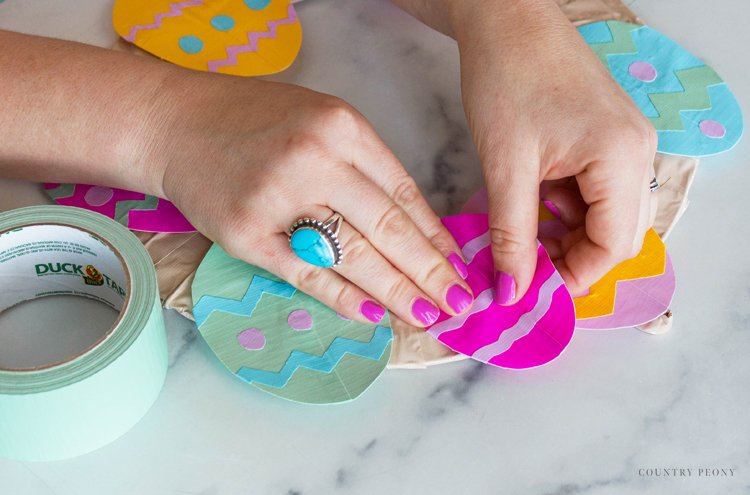
Then repeat the process with the medium-sized Easter eggs.

Finally, add the small-sized Easter eggs with Duck Tape®.

Enjoy Your Charming and Custom Duck Tape® Easter Egg Wreath

Find your favorite door, a mantle, or blank wall and hang your wreath up for all to enjoy this Easter season.

I love how cheerful and colorful this Easter egg wreath turned out using such a fun product like Duck Tape®. I hope you enjoy making yours just as much I did!
Thank you to the Duck® Brand for providing me with your amazing products to create this cheerful Easter wreath!
I believe crafting is more fun when we share our projects. Please email me at elizabeth@countrypeony.com, or please tag me @thecountrypeony or #countrypeony to show me your beautiful, custom creations!
Thank you so much for following along!