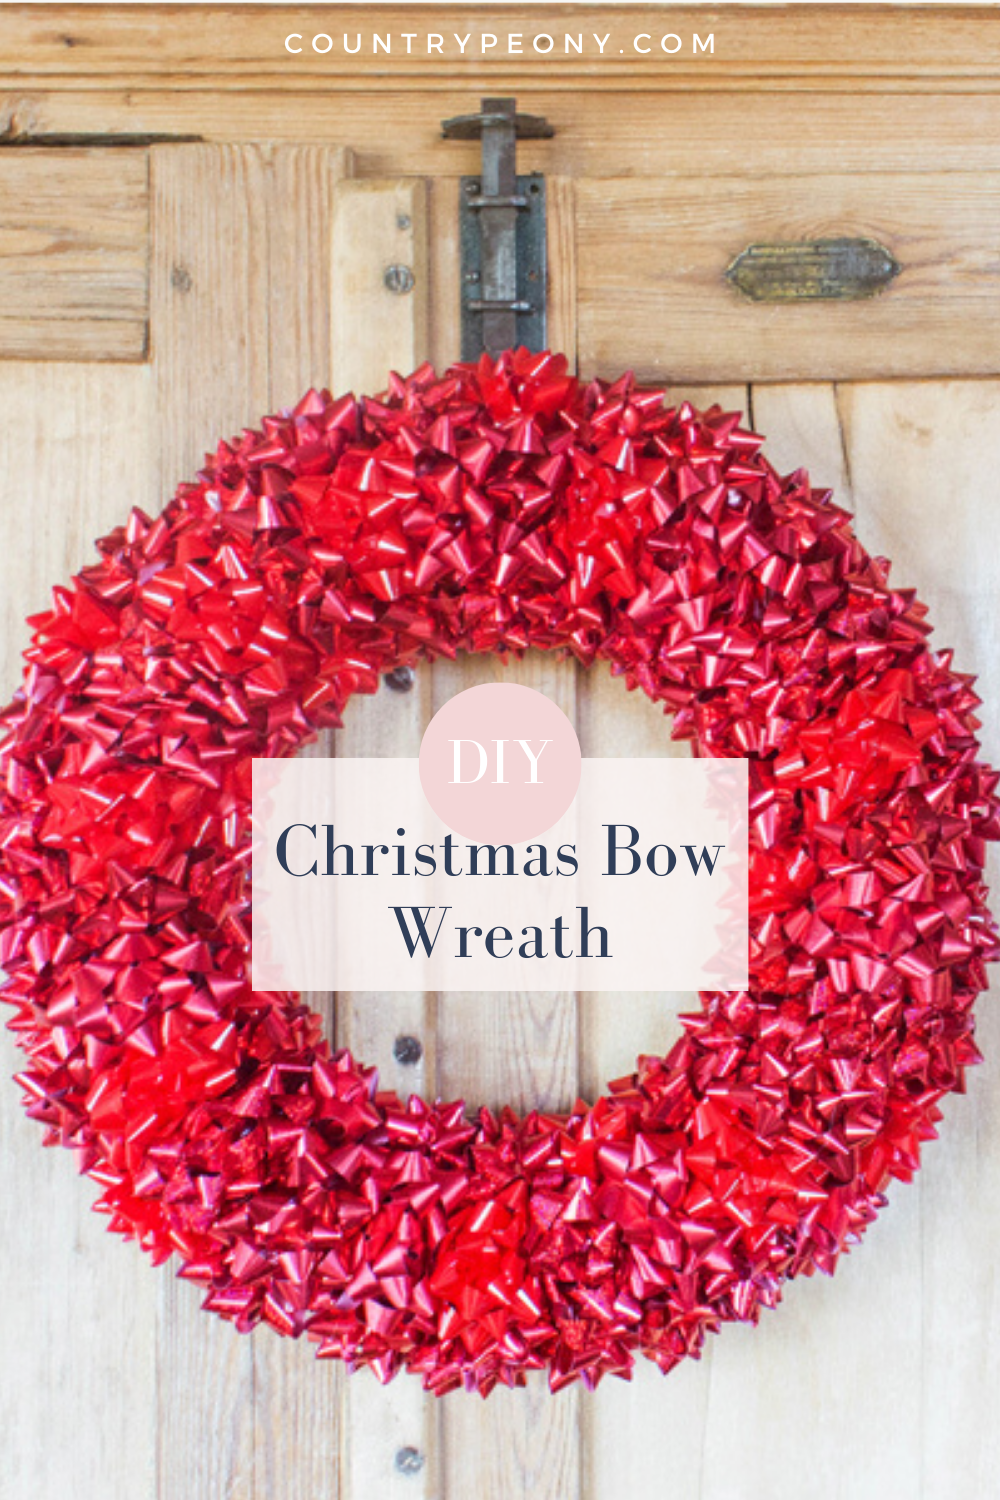
DIY Christmas Bow Wreath

If you have been following along for a while, you know I am a sucker for a great wreath, especially this time of the year! Last year I made this fun Rainbow Bauble Christmas Wreath, and the year before that I made a Dried Clementine Christmas Wreath. I love DIYing my own wreaths, because wreaths can be very expensive. So, why not save money and have fun along the way by creating your own? Case in point with today’s blog post. I was inspired by this gorgeous Gold Bow Wreath from Grandiron Road from several seasons ago. Unfortunately, it isn’t available anymore. When it was available it was out of my price range at about $150. I am happy to report that I spent $20 on my red bow wreath. I love the fun, festive statement it makes for the holidays.
I hope you enjoy saving some money and having fun as you make today’s red bow wreath for the Christmas season by following the steps below.

*This post contains affiliate links. For more information, please see my disclosure page here.
To make your own Christmas bow wreath, you will need:

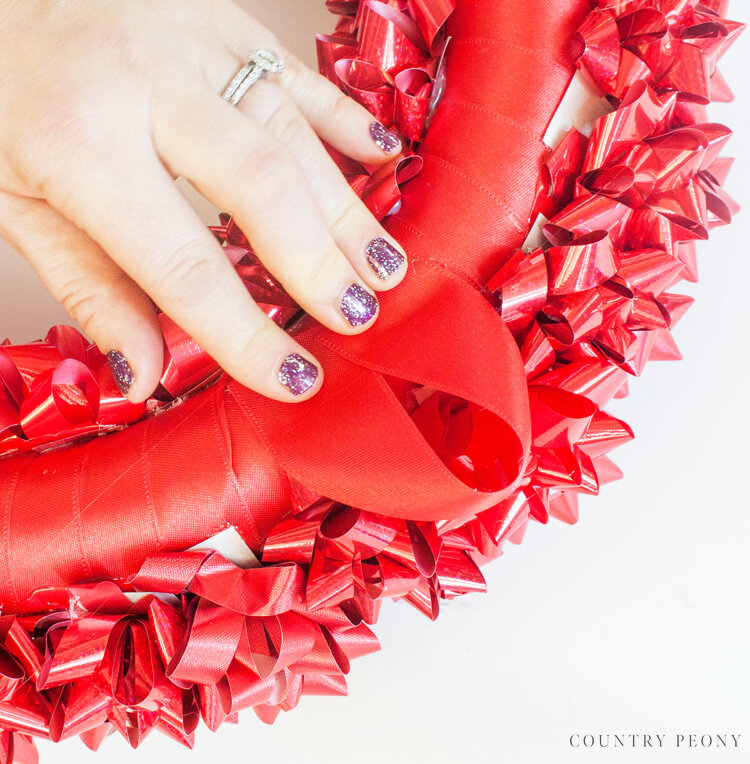
Step 1: Tightly wrap the ribbon around the wreath securing the ribbon with hot glue. Overlap the ribbon so that the whole wreath is covered, and hot glue the ribbon to the wreath every fourth wraparound.
The ribbon allows for a nice backdrop for the wreath, and it provides a steady base for the hot glue and bows to secure to.


Step 2: Once the ribbon is attached to the entire wreath, start to hot glue the bows onto the wreath. One at a time apply a generous amount of hot glue to the back of the bow, and attach it to the front of the wreath.

Then attach a bow to the inner portion and the bottom portion of the wreath.


Continue to add a bow to the front, inner, and bottom part of the wreath with hot glue. Ensure you place the bows right up against one another (almost as if they are squished together) to create a nice, compact, full look.
*It is helpful to hold the bows down as the hot glue dries so that they stay in the proper place.
*Since the inner portion of the wreath is shorter than the front and bottom, you can skip a bow once in a while. You can also add a bow once in a while to the bottom portion so that the wreath stays full.

Step 3: Attach a hanger to the back of the wreath. Make a small loop with the leftover ribbon and hot glue it to the back of the wreath.
Step 4: Hang your wreath, and enjoy it this holiday season!

After 66 bows and about 1.5 hours, I am so happy with the cheerful, finished product, and even happier with the price point!
I hope you enjoy making your own holiday wreath.