Elevating your Modern Holiday Cards with Basic Invite
*This post was created through a paid partnership with Basic Invite. However, all opinions are honest and 100% my own.
I am such a sentimental person, and I love giving and receiving cards, especially this time of the year. I normally send out a picture card of my family for Christmas to friends and family. I even have them displayed in my home every Christmas so I can see the growth over the years. This year I wanted to send out a holiday card for Country Peony. A way to say thank you to the businesses and friends that have supported my blog this year.
So I partnered with Basic Invite for this year’s Christmas card. And I am so glad that I did!
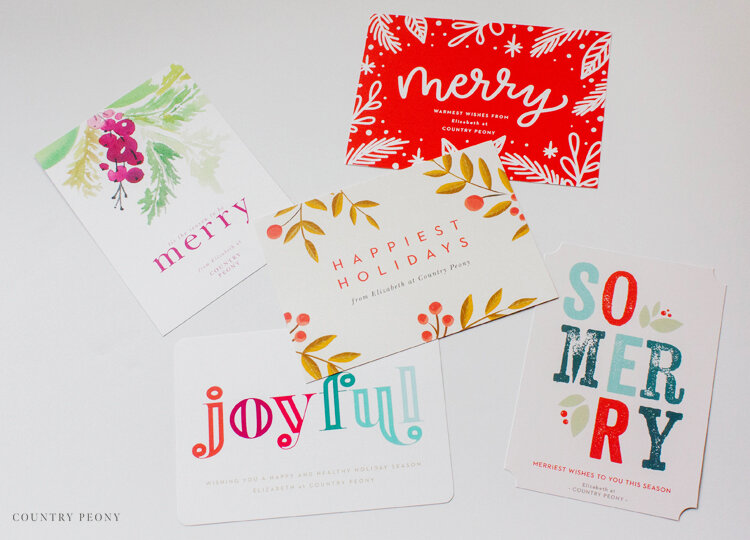
I don’t consider myself to be a tech savvy person, and their online interface was so easy to use that I was able to make a truly custom card within five minutes. The hardest part about the process was choosing which design and color to go with. Basic Invite has over 500 holiday designs alone, from modern holiday cards to victorian Christmas cards and beyond. Honestly, I couldn’t choose so I ordered five different options.
Bonus Points for Basic Invite:
So many color options. When you are creating your card online, you have up to 180 different color options and you can see the screen change instantly when you update the design. I am all about the details, and this was such a fun feature to ensure I got exactly what I wanted.
If you order your holiday cards through Basic Invite they will add all of your recipient’s addresses for free.
I am a sucker for metallics, and Basic Invite has beautiful gold, rose gold, and silver options.
Right now, Basic Invite is offering 30% off to all its holiday cards with the code: HOLI30
Now grab a cup of coffee, and enjoy the beautiful variety of cards that I was able to get from Basic Invite. And, continue to scroll down so you can see how I elevated my Christmas cards this year by adding something special to the backs of my envelopes.

I love watercolor, and I thought this design was classic and beautiful.
Such a fun and festive design for a holiday card.

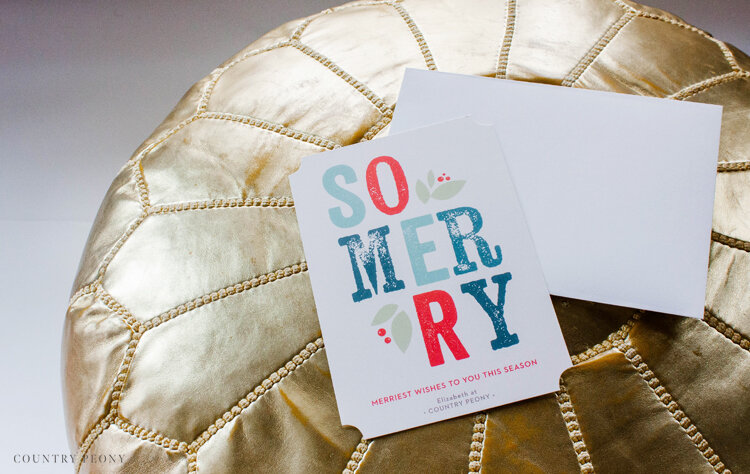
Who doesn’t think the holidays are joyful? And, the back of the card with the colorful stripes is so cute!

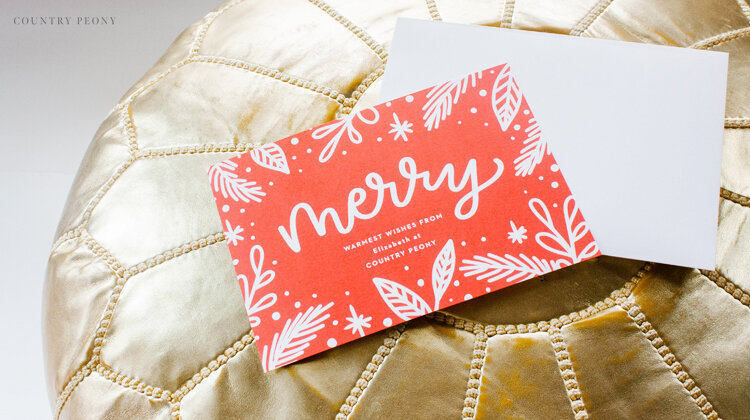
This card was my favorite. I love a classic, cheery red for the holidays and this merry card made me feel just that, merry.

I thought the understated berries and leaves were very beautiful and simple. I also love the fun, stripe detail on the back.


Another great feature about Basic Invite’s cards is that their envelopes are all peel and seal (no licking required).
As a reminder, right now Basic Invite is offering 30% off to all its holiday cards with the code: HOLI30
Continue to scroll down to see three fun ways that I added a special touch to the backs of the envelopes.
The DIY:
3 Ways to Elevate your Holiday Card
Embossing Powder Christmas Stamp
I love to use the embossing heat tool when I can. It creates such an elegant and fun look on any piece of paper. If you don’t have one, I would suggest you get one.
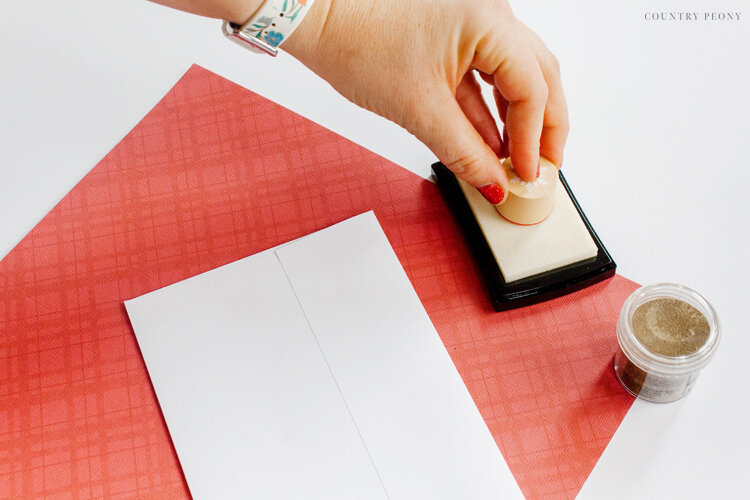
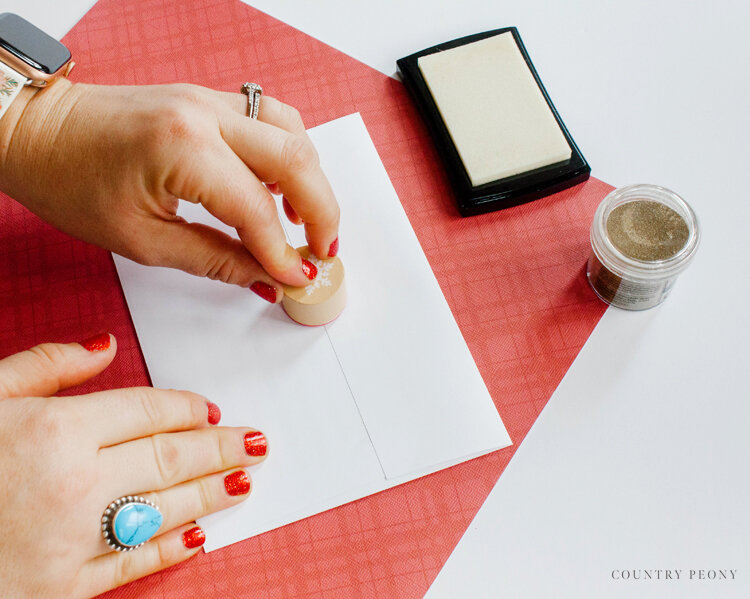
Step 1: Add watermark ink to your Christmas stamp, then press the stamp to the back crease of the envelope.
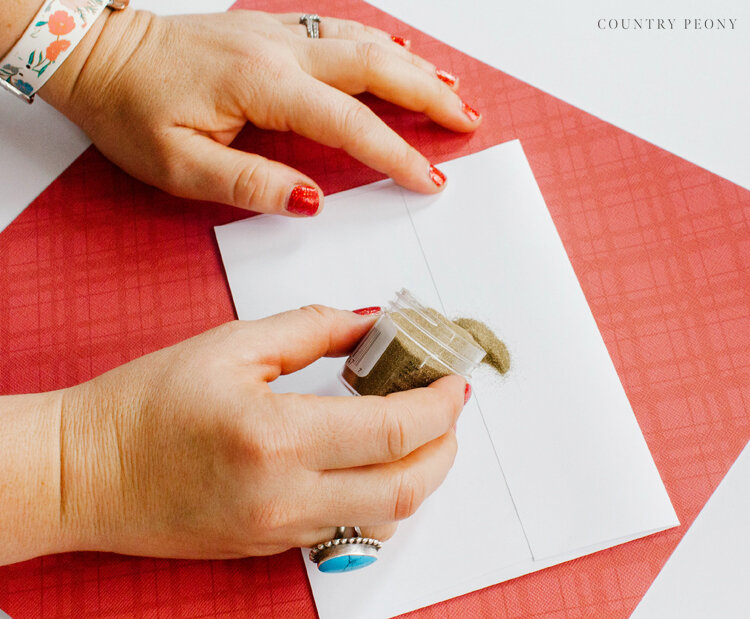
Step 2: Place a piece of paper underneath your envelope. Sprinkle embossing powder over the watermark stamped area.
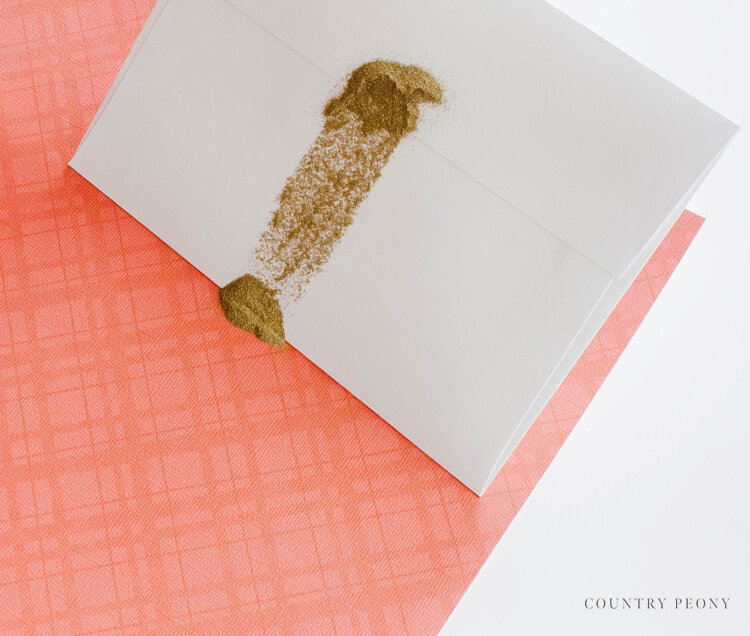
Step 3: Remove the excess glitter from the card by shaking it onto the piece of paper.
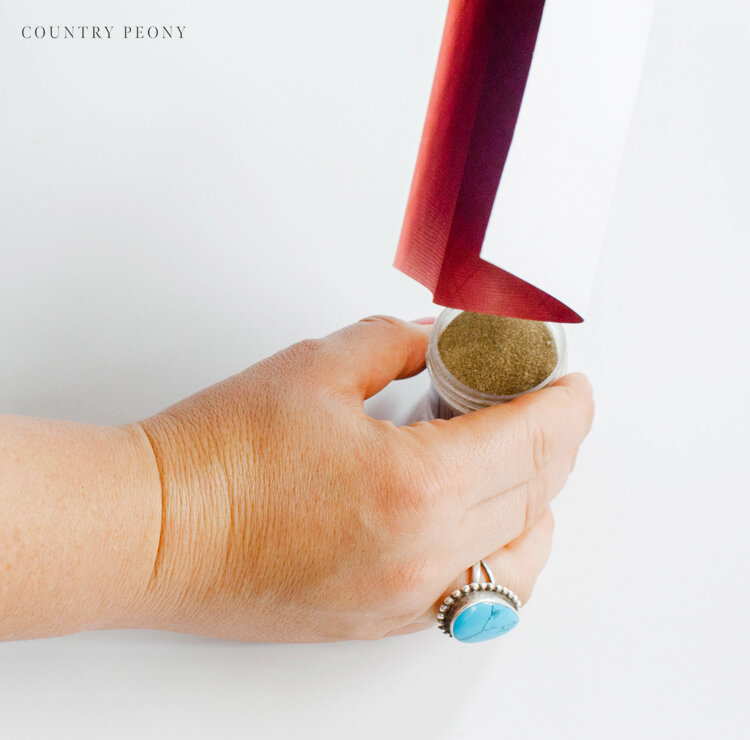
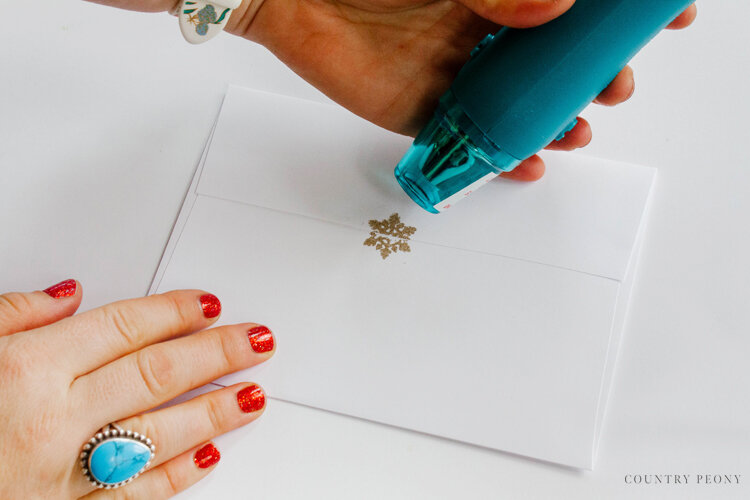
Step 4: Place the glitter into its container by creating a funnel with the paper.
Step 5: Turn on the embossing heat tool. Place the heat embossing tool about 3 inches from the stamp, and watch as it magically turns the loose glitter into solid and extra shiny glitter onto the envelope.
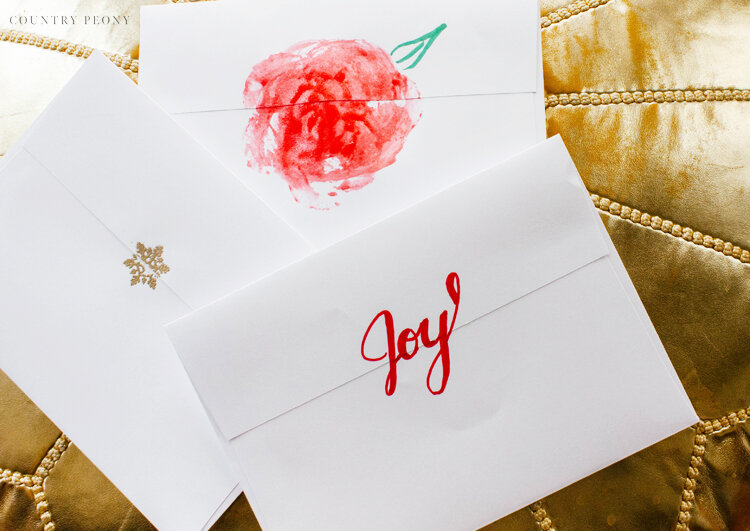
Faux Calligraphy
Thankfully, calligraphy has really made a comeback over the years. While I am not well-versed on calligraphy I do enjoy hand lettering, and here is a very simple take on the classic style.
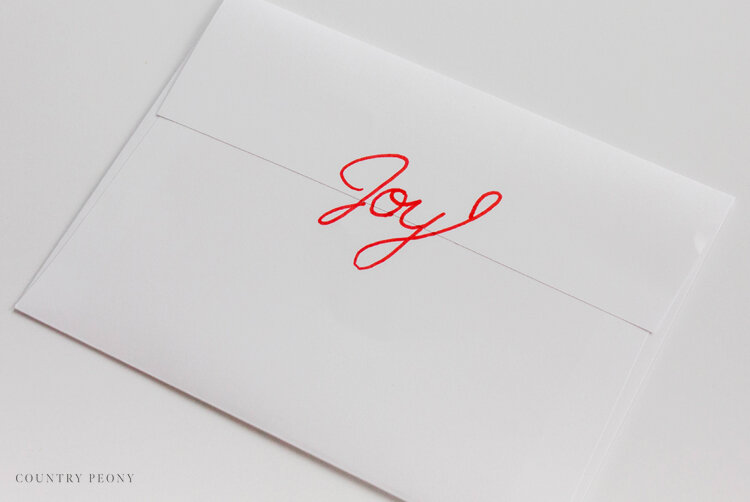
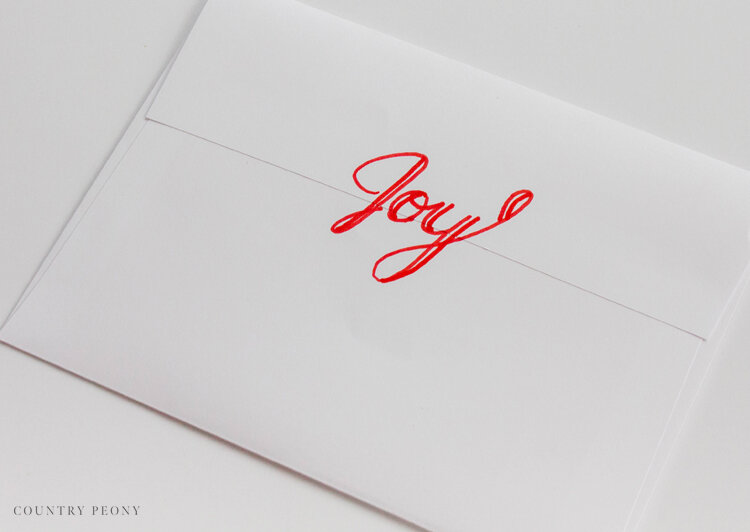
Step 1: With a sharp marker, like a sharpie, add a fun word to the back crease of the envelope.
*It may be helpful to test your word on a piece of paper first. And, it may also be helpful to write with a pencil first then trace over the pencil lines with the marker.
Step 2: Add a line next to the downstrokes of the word.
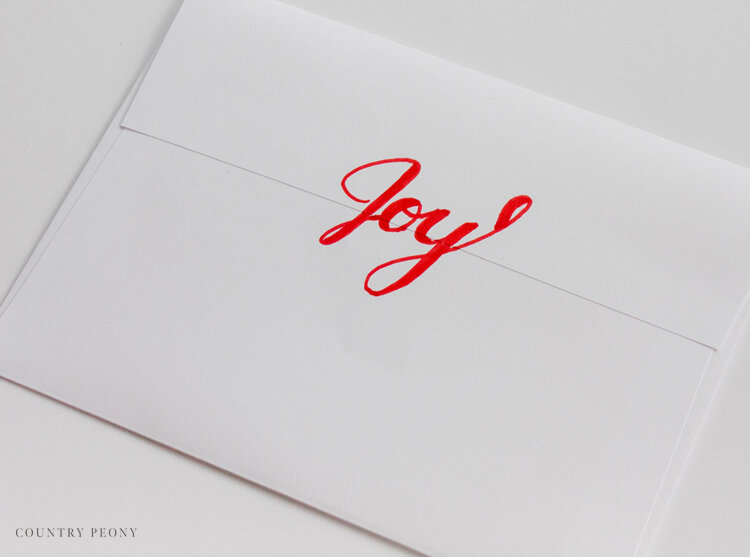
Step 3: Connect all letters together and fill in the space between the two lines.
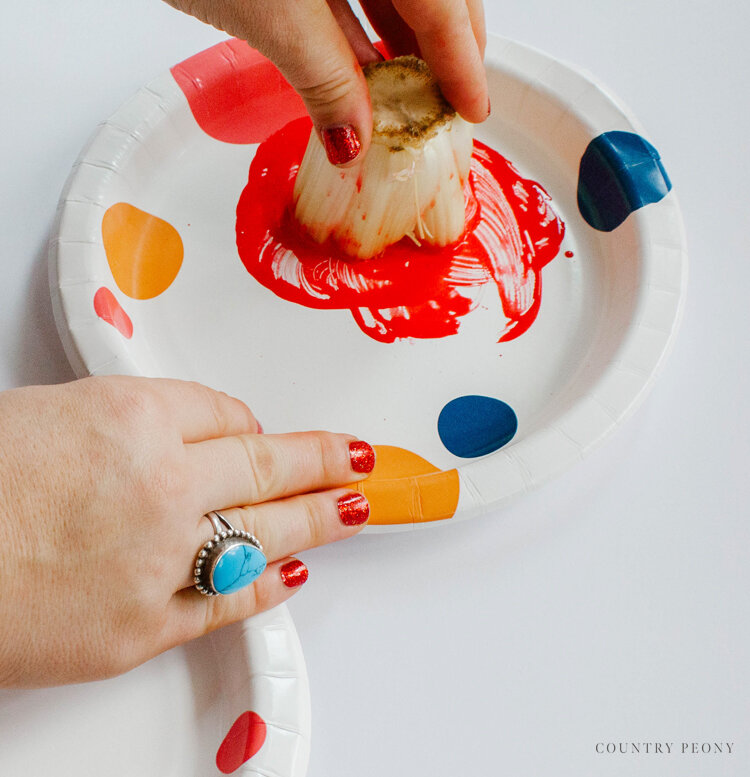
Celery Art
Now this may seem a little silly, but you can use celery as a tool to make beautiful strokes that resemble a watercolor painting. And, the kids will love tagging along for this DIY.
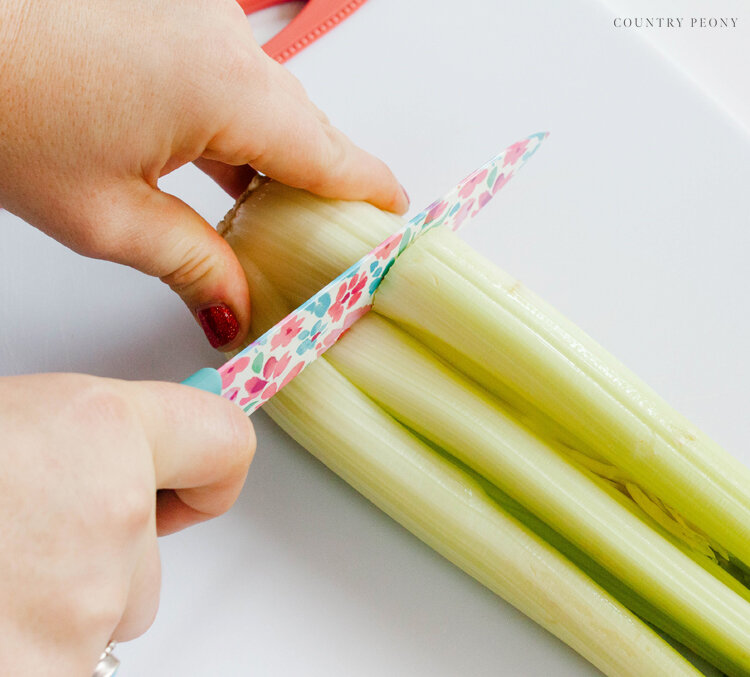
Step 1: Cut the end of the celery stalk off. Ensure the cut is even and level.
Step 2: Dip the bottom cut of the celery into your most festive red paint.
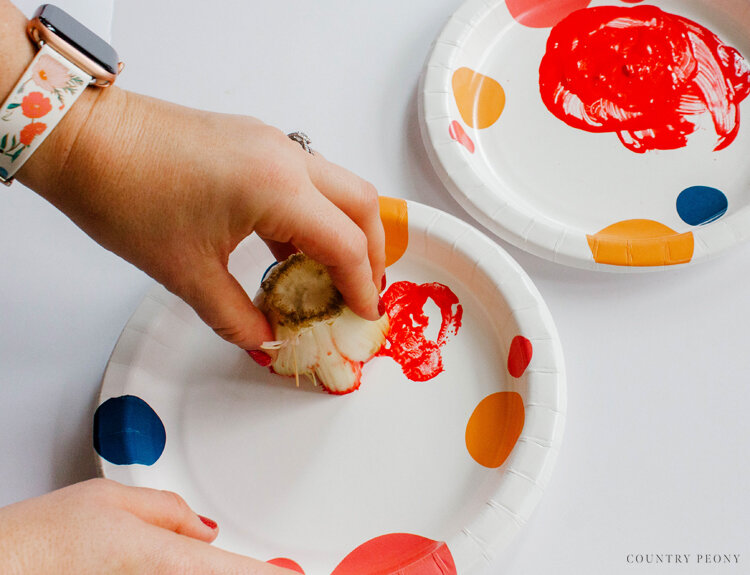
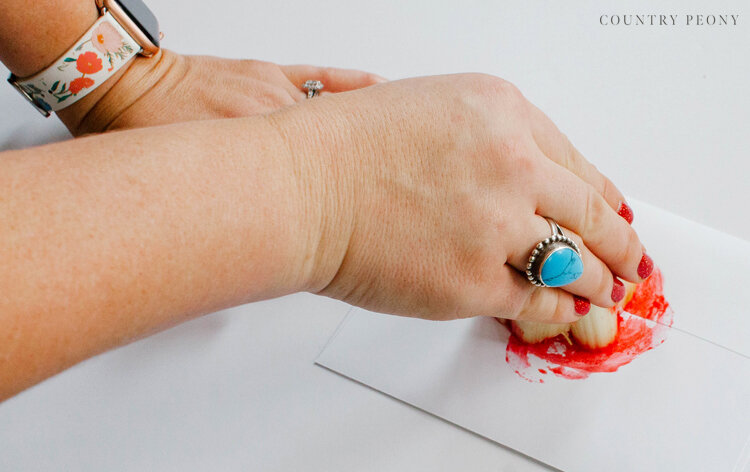
Step 3: On another piece of paper, blot the excess paint off of the celery.
Step 4: Stamp the celery onto the back crease of the envelope. Then slowly twist the celery a full 360 degrees.
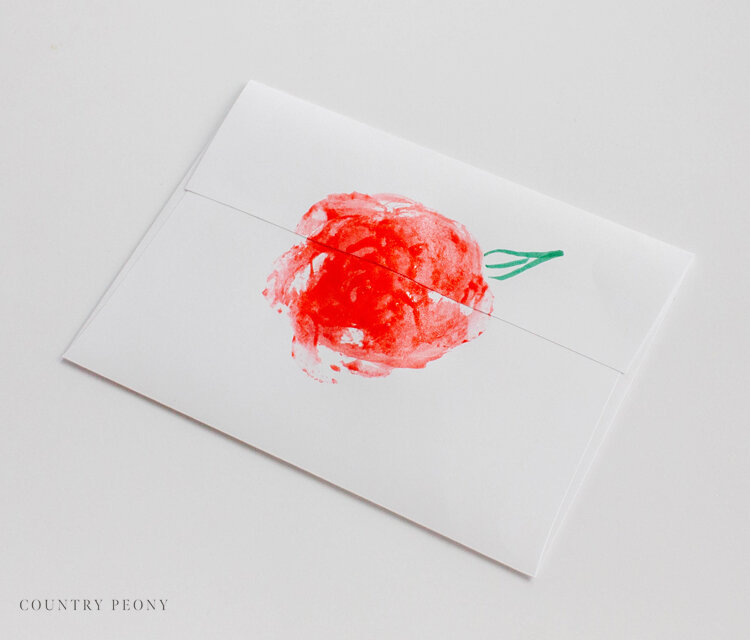
Step 5: Add a sweet leaf to the celery stamped flower.
I hope this inspires you to try something new with your holiday cards this year, and that you enjoy giving them, just as much as receiving them.
Thank you to Basic Invite for providing the beautiful cards!