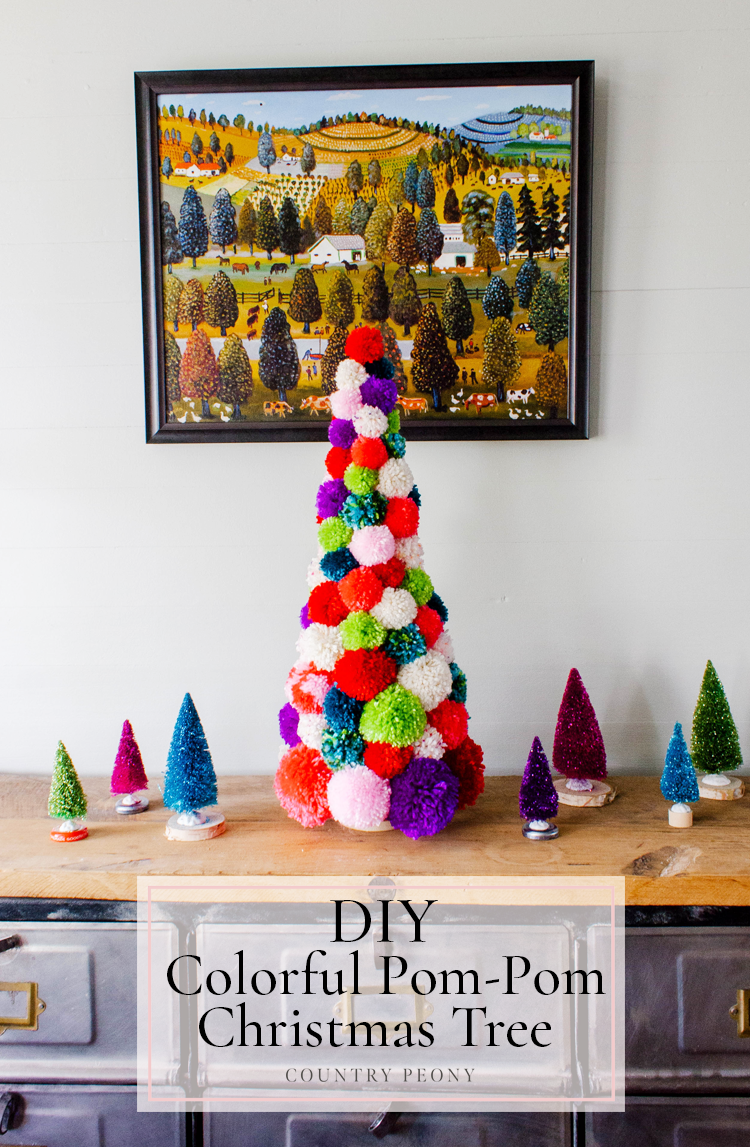
DIY Colorful Pom-Pom Christmas Tree with Clover
*This post was created through a paid partnership with Clover. However, all opinions are honest and 100% my own.
My Children’s Shared Bedroom is fun, colorful, and very whimsical. I wanted to create a Christmas tree that reflected those elements for their bedroom. After I saw the fun pom-pom projects that were featured on Clover’s Instagram and Facebook pages, I knew I wanted to try a pom-pom Christmas project myself. So I partnered with Clover to create a very fun and colorful Christmas tree using their pom-pom maker set.
I believe the end result achieves what I was looking for: fun, colorful, and very whimsical. If you want a fun project that you can do with your children while watching Christmas movies, this is it! I will warn you that pom-poms take a little bit of time, but they are so fun to make. The perfect activity to involve the family in. You will wonder what other projects you can add pom-poms to. And, the Clover pom-pom maker set makes the process a breeze.
So follow along as I show you how to make a cute and fluffy pom-pom in the video and text below. Then continue to see how the colorful pom-pom Christmas tree came to life!
Want a full video tutorial? Please enjoy this episode of Coffee & Crafting where I showcased how to make your own Pom Pom Christmas Tree!
And watch this video to see the detailed steps on how to make a pom pom! Then follow along for the picture tutorial!
*This post contains affiliate links. For more information, please see my disclosure page here.
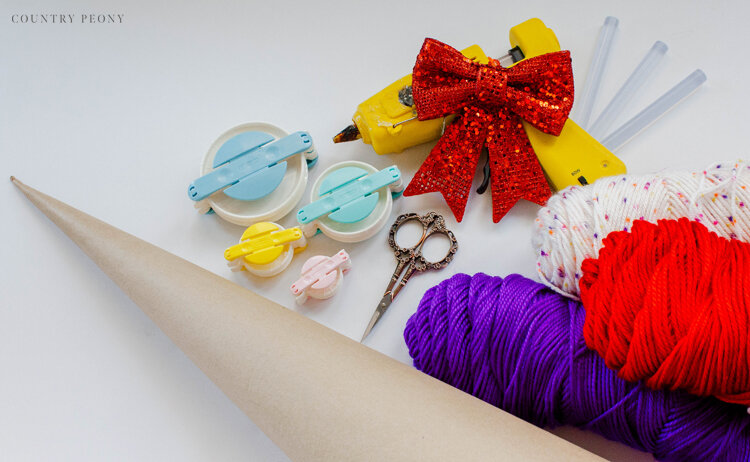
To make your own colorful pom-pom Christmas tree you will need:
Make your Pom-Poms using the Clover Pom-Pom Maker

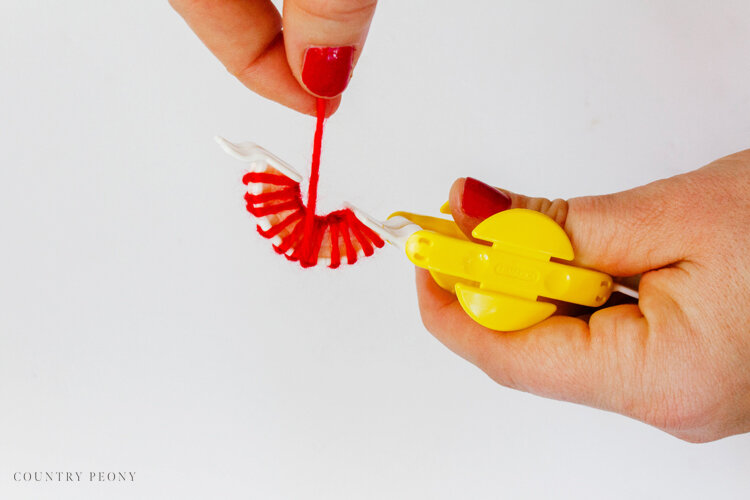
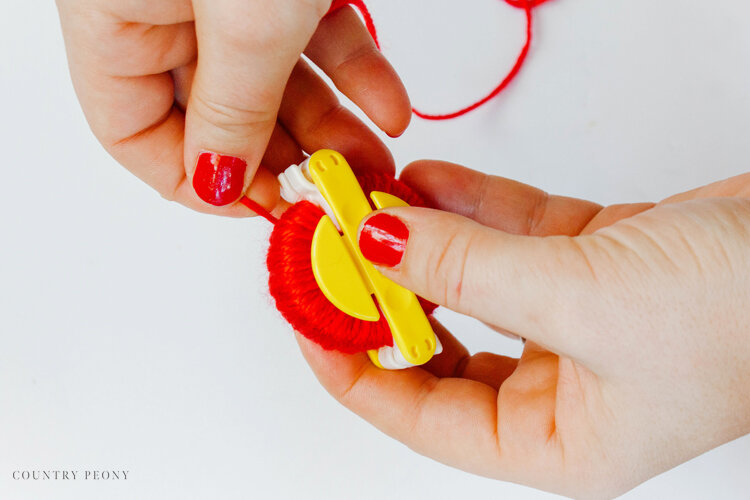
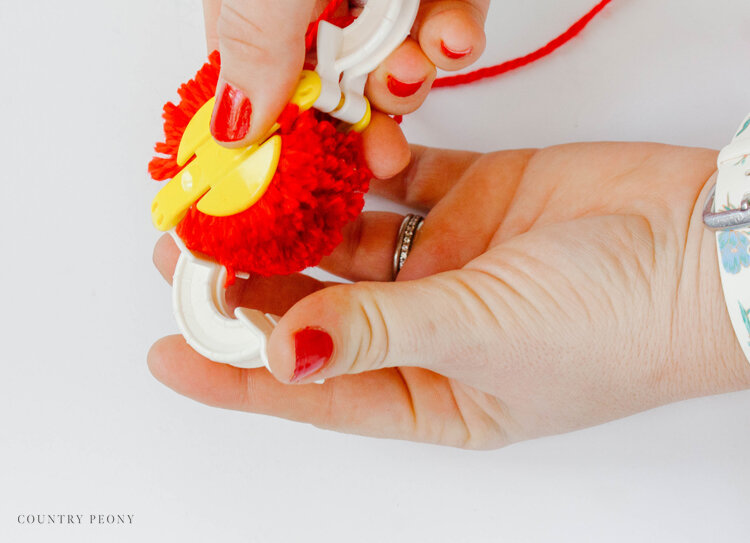
Step 1: Open up the pom-pom maker. Wrap the yarn around one side of the pom-pom maker arm.
Continue to wrap until you have a full, consistent amount of yarn on your pom-pom arm.

Step 2: Close the pom-pom arm that is full of yarn, and then bring the same yarn to other arm of the pom-pom.
Continue to wrap until you have a full, consistent amount of yarn on your other pom-pom arm.
*Keep in mind the more yarn you add to the pom-pom maker, the fluffier and more full the pom-pom will be.
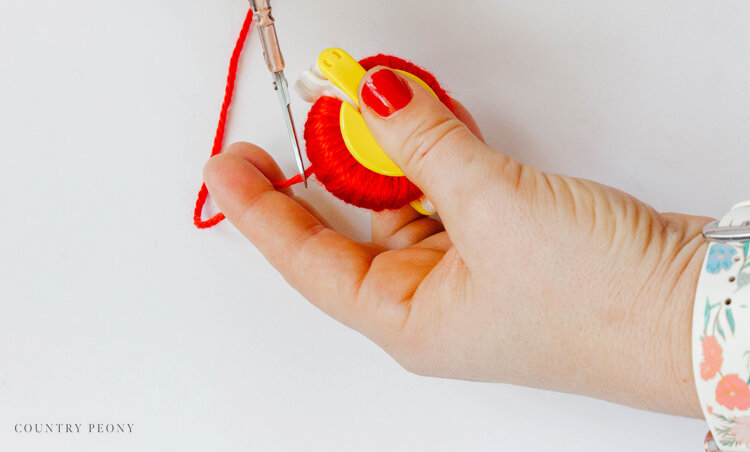
Step 3: Once you have achieved the yarn fullness you are after then close the arm on the other side.
Step 4: Snip the excess yarn.
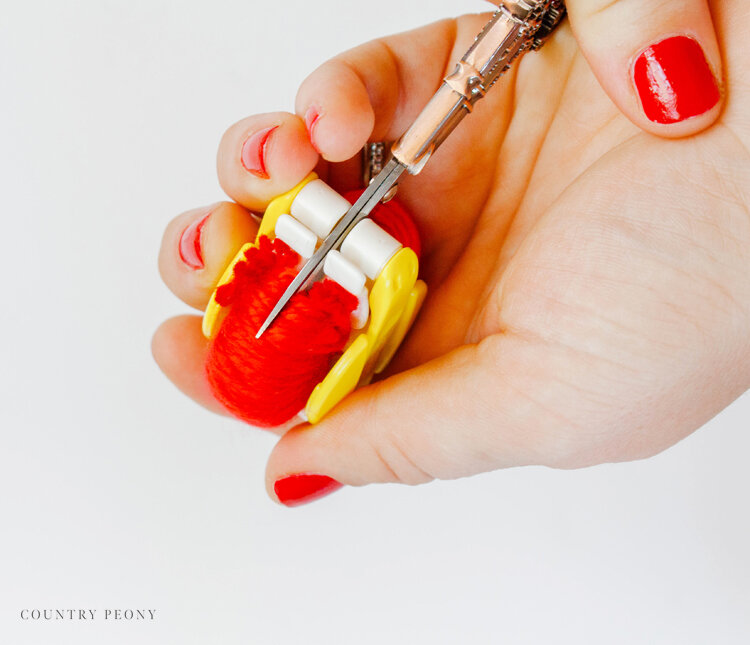
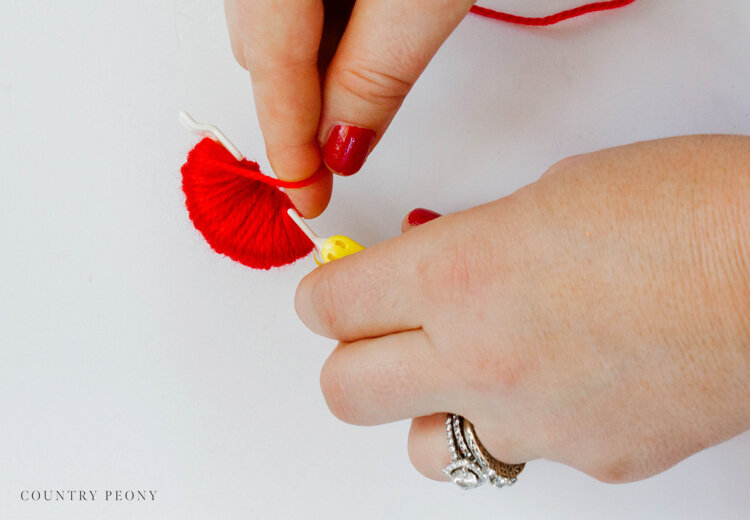
Step 5: Ensuring both pom-pom arms are closed and snug, follow the pom-pom maker line in between the two arms and start to the cut the yarn.
Step 6: Once you cut the yarn all the way around the pom-pom maker, then take a piece of yarn and tie a knot in between the two pom-pom maker arms.
*I also double knot this process to ensure it is nice and secure.
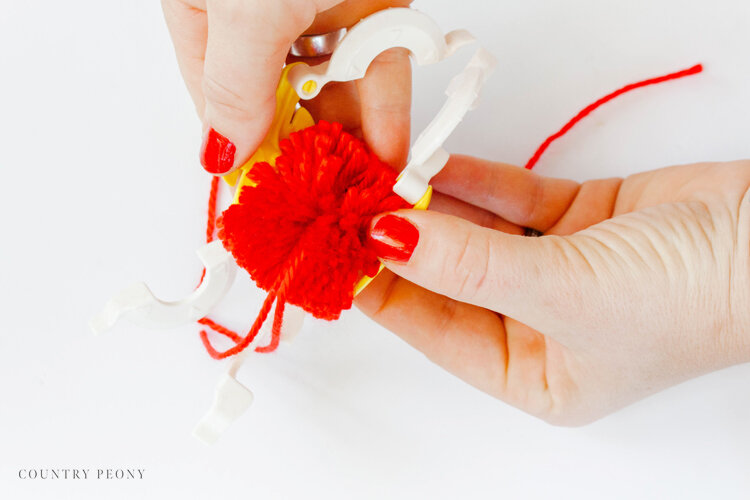
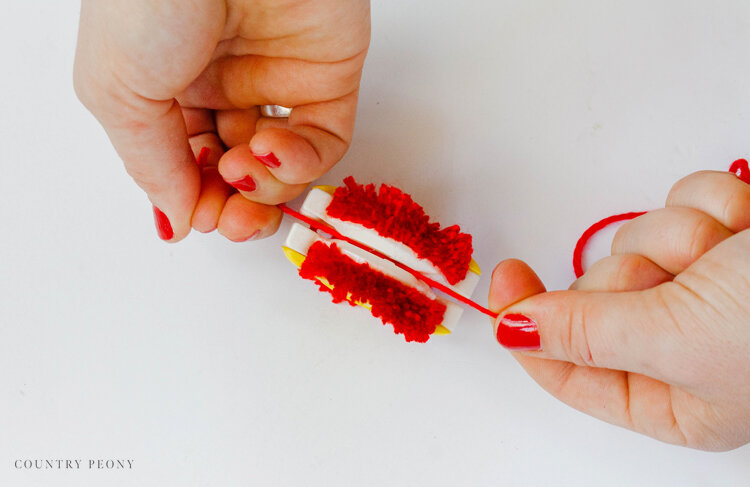
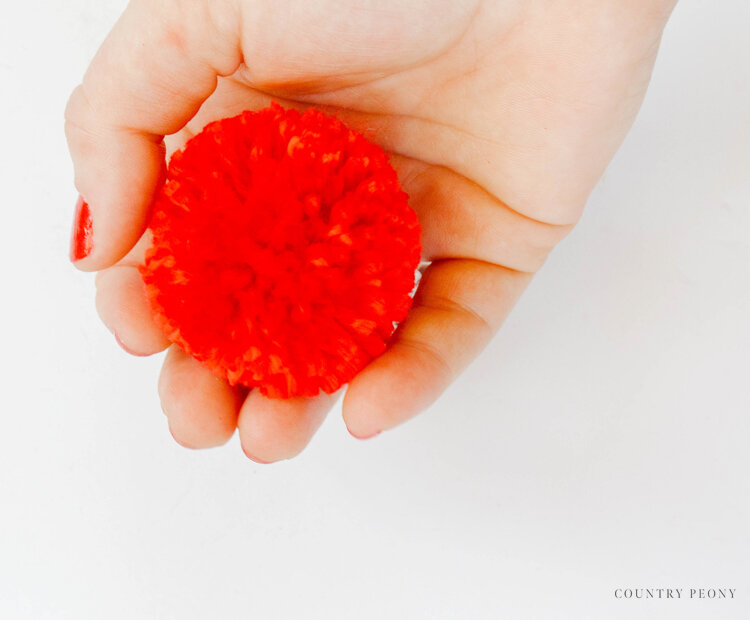
Step 6: Now for my favorite part: open the pom-pom maker arms and then slowly pull the pom-pom maker apart, revealing the cutest pom-pom ever!
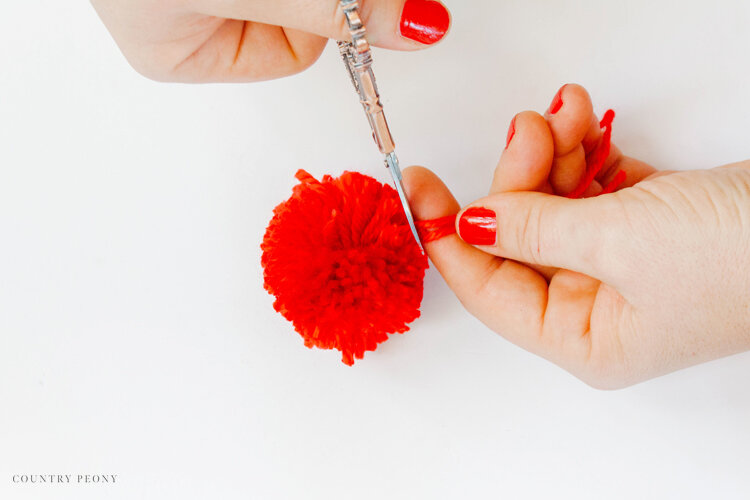
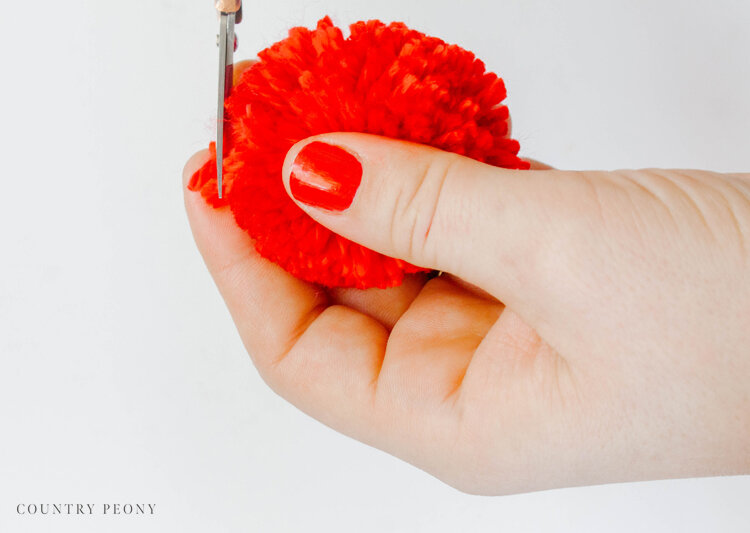
Step 7: Now it is time to fine tune and give your pom-pom a little trim. Cut off any excess yarn around the pom-pom to give a full, consistent look.
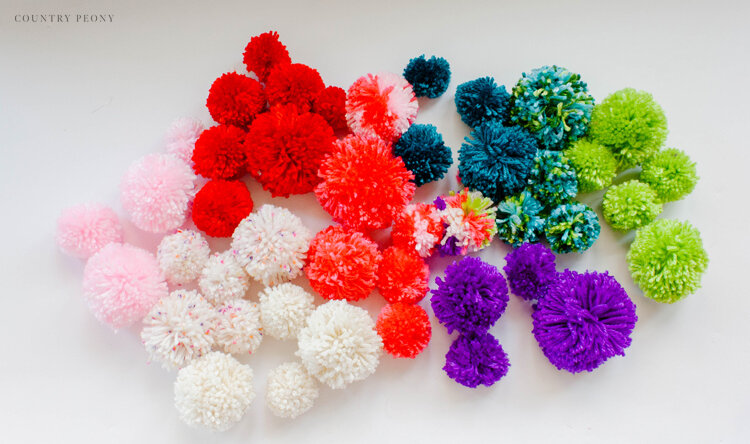
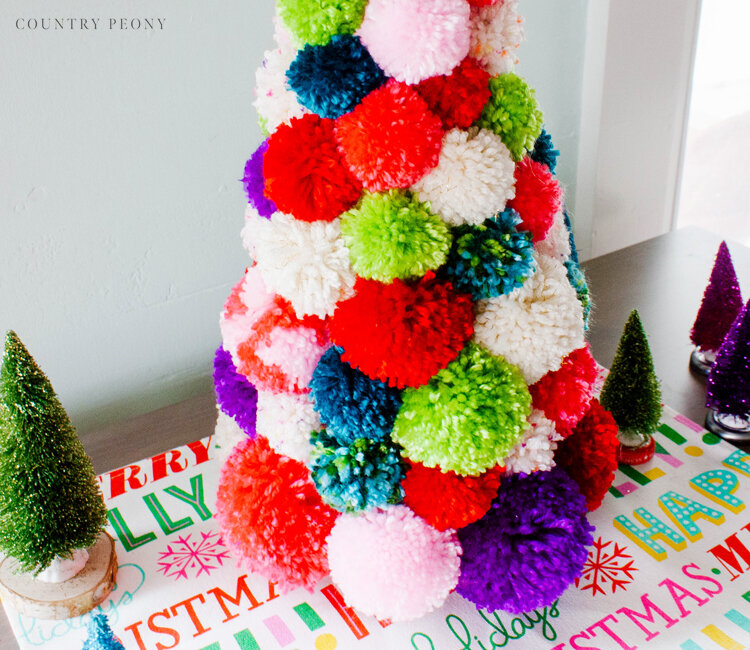
Step 8: Continue to make pom-poms in varying sizes and colors. I used all 4 different sizes in the Clover pom-pom maker set to achieve the whimsical look on the Christmas tree.
Make the Colorful Pom-Pom Christmas Tree

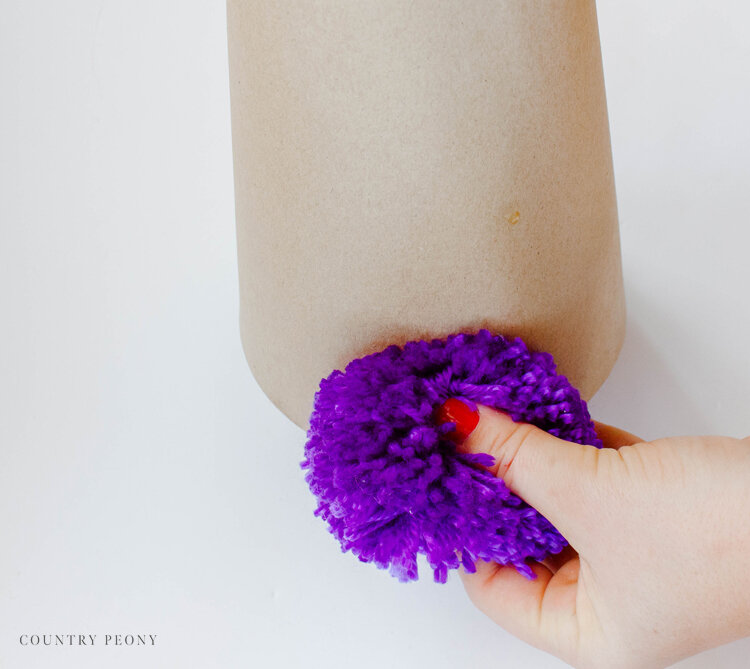
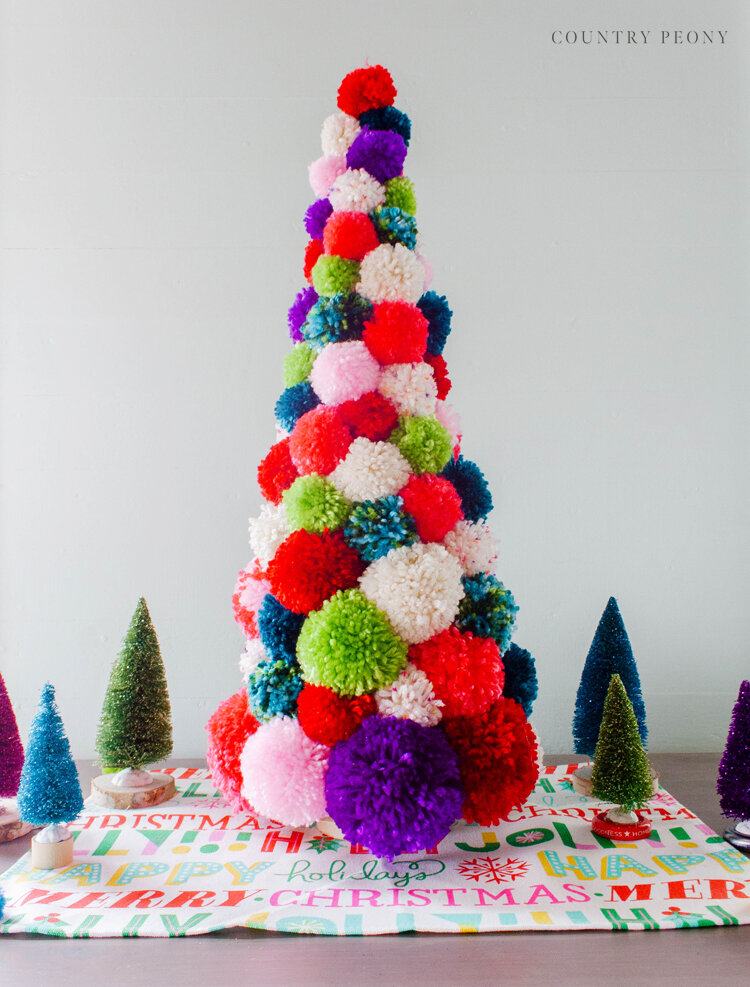
Step 1: Take stock of your pom-poms and the colors that you have made. Remembering, to add various sizes of various colors for your pom-poms. The largest pom-poms should go at the bottom, and then slowly get smaller in size as they rise up the tree. Then decide where you will place each pom-pom.
Step 2: Starting at the bottom of the tree, add a generous amount of hot glue to the back of your pom-pom. Then firmly apply it to the paper mache Christmas tree.
*It is helpful to hold your pom-pom in place as the glue dries.

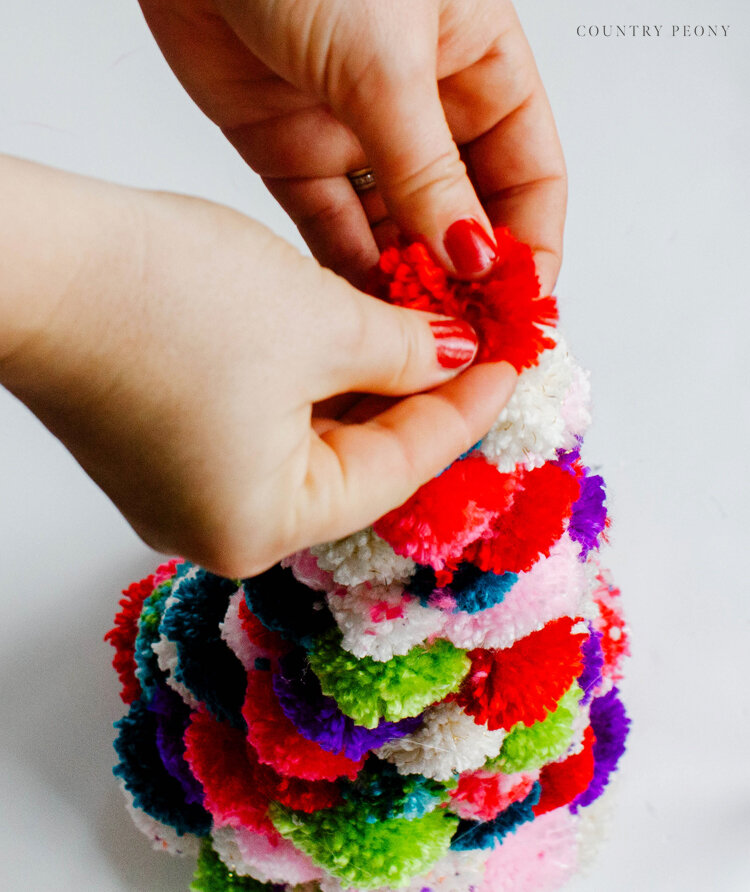
Step 3: Work your way up the tree and continue to hot glue pom-poms to your tree. Place each pom-pom right next to the other to create a full effect. Mix colors and sizes so there is some whimsy and variation.
*As a reference, for my 23 inch Christmas tree, I used about 80 pom-poms.
Step 4: Once you reach the top, you can either add an ornament as a focal point or (like I did) you can slide the center of a small pom-pom onto the tree top to create a seamless look. (Ensure that you hot glue the pom-pom to the tree once it fits snuggly on the top.)
Step 5: Step back and enjoy your beautiful, custom creation!
My children were so happy with the fun tree that showed up on their dresser.
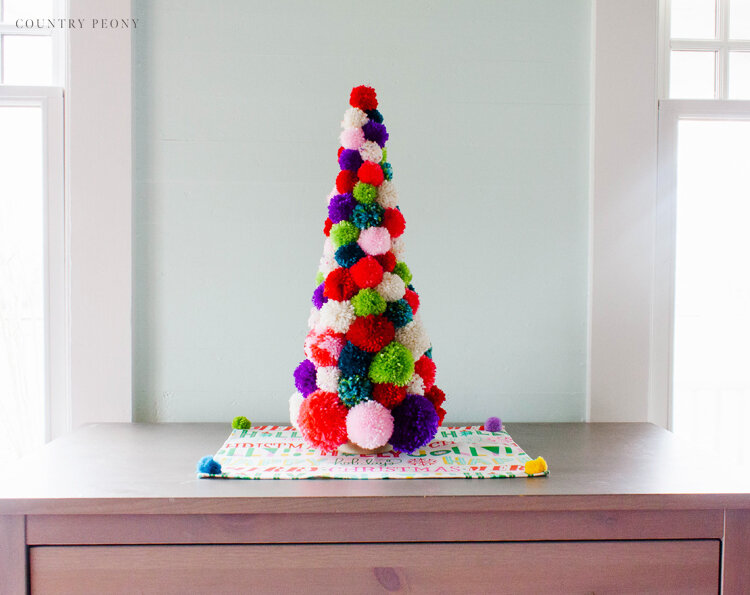
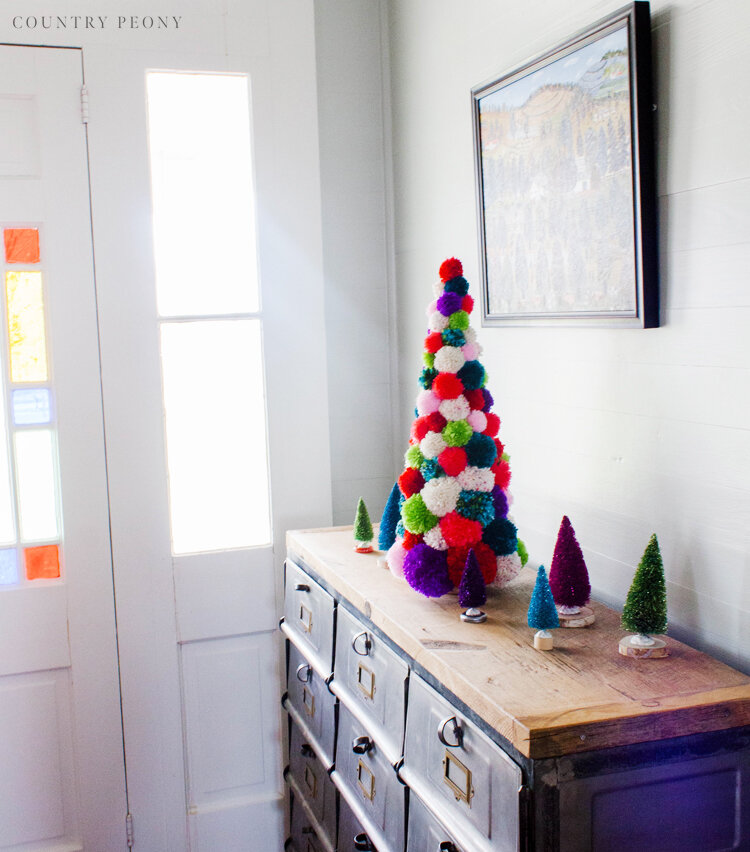
I am so happy with how it turned out that I decided to move it to our main hallway as the main tree for our bottlebrush forest.

This is a DIY Christmas craft that my children and I will cherish for many years to come. I hope you enjoy making yours as much as I did.
Thank you so much to Clover for the opportunity to make this very fun and whimsical Christmas tree!


