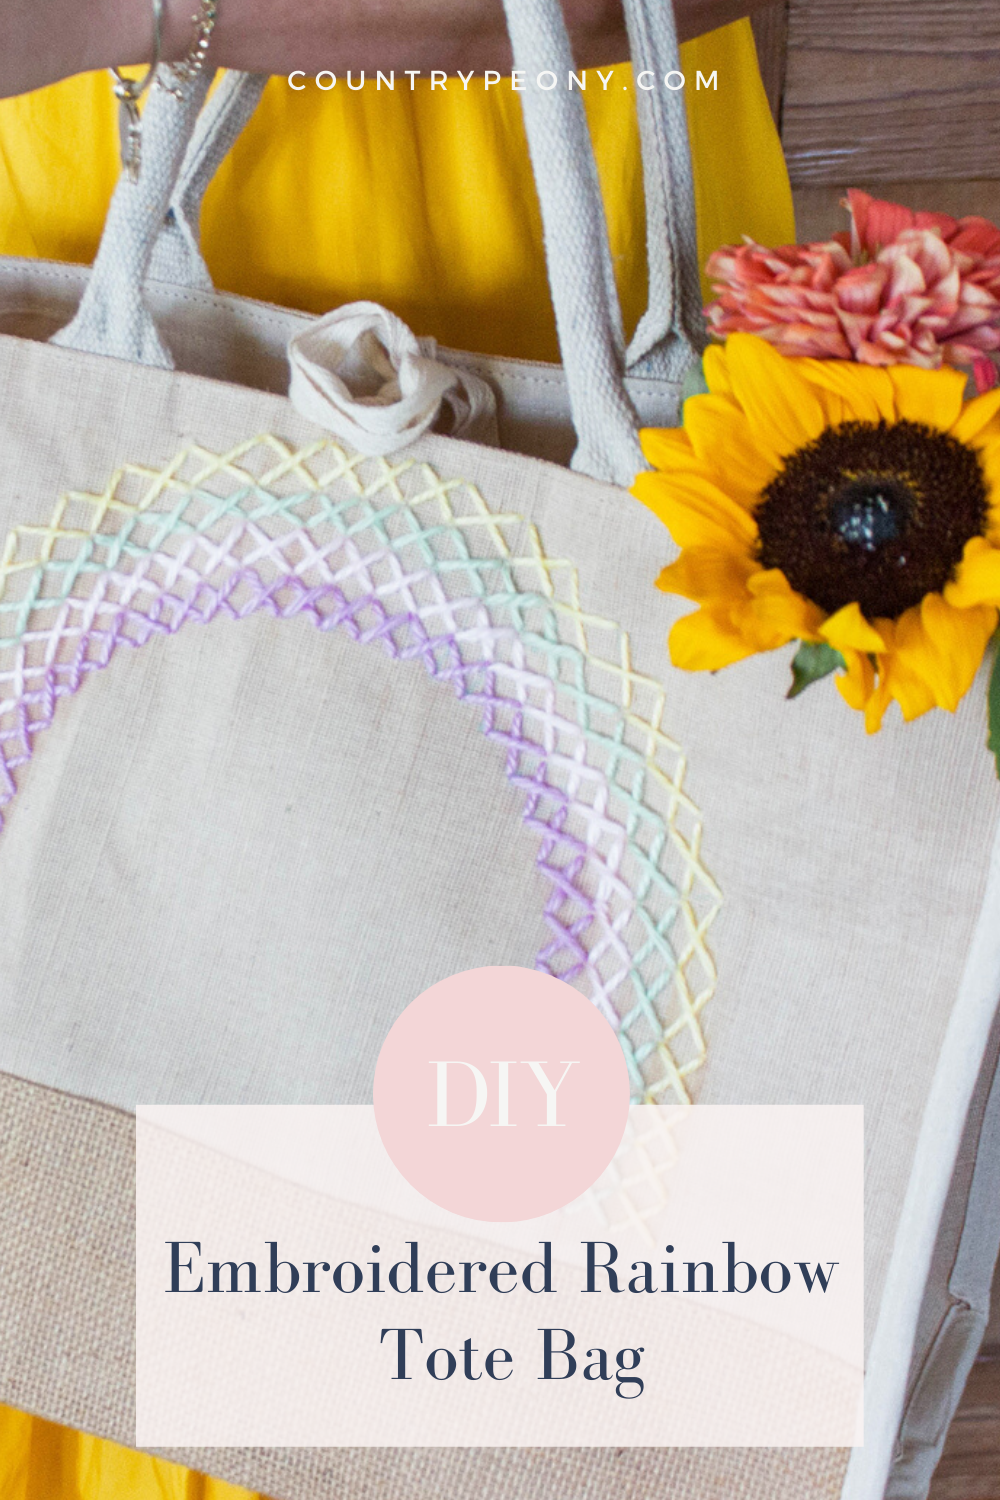
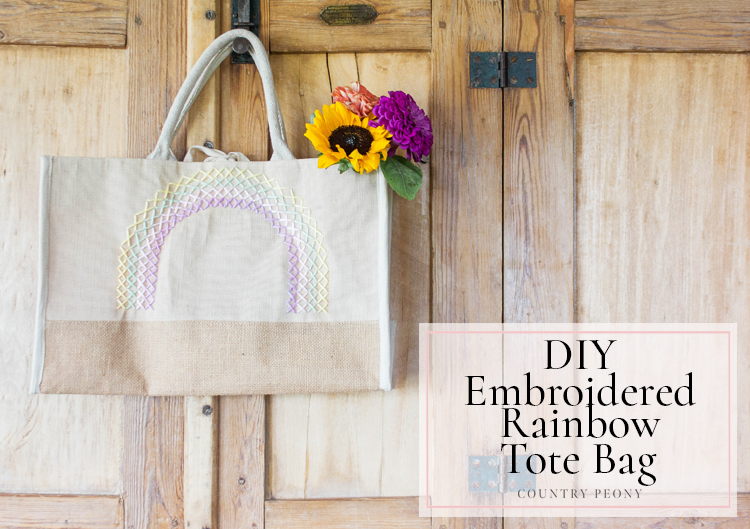
DIY Embroidered Rainbow Tote Bag
*Paper Mart graciously provided the wonderful tote bag for this post. However, all opinions are honest and 100% my own.
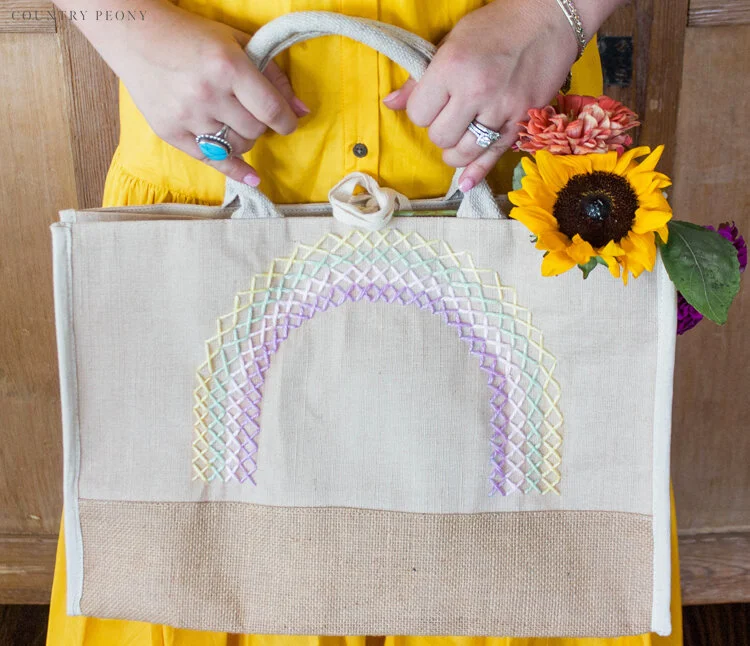
Eventhough we are still slowly and carefully making our way outside, I love having tote bags available. If you have been following along for a while you probably know that I have a thing for tote bags. I decorated a summer tote many summers ago, my children helped me decorate a Mother’s Day tote two years ago, and last summer I elevated a simple cotton tote with vintage florals. Especially with this stage of my life, with three little ones I constantly need on-the-go storage for my children’s extra items. It is also helpful to keep a tote in my car, at my parent’s house and at my in-law’s house for items the kids may need. That is why I am so excited to show you today’s DIY that will hopefully bring extra joy to your days: DIY Embroidered Rainbow Tote Bag.
I am so thankful that Paper Mart provided their beautiful, high quality tote bag for this project. I love this tote bag because it is a great size, is great quality, and is very pretty. Thank you, Paper Mart!
You may know from my Instagram post, that my recent DIY Knotted Headband with Flower Embroidery project sparked my love for embroidery once more, and I am now determined to finish my late grandmother’s cross-stitch piece that she started over twenty years ago. I have been having so much fun playing with embroidery stitches and so I wanted to incorporate embroidery into today’s DIY. Cross-stitch is a very simple embroidery technique that creates large impact. To create even more impact I used yarn instead of thread since the tote bag has a more open weave. This technique will hopefully inspire you to try cross-stitch on something you already own like a shirt, bag, or to embellish a blanket. The possibilities are endless. You can also create any pattern you choose. The hope and joy that rainbows represent made it a clear winner for today’s tote. Whatever you choose, I hope you have fun with it!
Follow along for the simple step-by-step tutorial to make your own embroidered rainbow art tote bag using cross-stitch!
*This post contains affiliate links. For more information, please see my disclosure page here.
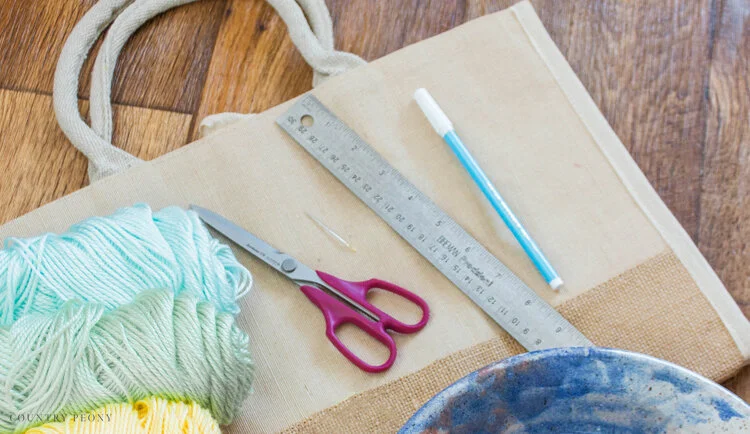
To make your own DIY Embroidered Rainbow Tote Bag you will need:
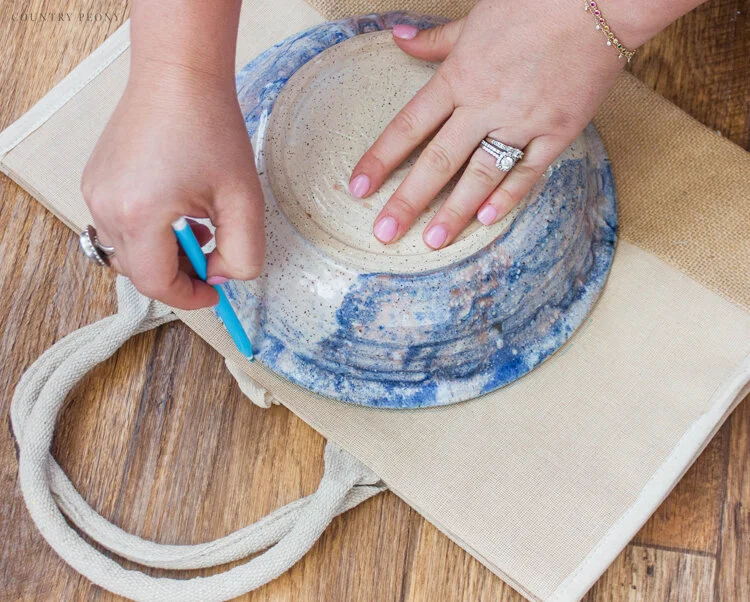
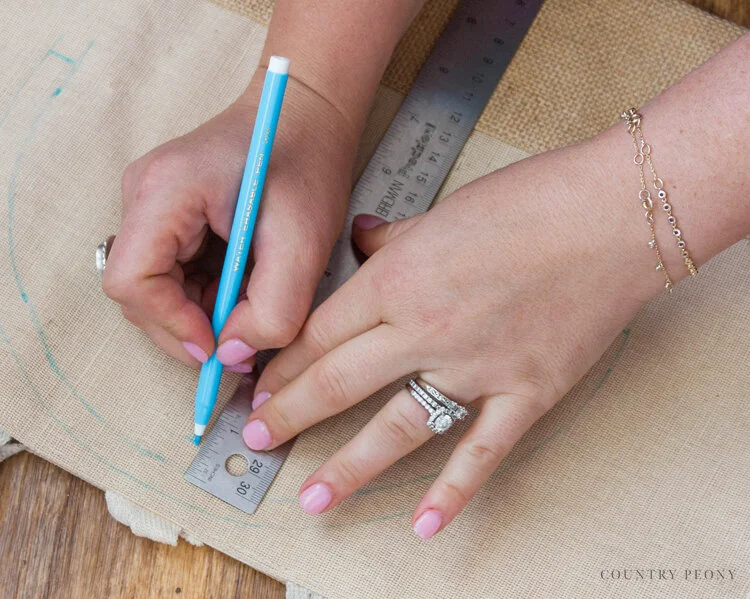
Step 1: Find the center of the tote and place a bowl in the middle. Use your water erasable pen, and create an arch using the bowl as a template to represent the outside of the rainbow.
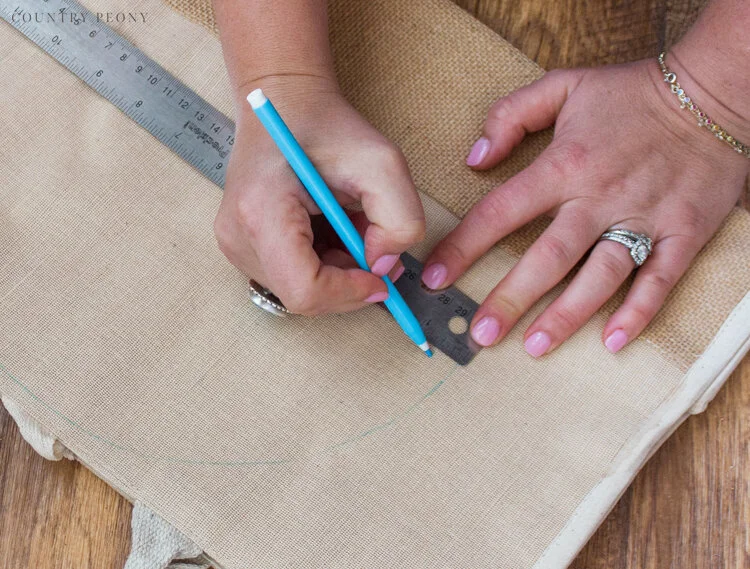
Step 2: Measure and mark small lines with the water erasable pen 6 inches on the inside of the arch to create the first rainbow line.
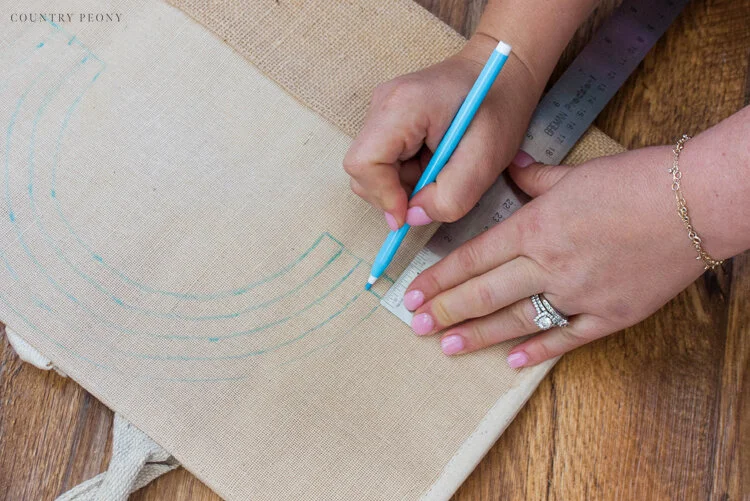
Continue to measure and mark lines 6 inches on the inside of the arch.
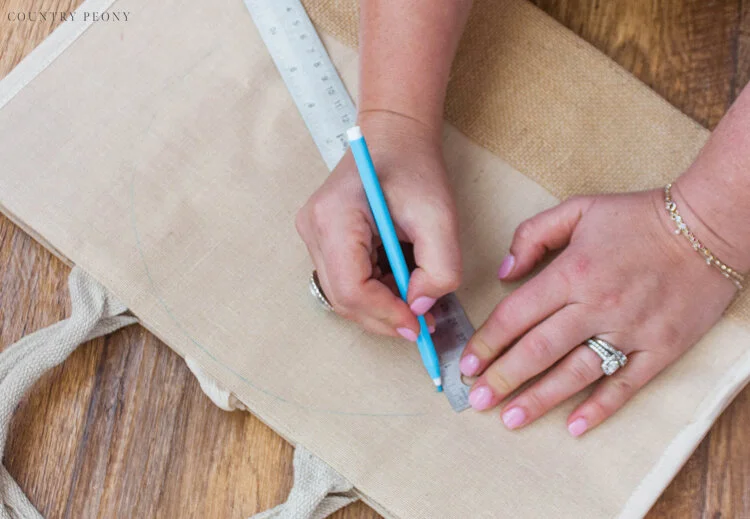
Step 3: Connect the marks to create the first rainbow line.
Step 4: Create another rainbow 6 inch wide line on the inside of the first rainbow line by following steps 2 and 3.

Step 5: Continue to make rainbow lines until you have 4 lines, or however many you want your rainbow to have.
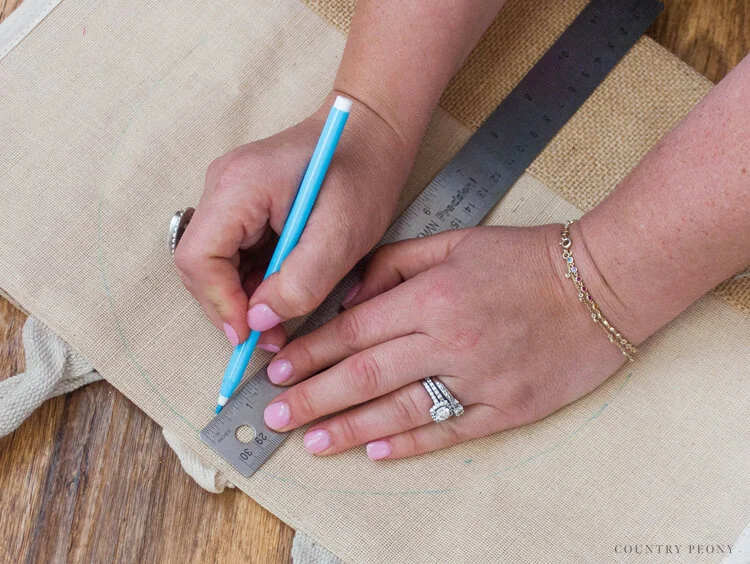
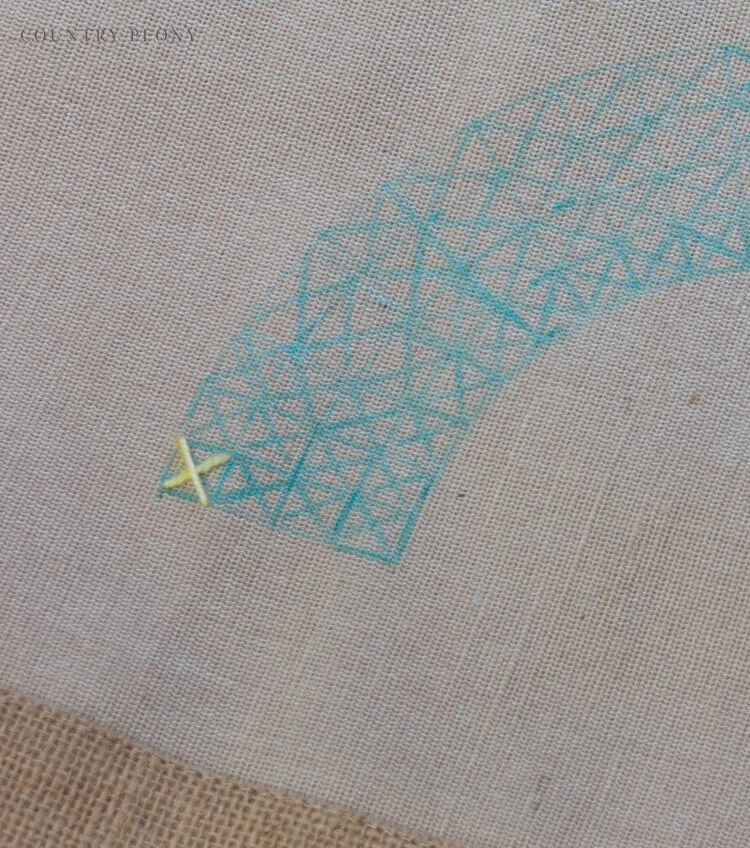
Step 6: Create 6 inch boxes inside the lines.
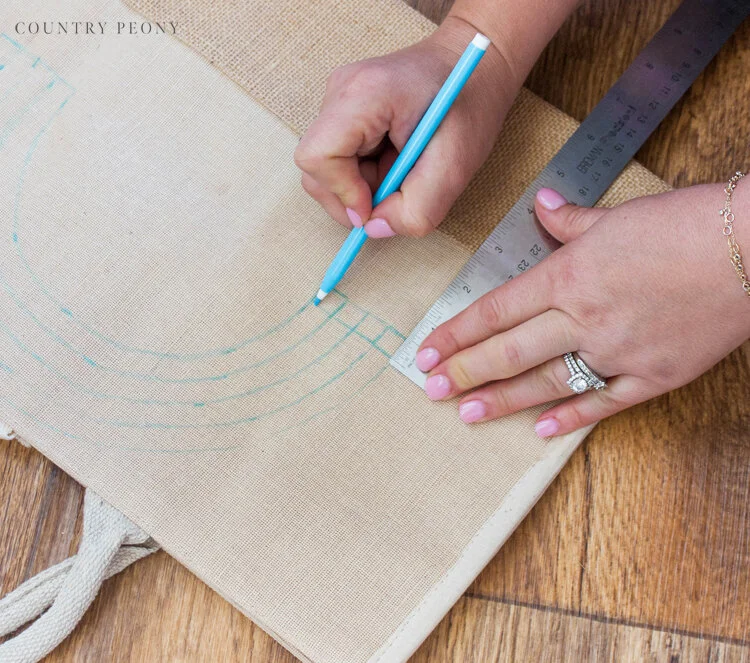

Step 7: Draw an x inside the 6 inch boxes as a pattern for the cross-stitch.
Step 8: Continue to draw boxes and x’s along the rainbow lines.
*You will need to adjust the size of the boxes and x’s for the arch of the rainbow. The arch curve of the outermost line should have the largest boxes and x’s. Try to keep the innermost rainbow line to 6 inch boxes, and then increase from there. Remember, it is okay to start over if you don’t like the look of your boxes. The water erasable pen makes it very easy to start over by simply using a wet towel to dab off the ink.
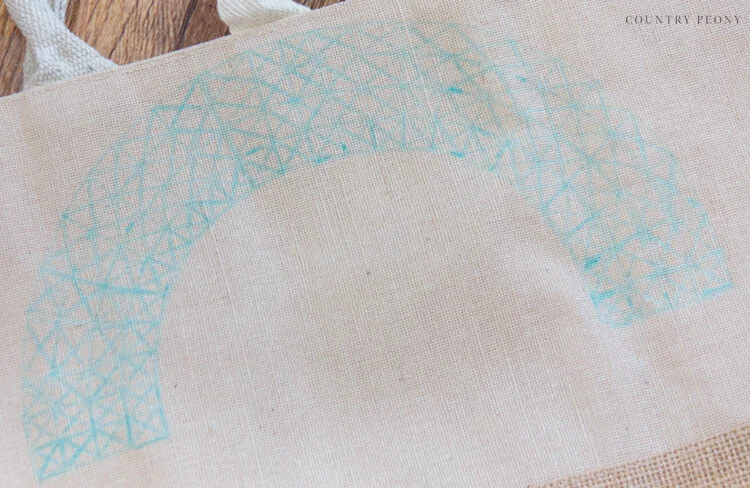
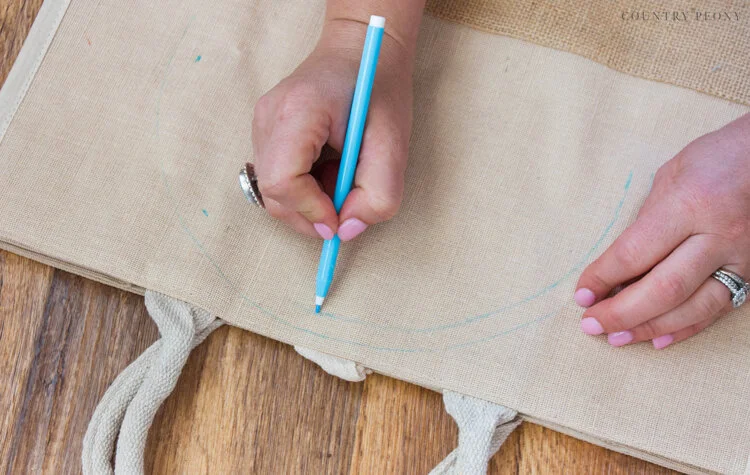
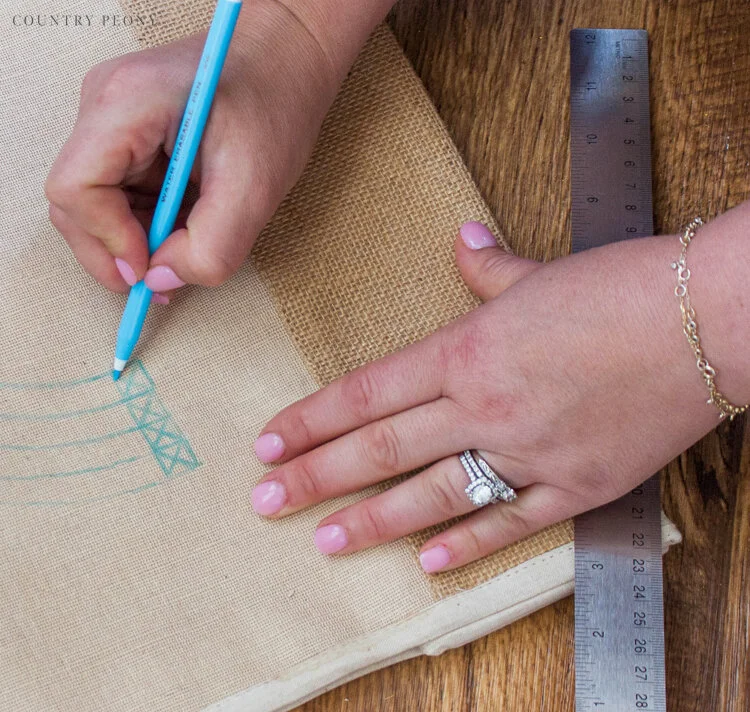
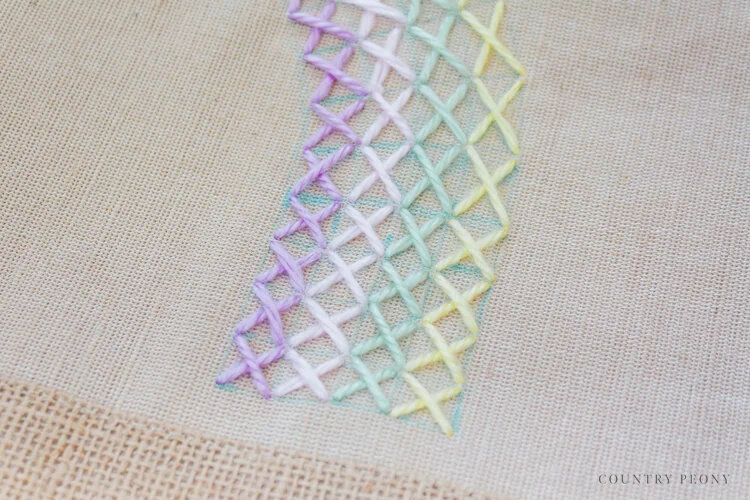
You can see from the picture above that the boxes in the corners of the arches are different sizes as the rainbow lines extend out. Do what works best for you, and don’t be afraid to start over if you don’t like it.
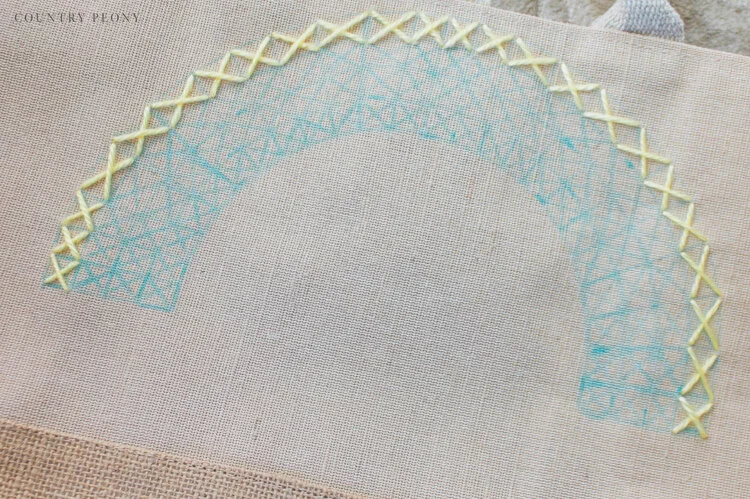
It is important to create a good pattern that you are happy with before you start the cross-stitching.
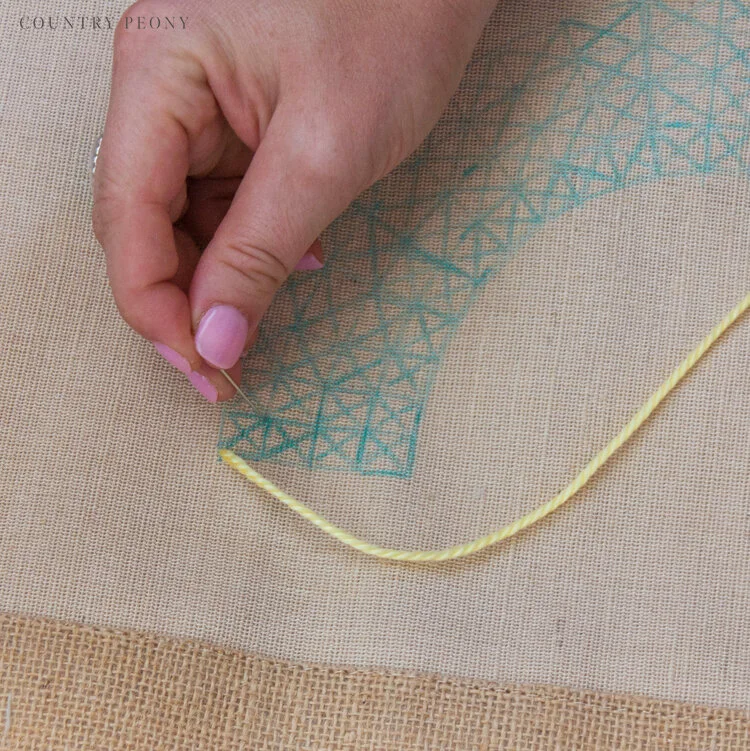
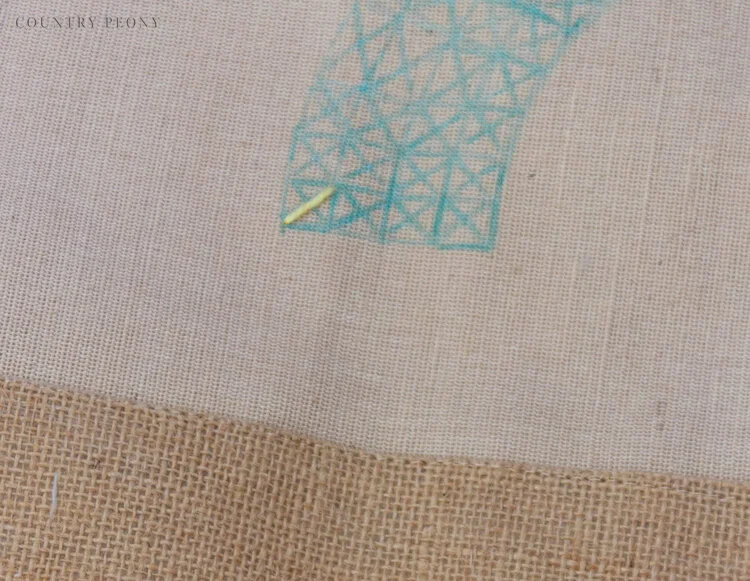
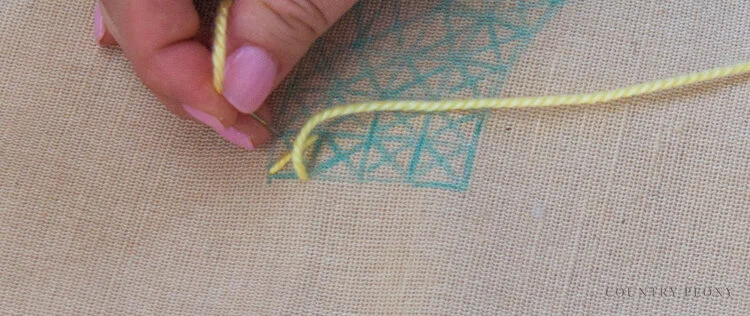
Step 9: Use your homemade and custom embroidery pattern to cross-stitch x’s in each of your boxes.
As mentioned above I used yarn for this project since the tote has more of an open weave and I wanted a larger impact than embroidery thread could create. It is important to use a large eye embroidery needle (linked above) if you work with yarn so your yarn will go through the needle eye.
This process takes the longest so take your time and have fun with it!
*You can use any color combination of yarn that you like. I used pastel yellow, green, pink and purple, because that is what I had on hand and I like how happy and cheerful the pastel colors play off the jute tote.
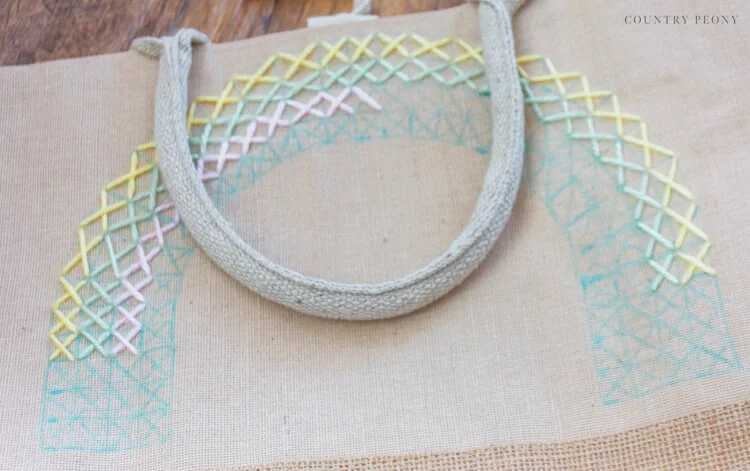
*I want to point out here that the above image represents how I changed my mind mid-project. I originally planned to add some pom-poms to act as clouds at the bottom of the rainbow. However, they were going to be too bulky and didn’t feel right for the project. So, I decided to nix the pom-pom idea, and extend the sides of the rainbow.
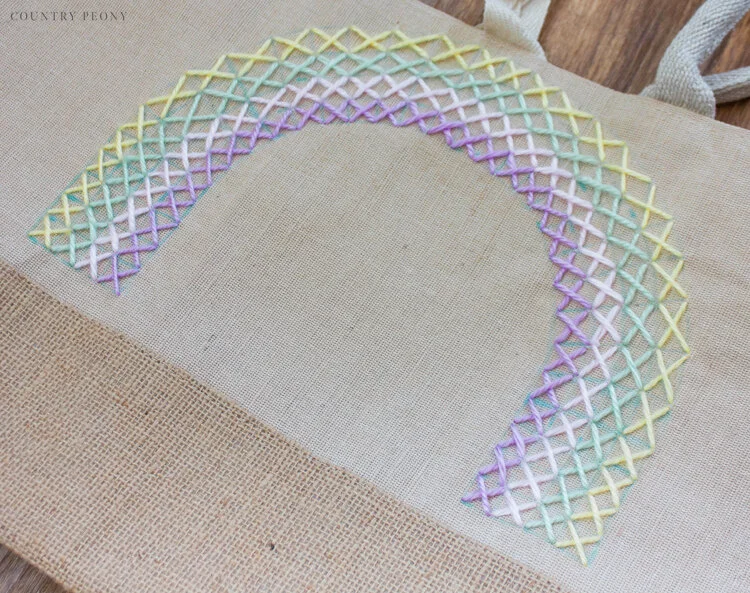
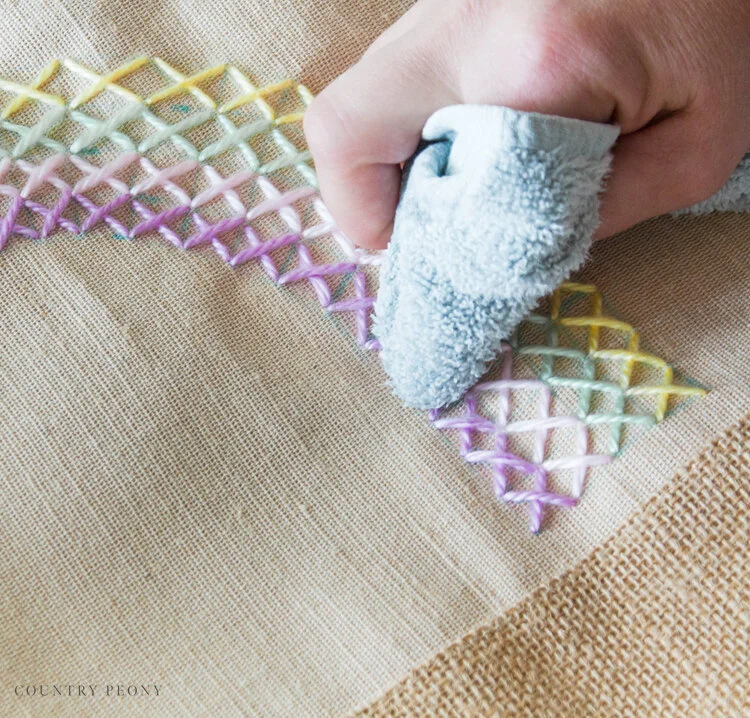
Step 10: Once you complete the cross-stitch embroidery, take your wet cloth and dab it into the fabric pen lines. They should erase quickly. If not, add more water.
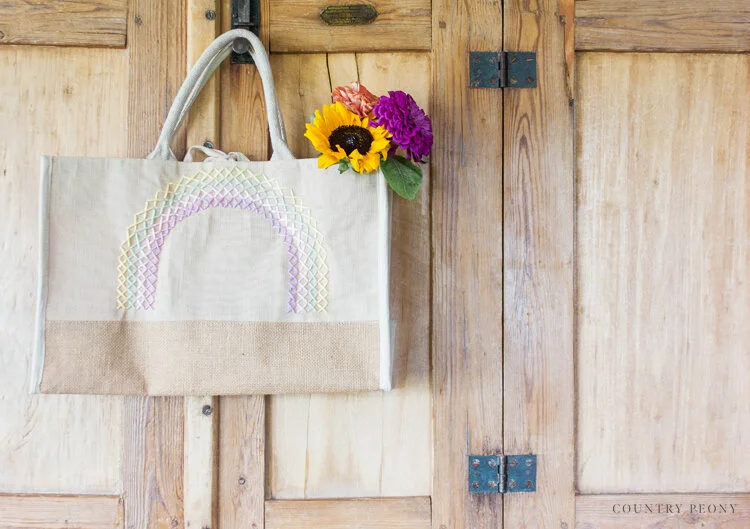
Step 11: Let the tote bag air dry, then enjoy it all summer long!


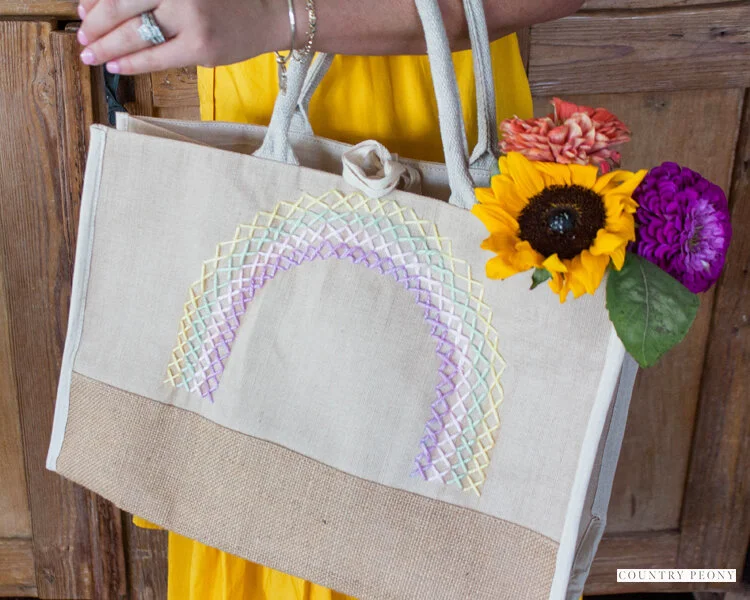
I love how sweet and simple this tote turned out.
It is the perfect tote for flower gathering and farmer market runs!
I believe crafting is more fun when we share our projects. Please email me at elizabeth@countrypeony.com, or please tag me @thecountrypeony or #countrypeony to show me your beautiful, custom creations!
Thank you so much for following along!