DIY Knotted Headband with Flower Embroidery
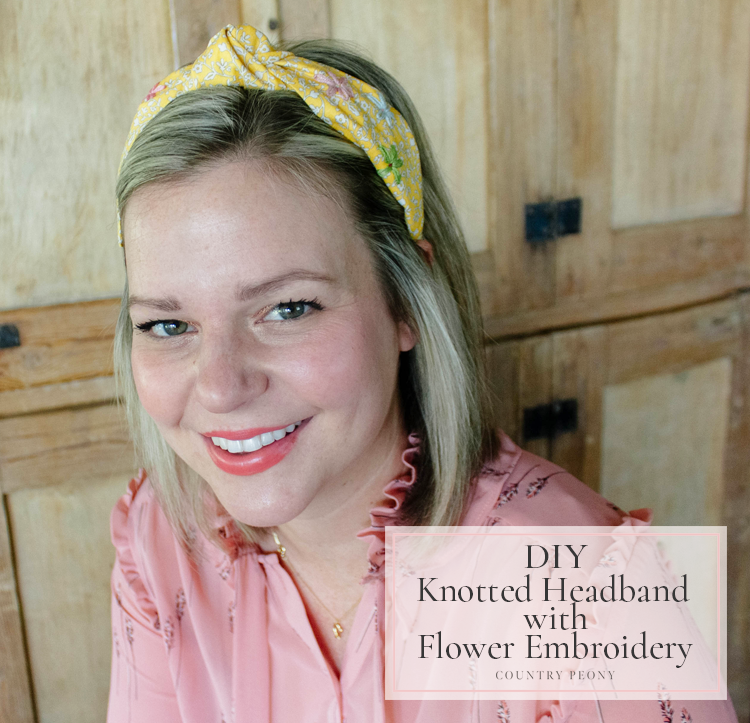
I don’t know about you, but I have been living in knotted headbands these days (especially as we are at home). I was on the lookout for a yellow cotton fabric headband for summer days, and I could not find one. So, in true DIY fashion, I made one! I thought I would take you along for the process of how I made my own DIY Knotted Headband in case you wanted to make one yourself.
Also, because I like things with a little more personality and customization, I pulled out my embroidery stash and added lazy daisy embroidery stitches and french knots to create cute little flowers. I love the little details and added charm this very simple embroidery added, but I am even more excited about the spark that it brought back. I can’t wait to try more projects with embroidery now, and maybe even finish the cross-stitch piece that my late granny started and left for me.
I think this headband would make a really cute gift. If you are resourceful this DIY is very inexpensive. You can also use any scrap fabric that you have, and an old headband (like I did). I hope you enjoy making your own!
Enjoy the step-by-step video below then follow along for the step-by-step tutorial to make your own DIY Knotted Headband with Flower Embroidery!
Continue below for the step-by-step pictorial to make your own DIY Knotted Headband with Flower Embroidery

*Some of this post contains affiliate links, which means a commission is earned if you purchase via my link at no extra cost to you. Thank you so much for helping to support this blog. For more information, please see my disclosures here.
To make your own knotted headband with flower embroidery, you will need:

Step 1: Measure the length of the headband. Then, add 6 inches to the measurement to account for the knot. My headband was 14 inches long, so I needed to cut a total length of 20 inches.

Step 2: Cut the fabric to fit the length of the headband plus 6 inches for the knot. Cut the width to be 6 inches.


Step 3: Glue along the length of the fabric end. Then fold the other fabric end over to secure.

Set the glued fabric piece aside to dry.

Step 4: Cut a thin strip of fabric that is the length of the headband.

Step 5: Attach the thin strip of fabric to the outside and the inside of the headband with glue.


Step 6: Take the glued fabric and find the middle. Then tie a loose, big knot around the middle of the headband.


Fluff out the knot, and straighten the ends of the knot so they lay flat on the headband.

Step 7: Add the flower embroidery.
I used a combination of a french knot and a lazy daisy stitch to create simple flowers. I added 3 flowers on each side of the knot in different pastel tints of embroidery thread.
As I mentioned, I am slowly getting into embroidery and this pocketbook has been a great resource for my dive back into embroidery.


Step 8: Bring the loose fabric together at the bottom. Glue a small piece of ribbon around the fabric to secure the bottom.


Secure the ends of the ribbon with glue.


Step 9: Cut the ribbon in half (lengthwise), and glue the ribbon to the inside of the headband to cover and secure the fabric edges.

Step 10: Enjoy your custom headband!

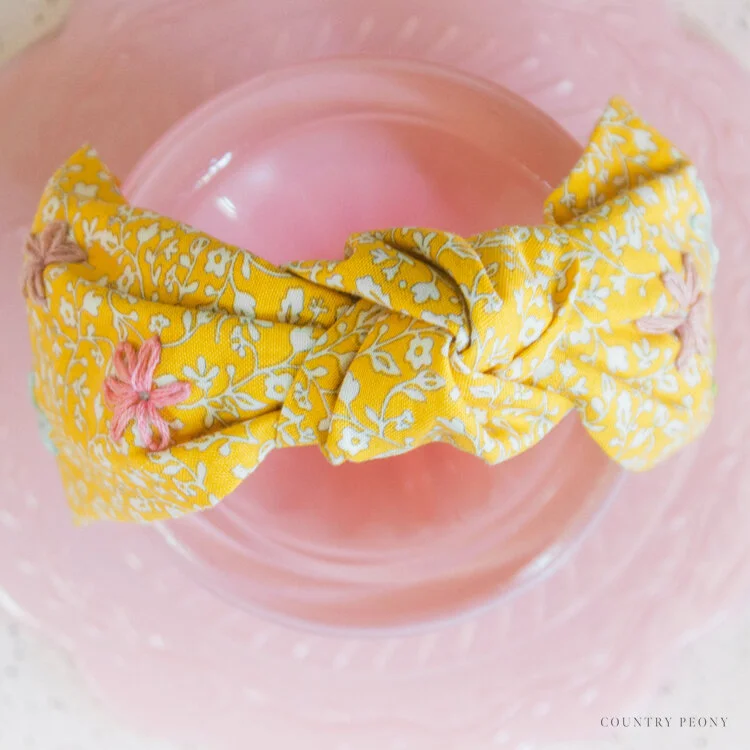

I love all of the sweet details on my headband, and am so excited to wear it this summer!


I believe crafting is more fun when we share our projects. Please email me at elizabeth@countrypeony.com, or please tag me @thecountrypeony or #countrypeony to show me your beautiful, custom creations!
Thank you so much for following along!
