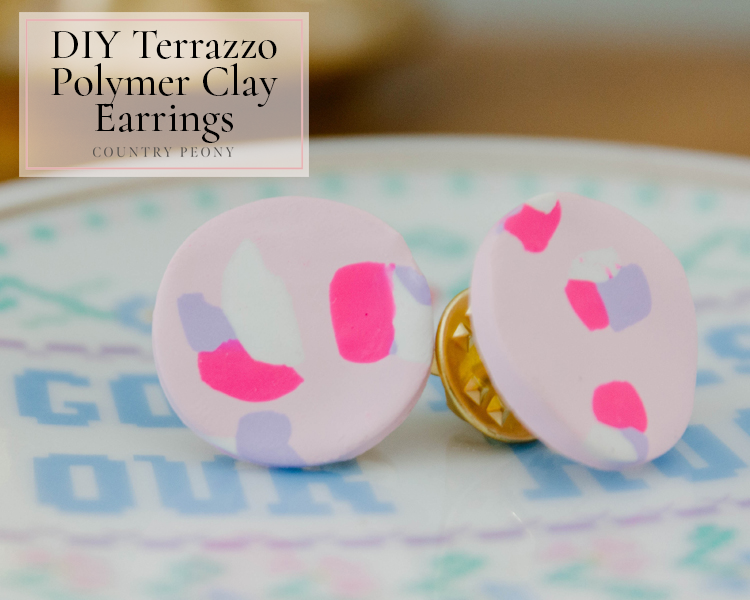
DIY Terrazzo Polymer Clay Earrings
The terrazzo trend has been popular for a couple of years. I have been sprinkling its modern aesthetic in small parts of my home. I love the playfulness of it!
Recently, when my children and I were playing with polymer clay, I thought I would give the terrazzo trend a try. During that crafting session with my children, I found the simplest way to make the cutest earrings with the terrazzo trend. Today, I want to take you along for the journey. This technique can be carried through to other jewelry pieces, magnets, name tags, or whatever your heart desires. The possibilities are endless! The key to success is to just have fun with it, and to not overthink it. I hope you have as much fun playing with clay as my children and I did!
Want to see how to make these earrings in real time? Please enjoy this recent episode of Coffee & Crafting where I showcased how to make these polymer clay earrings!
Enjoy the step-by-step video below then follow along for the step-by-step tutorial to make your own DIY Terrazzo Polymer Clay Earrings!
Continue below for the step-by-step pictorial to make your own DIY Terrazzo Polymer Clay Earrings

*Some of this post contains affiliate links, which means a commission is earned if you purchase via my link at no extra cost to you. Thank you so much for helping to support this blog. For more information, please see my disclosures here.
To make your own terrazzo earrings with polymer clay, you will need:

Step 1: Lay out a piece of parchment paper on top of a baking sheet.

Step 2: With the rolling pin clay tool, roll out the base color polymer clay to about 1/4 inch thick.
*Roll from the middle to the outside to ensure the clay is even throughout.

Step 3: With the clay knife (or any knife), cut very small pieces of clay from the other 3 colors of polymer clay. Then set them aside.


Step 4: Use the needle clay tool, to gently place the small pieces of clay onto the rolled out clay.

Add the small clay pieces right next to each other, in clusters.
Keep adding clay clusters to the rolled out clay in the same color arrangement so the look is uniform.


Step 5: My favorite part! Use the clay rolling pin to gently and evenly roll the clay clusters into the rolled out clay base.


Step 6: Cut the clay circles with the circle cutter.
Carefully press the circle cutter into the clay. Then, firmly twist the circle cutter until you know you cut through the clay.
Lastly, take the circle cutter out of the clay base, and use your finger to gently and slowly push the clay circle out of the cutter.

Step 7: (Optional) Use your fingers and rolling pin to even out any imperfections in the clay circle.
*Don’t overthink it and go overboard with this step. Imperfections are beautiful, and confirm that a piece is custom!

Step 8: Keep your clay circles on top of the parchment paper on a baking sheet. Then follow your clay manufacturer’s instructions and bake accordingly.
Sculpey recommends 275 degrees F for about 15 minutes for every 1/4 inch thick piece of clay. So, I baked mine for 15 minutes at 275 degrees F.
Step 9: After your clay is done baking take it out of the oven and let it cool for 15 minutes.

Step 10: Add craft glue to the back of the earring stud, then attach the clay circle to it.
I recommend gluing the earring stud toward the top of the circle (1/3 of the way down from the top) so that your earring sits properly on your ear.


Step 11: Let your glue dry, then enjoy your custom earrings!

I love how these earrings turned out, and I love how they give my outfit a fun little pop of color.
I am now excited to try more polymer clay projects with my children this summer!

I believe crafting is more fun when we share our projects. Please email me at elizabeth@countrypeony.com, or please tag me @thecountrypeony or #countrypeony to show me your beautiful, custom creations!
Thank you so much for following along!


