DIY Metallic Foil Resin Hair Barrettes

*Some of this post contains affiliate links, which means a commission is earned if you purchase via my link at no extra cost to you. Thank you so much for helping to support this blog. For more information, please see my disclosures here.
Resin projects are very popular this summer. Crafters and DIYers alike are finding ways to put resin to good use whether that through art, home decor items, or as jewelry. Resin is so versatile and I love the elevated look it brings to any craft project. I experimented with resin last Christmas with my DIY Peppermint Christmas Coaster.
I needed some hair barrettes to chicly combat this Texas summer heat, and so I thought it would be fun to add foil flakes to resin to create classy hair barrettes. This time around I used Color Pour’s Resin & Resin Hardener, and it was so simple.
Disclaimer: This project is unique to my other projects because it requires exact detail. The most important step is to ensure to measure exactly 1 to 1 ratio when working with your resin and hardener. Also, it is important to stir all of the resin together for about 5 minutes, slowly. If you don’t prepare the resin mixture properly, it won’t cure. However, if you do take your time, measure, and stir slowly you will end up with a beautiful project.
For me, the hardest part of this entire project is waiting for it to cure. I am an inpatient person by nature, especially when I am waiting for all of the wonderful goodness to reveal itself. But, it is well worth the wait!
For your convenience, please enjoy the step-by-step video below then follow along for the step-by-step tutorial to make your own DIY Metallic Foil Resin Hair Barrettes!
Continue below for the step-by-step pictorial to make your own DIY Metallic Foil Resin Hair Barrettes.

To make your own foil resin hair barrette, you will need:

Step 1: Protect your work surface, and put on disposable gloves.

Step 2: Add equal amounts of resin and resin hardener to a disposable cup.
*For this small project I used 1 oz of resin and 1 oz of hardener, and I still had some leftover.


Step 3: With the stir stick, slowly mix the resin and resin hardener together for 5 minutes.
*I set up a timer to ensure that I mixed for 5 minutes.

Step 4: Carefully pour the resin mixture into the barrette molds.
Do not overfill the molds so the resin doesn’t overflow. Pour slowly to avoid bubbles.
*Keep a wet towel nearby for easy cleanup in case the resin overflows.
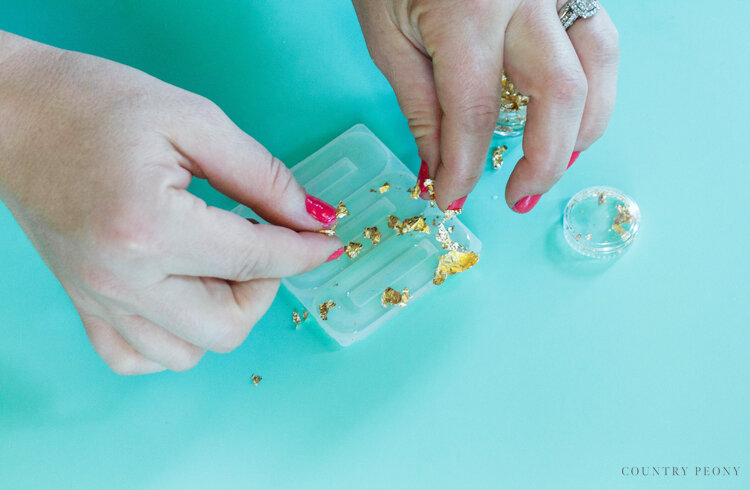
Step 5: Carefully tear the metallic foil flakes and sprinkle them on top of the resin mixture.
*I would recommend removing your gloves for this step because foil flakes are very temperamental. It is also helpful to keep your wet towel nearby since the foil flakes stick easily to your hands and to the work surface.
This step can be pretty messy.
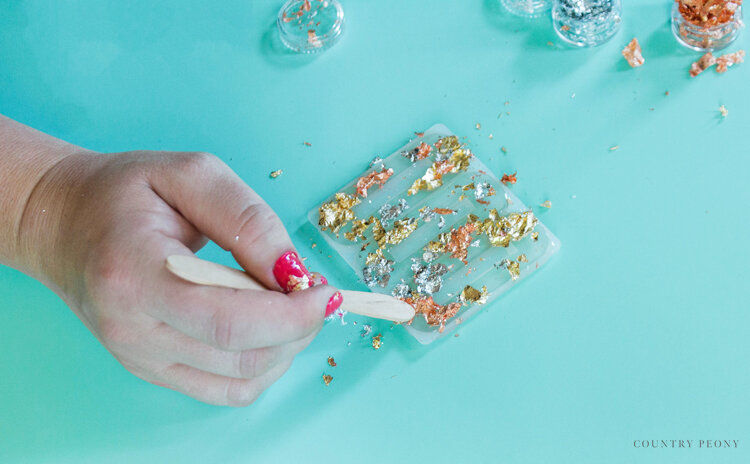
Step 6: Use the stir stick to gently push some of the foil flakes into the resin, and to clean the mold.

Step 7: Let the resin cure for atleast 24 hours then carefully remove the barrettes from the mold.
*Just to be on the safe side I let my resin sit for 48 hours before I removed the barrettes.

Step 8: File down any rough edges.
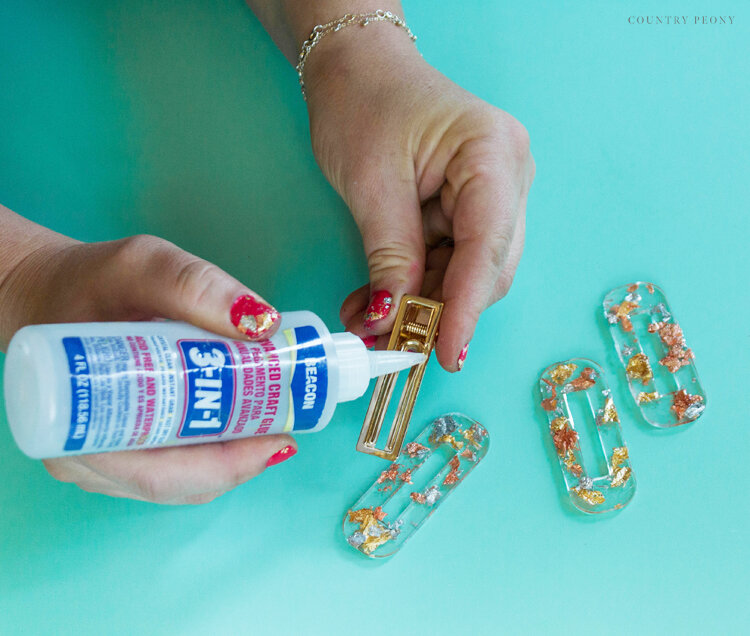
Step 9: Attach the clip to the resin’s smooth side with Beacon’s 3-in-1 Advanced Craft Glue.

Step 10: Let the glue dry then enjoy your custom, resin barrette!

I love how my barrette turned out! I am already thinking of fun ways to play with resin for more barrettes and jewelry.

I believe crafting is more fun when we share our projects. Please email me at elizabeth@countrypeony.com, or please tag me @thecountrypeony or #countrypeony to show me your beautiful, custom creations!
Thank you so much for following along!


