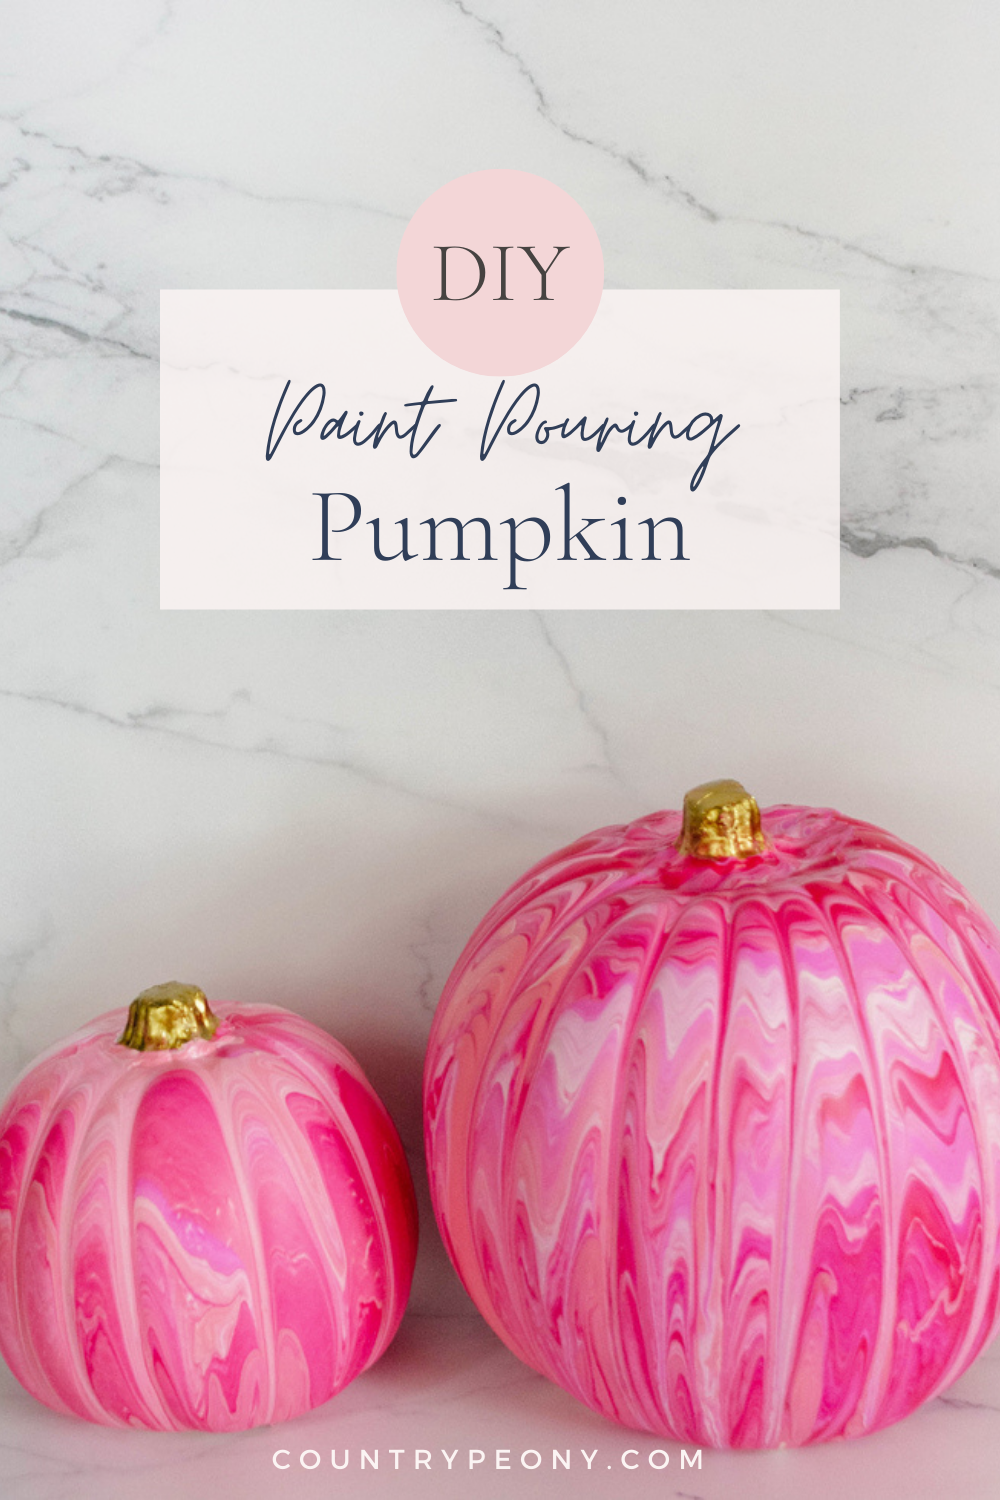
DIY Pink Pumpkins with Paint Pouring

*This post contains affiliate links. For more information, please see my disclosure page here.
Every Fall I try to find a new way to decorate with pumpkins. I love trying new techniques. Last year I used one of my favorite napkin patterns to create these pretty patterned pumpkins, and a couple of years ago I used fabric and Mod Podge to decorate pumpkins.
I have been wanting to try the very trendy paint pouring technique, and so I thought pumpkin season would be the perfect time to try this fun technique. I was right! I loved working with Color Pour’s Pre-Mixed Pouring Paint Kit in Berry for this project. It was very simple, and almost magical as I watched the paint flow together to create beautiful designs on the pumpkins. It changes right before your eyes! I also love that every pumpkin will look different, and is an art piece on its own.
I did not use the cell magic for this project, because I didn’t want the lacey effect (or cells and texture).
Either way, you can’t go wrong with this project or technique. The hardest part is being patient and letting it dry. My best advice for this project is to have fun with it!
Enjoy the video below to learn how to use the paint pouring technique to create your own decorated pumpkins.
And then please enjoy the video below showcasing this technique during a recent episode of Coffee & Crafting!
Then follow along for the step-by-step tutorial to make your own paint pouring pink pumpkins!
Continue below for the step-by-step pictorial to make your own DIY Pink Pumpkins with Paint Pouring.

To make your own paint pouring pink pumpkin, you will need:
Shop the Tools Here:


Step 1: Place a large plastic trash bag on your work surface to protect it. This project is very messy!

Step 2: Put on disposable gloves. Again, this DIY is very messy.

Step 3: Shake the paint pouring bottle well.
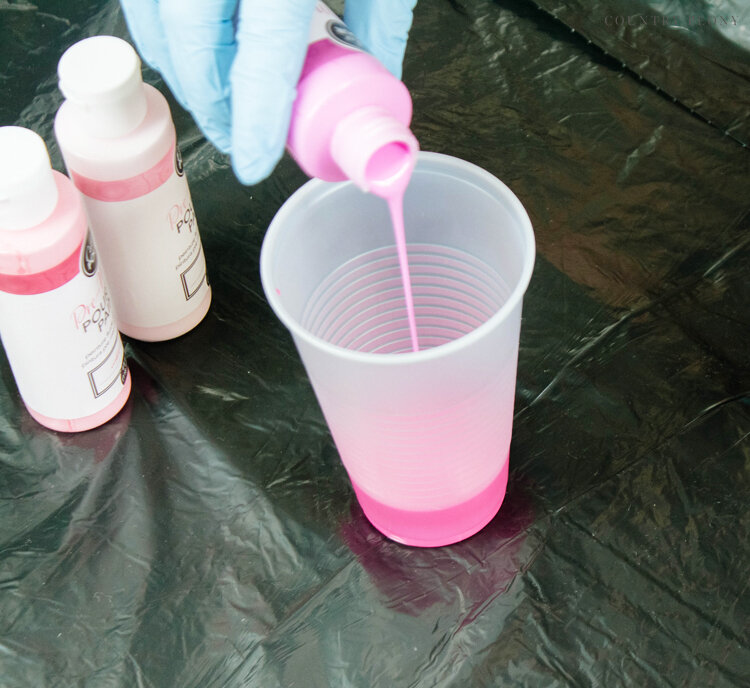
Step 4: Pour all colors into the disposable cup one at a time on top of each other. No need to mix, just pour.


Step 5: Gently place the pumpkin on top of a disposable cup to act as a stand.
You can tape the bottom of the pumpkin to the cup for more stability if you would like to, but it isn’t necessary.

Step 6: Slowly and gently pour the paint cup around the top of the pumpkin in a circular motion as close to the stem as possible.
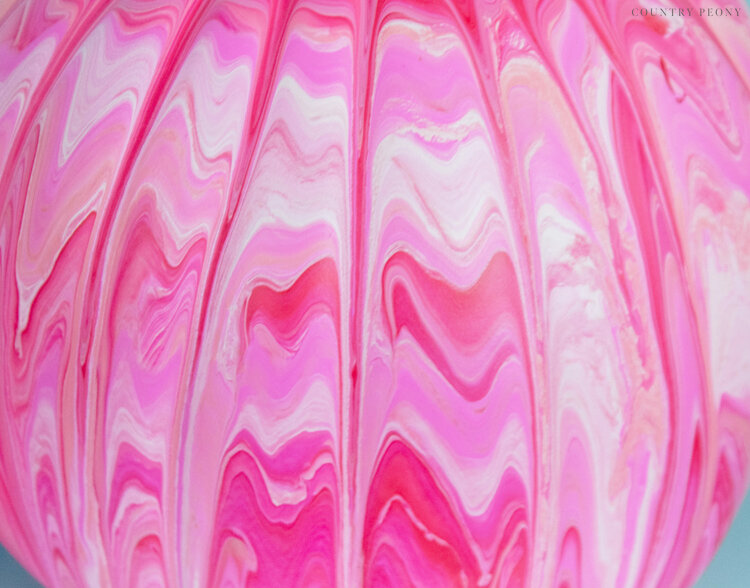
Continue to pour around the top of the pumpkin until the paint covers the entire sides of the pumpkin.
This is the magical part: watch and enjoy as the paint falls to create a beautiful pattern on the pumpkin!

Step 7: Let the pumpkin dry for 24 hours.
Honestly, this is the hardest part. Make sure your pumpkin is in a low traffic area so that it can quietly dry.


Step 8: Once the pumpkin is dry, apply two coats of craft paint to the stem.

For the smaller pumpkin I only went around with the paint twice. For the larger pumpkin, I applied several different layers of the paint to create a more layered effect. It is fun to experiment with it. Whatever way you choose, the key is to just have fun!
Step 9: Display your pumpkins and enjoy!
I am so happy with how my pumpkins turned out, and I enjoyed the process so much!

No two pumpkins will look the same, and that is what makes this project so fun! I can’t wait to see your pumpkins.
I believe crafting is more fun when we share our projects. Please email me at elizabeth@countrypeony.com, or please tag me @thecountrypeony or #countrypeony to show me your beautiful, custom creations!
Thank you so much for following along!