
DIY Scarf Necklace – The Perfect Summer Statement Piece
DIY Scarf Necklace – The Perfect Summer Statement Piece
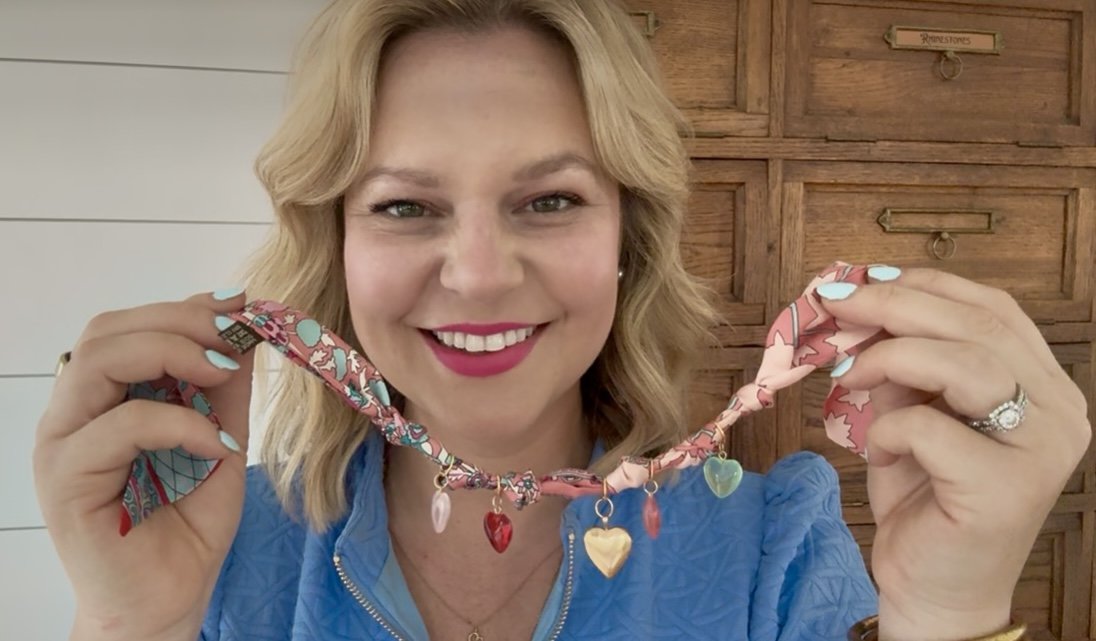
Lately, I’ve been spotting scarf necklaces all over the internet—and you know I had to try making one myself! With just a few simple materials (and a love for all things handmade), I created a scarf necklace that feels whimsical, personal, and perfect for summer.
The best part? This project is totally customizable and a great way to use what you already have on hand—hello, budget-friendly fashion! Plus, you can change out the charms as you see fit!
But first, enjoy this step by step video tutorial to make your own scarf necklace this Summer!
What You’ll Need:
*This post contains affiliate links. For more information, please see my disclosure page here.
A skinny scarf (I found mine on Amazon)
Jump rings (also grabbed a set from Amazon)
Charms (I picked up a few at Michaels and used one I already had)
A doll needle (for threading the scarf)
How to Make It:
Thread the Scarf Through the Jump Ring: Use a doll needle to help guide the scarf through a jump ring. This creates the base for adding your charm and gives a clean, finished look.
Add Your Charm: Slip your chosen charm onto the jump ring. This is where your personality shines—go bold, go vintage, go colorful…whatever feels like you.
Secure It with Knots: Tie a loose knot on either side of the charm to hold it in place. Not only does this keep your charm centered, it adds a nice bit of texture and shape to the necklace.
Keep Going: Add as many charms as you like! I say more is more—layer on the sparkle, symbols, and surprises.
Wear It: To finish, tie the scarf around your neck with a loose knot or bow. It’s breezy, chic, and oh-so-summery.
Whether you're heading to brunch, a craft show, or just want to add something fun to your everyday outfit, this DIY scarf necklace is a quick project with big payoff. Have fun mixing textures, colors, and meanings with each charm—it’s wearable creativity at its finest!
Would you try this trend? Let me know in the comments or tag me if you make one! 💛✨



Embrace slow crafting, and learn how to make sweet, nostalgic fabric yo-yos — also known as Suffolk puffs — by hand and with a tool!
Whether you're a seasoned crafter or just getting started, this workshop will teach you how to create charming, vintage-inspired fabric yo-yos that can be used for everything from wreaths and garlands to gifts, accessories, and home decor.
✂️ What is a Fabric Yo-Yo (a.k.a. Suffolk Puff)?
A fabric yo-yo — also known as a Suffolk puff — is a small, gathered circle of fabric that’s been hand-sewn to create a beautiful little rosette or puff. This delightful technique originated in the UK and has been loved by quilters and crafters for generations.
They're easy to make, totally addictive once you start, and the perfect way to use up your favorite fabric scraps.
💡 In This Workshop, You'll Learn:
How to make a fabric yo-yo (Suffolk puff) by hand — no special tools needed.
How to use a yo-yo maker tool for quick, consistent results.
Tips for selecting fabric and thread that work best.
How to shape, knot, and finish your yo-yos cleanly.
Creative and inspiring ways to use your yo-yos in décor, gifts, accessories, and beyond!
🎨 Who This Workshop Is For:
This class is perfect for:
Beginners ready to try something simple and satisfying
DIYers who love a good stash-busting project
Anyone who’s ever saved fabric scraps for “something special”
Quilters and sewists looking for a charming embellishment
🧵 What You’ll Need:
You don’t need much to get started! A full supply list will be sent to you after you register, but the basics include:
Fabric scraps (cotton is ideal)
Needle + thread
Scissors or fabric shears
Optional: yo-yo tool (like the Clover Yo-Yo Maker)
🎁 Included with Your Registration:
Access to the workshop REPLAY
Lifetime replay access
A downloadable step-by-step PDF tutorial
Creative inspiration to keep your yo-yo game strong
💬 A Note from Elizabeth:
I’m so excited to share this beloved little craft with you! There’s something so satisfying about turning a scrap of fabric into something beautiful with just a needle and thread. Whether you're joining live or catching the replay, I can't wait to see what you create.
— Elizabeth