Mackenzie-Childs-style Easter Decor with Woodpeckers Crafts
*This post was created through a paid partnership with Woodpeckers Crafts. However, all opinions are honest and 100% my own.
*This post contains affiliate links. For more information, please see my disclosures page here.

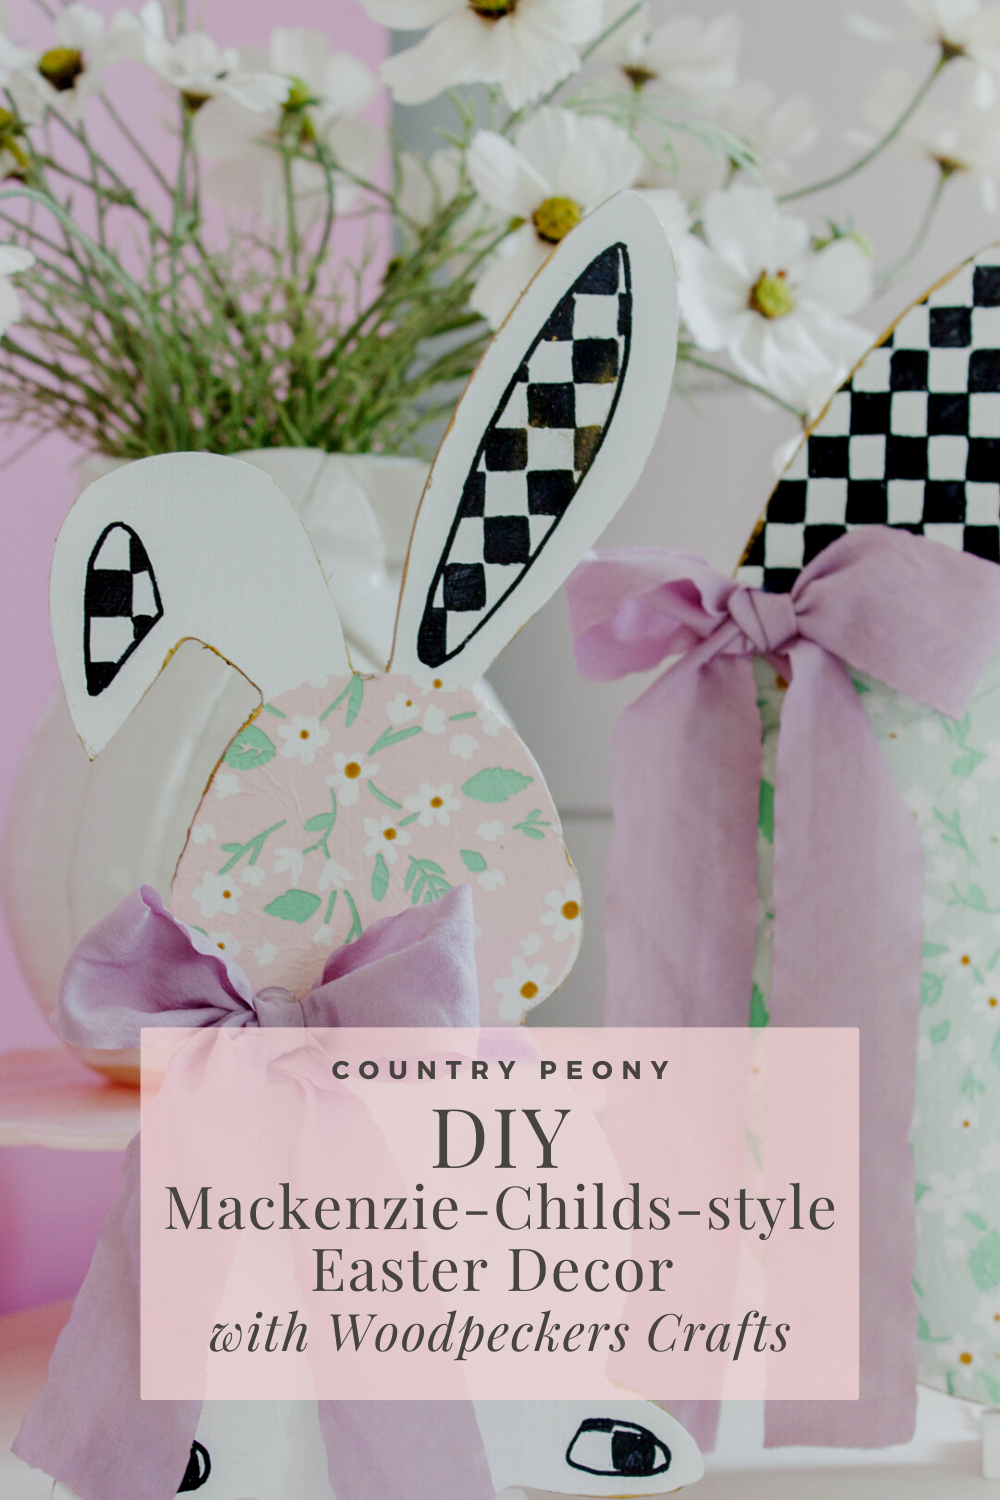
Cheers to Spring and all of the beautiful colors and floral inspiration that comes with it! Today I have a really sweet Spring DIY featuring Woodpeckers Crafts amazing wooden products that is inspired by the signature checkerboard pattern from Mackenzie-Childs-style. Pairing Woodpeckers Crafts charming Easter cutouts with sweet pastel Spring colors and Mackenzie-Childs-style checkerboard pattern make for a fun and whimsical Spring vignette.
I especially love this project, because you can use whatever color palette or floral design you want! Also, I used Woodpeckers Crafts charming bunny and Easter eggs for this project, but they also have so many other adorable Easter wooden cutouts available. I hope this DIY inspires you to have a little fun with your decorations this Spring!

Before we get started on the tutorial, I wanted to highlight Woodpeckers Crafts. I am so excited to partner with Woodpeckers Crafts today because they provide very high-quality wooden products that are the perfect base for any crafting project. Their mission to use wood to fuel creativity is a wonderful one I can get behind, and I feel so grateful to partner with them on today’s project. And, if you want to try this craft project for yourself or if you want to purchase any of their products, they have graciously offered 5% off your purchase, by using the code “countrypeony”. Want to see more blog post tutorials featuring Woodpeckers Crafts? Click HERE, HERE, HERE, HERE, HERE, HERE, HERE, HERE, HERE, HERE, HERE, and HERE.
Now enjoy a short video tutorial showcasing how to make your own Mackenzie-Childs-style Easter décor.
Enjoy this video below showcasing how to create your own Mackenzie-Childs-style Easter decor!
Continue below for the step-by-step picture tutorial to create your own Mackenzie-Childs-style Easter decor for Spring!

To make your own Easter vignette, you will need:
· Woodpeckers Crafts Wood Easter Bunny Cutout Large. Use code “countrypeony” for 5% off your purchase at Woodpeckers Crafts.
· Woodpeckers Crafts Wood Easter Egg Cutout Large. Use code “countrypeony” for 5% off your purchase at Woodpeckers Crafts.
· Woodpeckers Crafts Wood Easter Egg Cutout Small. Use code “countrypeony” for 5% off your purchase at Woodpeckers Crafts.
· Woodpeckers Crafts Wooden Cutout Stand. Use code “countrypeony” for 5% off your purchase at Woodpeckers Crafts
· Mod Podge
· Foam Paintbrush
· White Craft Paint
· Black Paint Pen
· Pretty Patterned Napkin
· (Not Pictured) Hot Glue Gun with Glue Sticks
· (Not Pictured) Ribbon
· (Not Pictured) Scissors
· (Not Pictured) Ruler
· (Not Pictured) Pencil
Paint the Wooden Cutouts
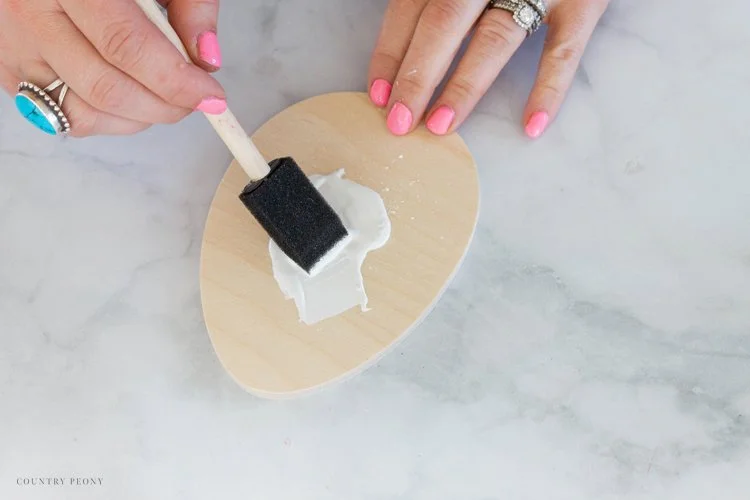
Paint 2 coats of white craft paint onto the wooden cutouts with a foam brush.
*Not only is the white paint helpful for the checkerboard pattern, but it will make the napkin stand out more on the cutout.
Set it aside to dry.
Create the Grid for the Checkerboard Pattern

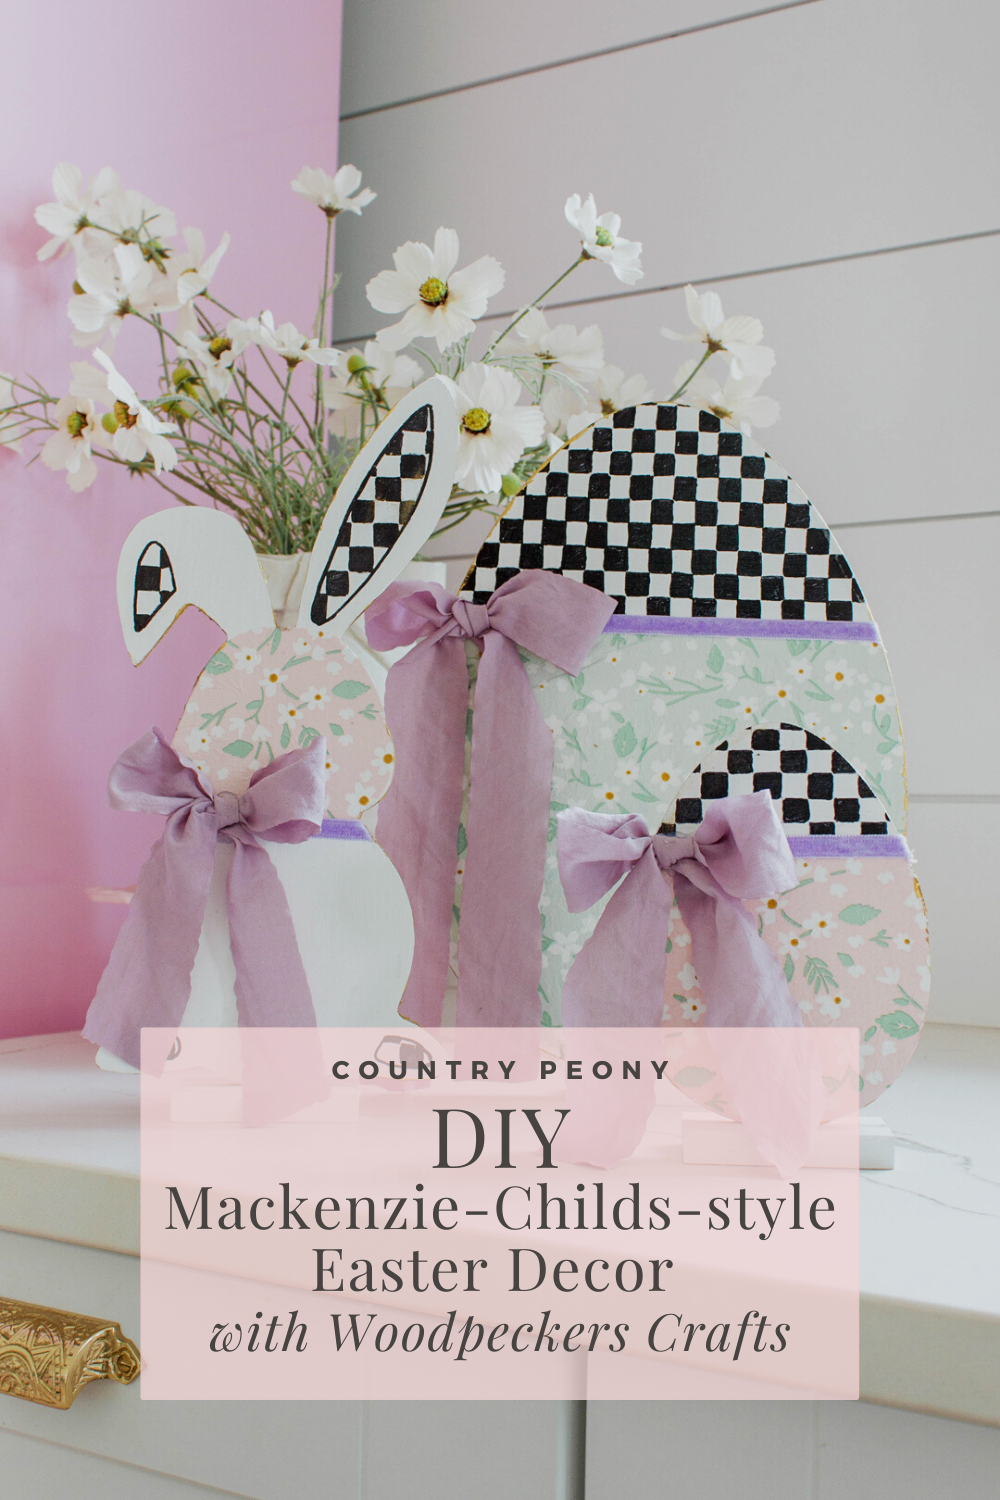
Determine the placement of the checkerboard pattern inspired by the Mackenzie-Childs-style. I placed the checkerboard pattern on the top third portion of the egg, and on the ears and feet of the bunny. However, it is up to you!
Once you determine placement, use a ruler and a pencil to create a grid for the checkerboard pattern. Each square was 1 centimeter.

Paint the Checkerboard Pattern

Use a paint pen to color in the boxes for the checkerboard pattern. I used a black paint pen, but you can use navy or silver, or any color!
I also want to note that for the original checkerboard inspiration, it has a very hand painted effect. So, do not worry about the perfection of this step.
Decoupage a Napkin onto the Cutout

Remove the top layer from a pretty patterned napkin. Then, lay the wooden cutout on top of the napkin, and trace the cutout around the napkin. Cut out the napkin so that it will fit onto the wooden cutout.
Decoupage the napkin onto the cutout. Apply one coat of decoupage to the cutout with a foam brush. Then, place the napkin onto the cutout, and decoupage the napkin onto the cutout by applying the decoupage directly onto it. Smooth out the decoupage with a foam brush to remove any bubbles.
Set it aside to dry.
Add Gold Trim to the Edge of the Cutout

Once dry, embellish the edges of the cutout with gold trim.
Finish the Project with a Bow

Hot glue ribbon to marry the decoupage end and the checkerboard end together. Then, add a bow in the same color to finish off the whimsical and feminine Easter decoration.
Enjoy the Whimsical Easter Decor

Place the wooden cutouts in the cutout stands. Then, set out for all to enjoy this Spring!


Thank you to Woodpeckers Crafts for providing me with their amazing Easter cutouts. As a reminder, if you want to create your own, please use code “countrypeony” to receive 5% off at checkout at Woodpeckers Crafts.
As with all of Woodpeckers Crafts products, the creative possibilities are endless! I hope you enjoy crafting with Woodpeckers Crafts this Easter! I can not wait to see what you make!
I believe crafting is more fun when we share our projects. Please email me at elizabeth@countrypeony.com, or please tag me @thecountrypeony or #countrypeony to show me your beautiful, custom creations!
Thank you so much for following along!